
Data safety has come a long way. From somewhat unreliable hard disks to today's mix of reliable SSDs and cloud-backed storage options, your data is safer than ever. Windows has become more reliable over the years as well, but if you want to be entirely sure that your data is safe, making a backup is the way to go.
Windows 11 has Backup and Restore functionality built right in. While it’s not as easy as backing up your Android phone, it’s still quite easy to use and works well enough not to require a third-party app. Here’s how to back up Windows 11 and restore it when needed.
How to back up Windows 11
The Backup and Restore tool in Windows 11 is tucked away in the Control Panel. If you’re familiar with Windows because you’ve used the earlier operating system versions, then you’ll find this tool even easier to use. You’ll need an external drive to save the backup. Follow the steps below to back up Windows 11.
- Connect your external drive to your Windows 11 computer.
-
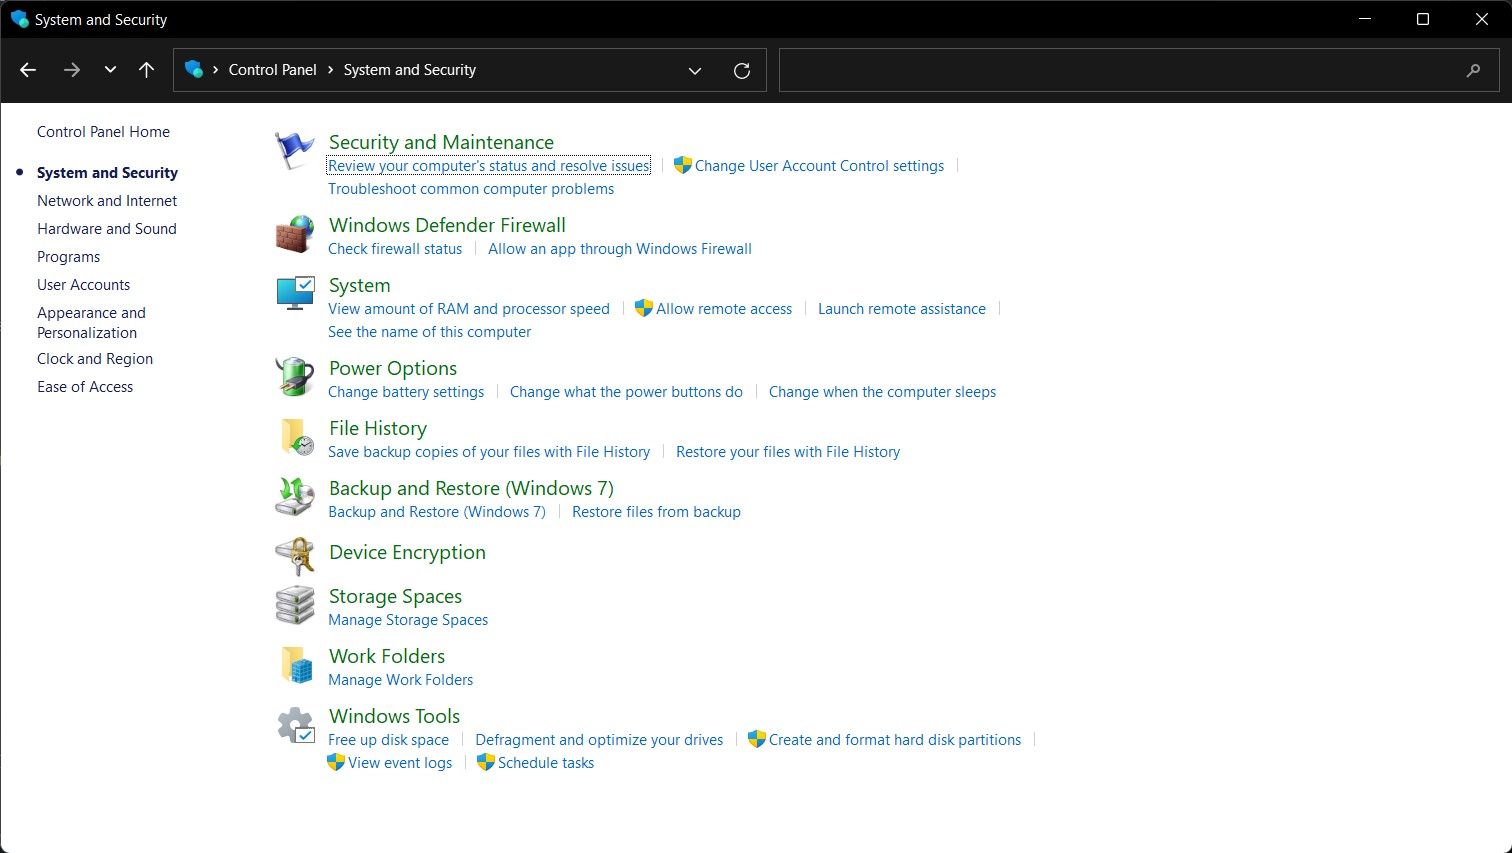
Open the Control Panel via Windows Search, and click System and Security.
- Click File History in the right-hand side pane.
- Click System Image Backup at the bottom of the left navigation pane.
-
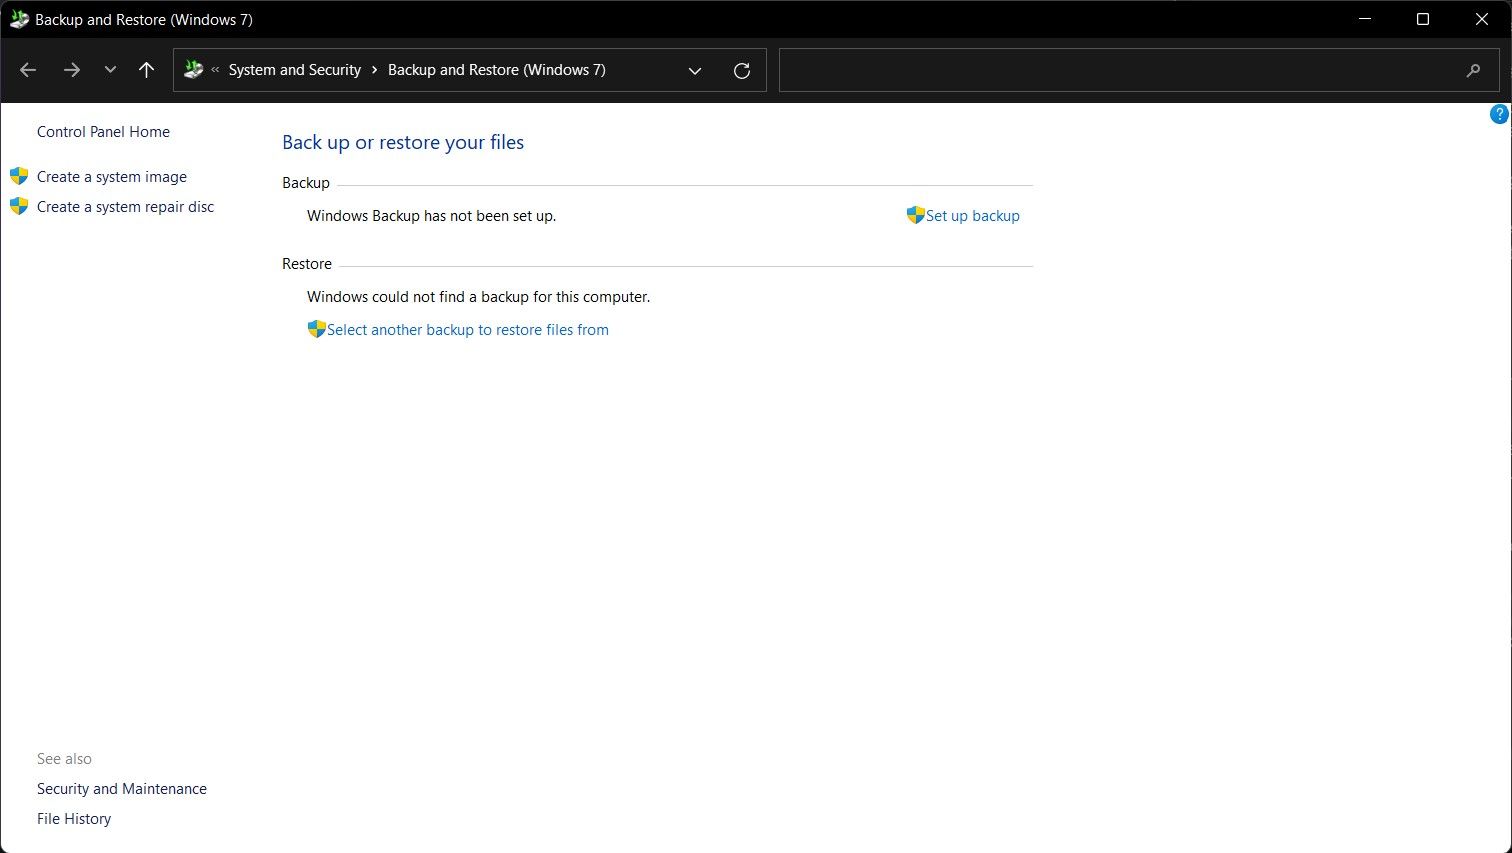
In the new window, click the Create a system image option.
-
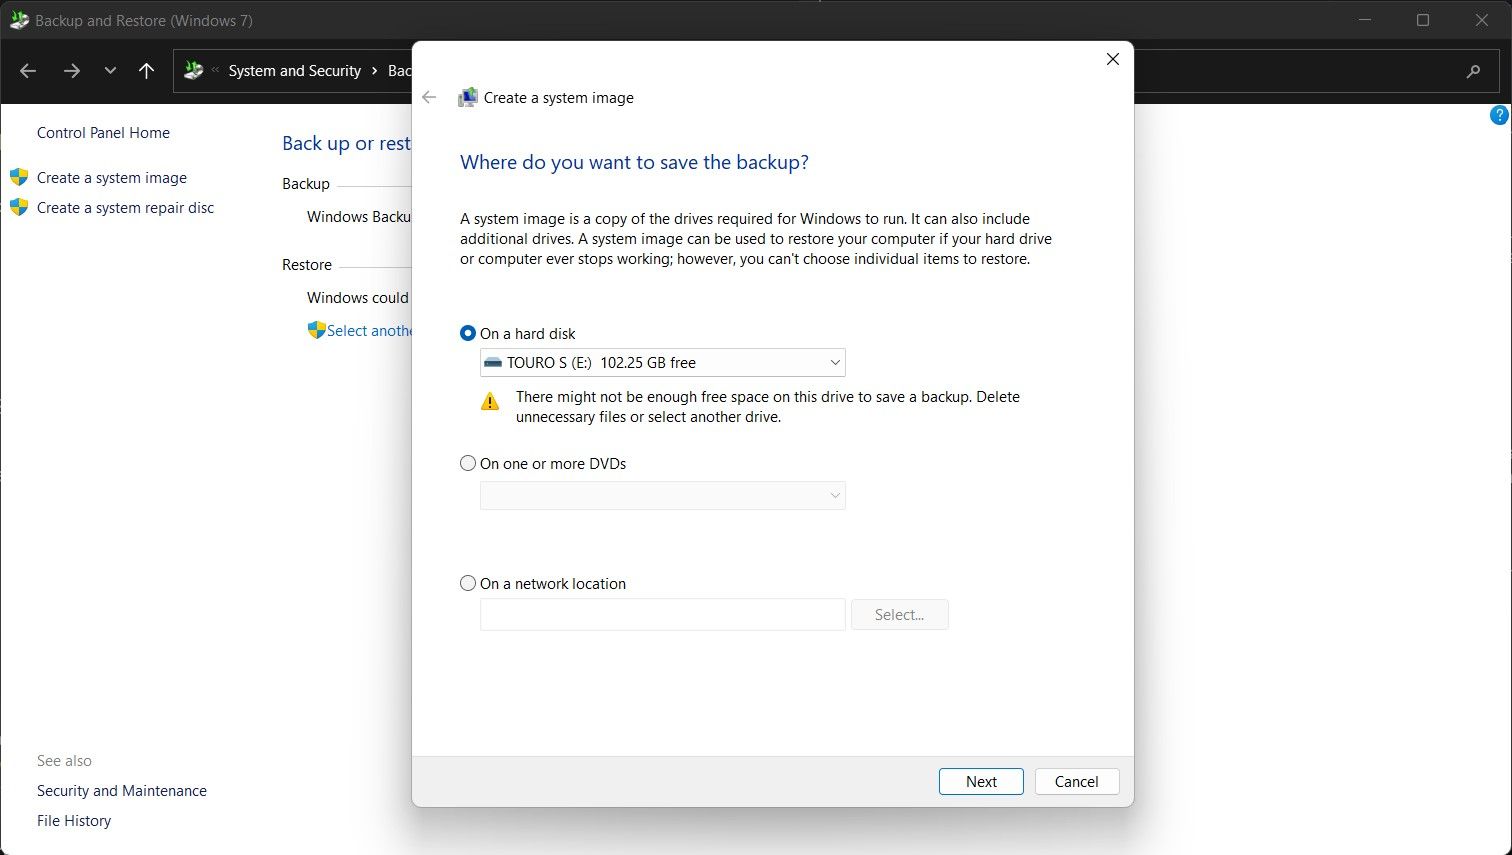
The System Image Wizard will guide you through the process. Select the On a hard disk option. Your external drive will be automatically selected, but click the drop-down menu to select it if needed. Click Next.
-
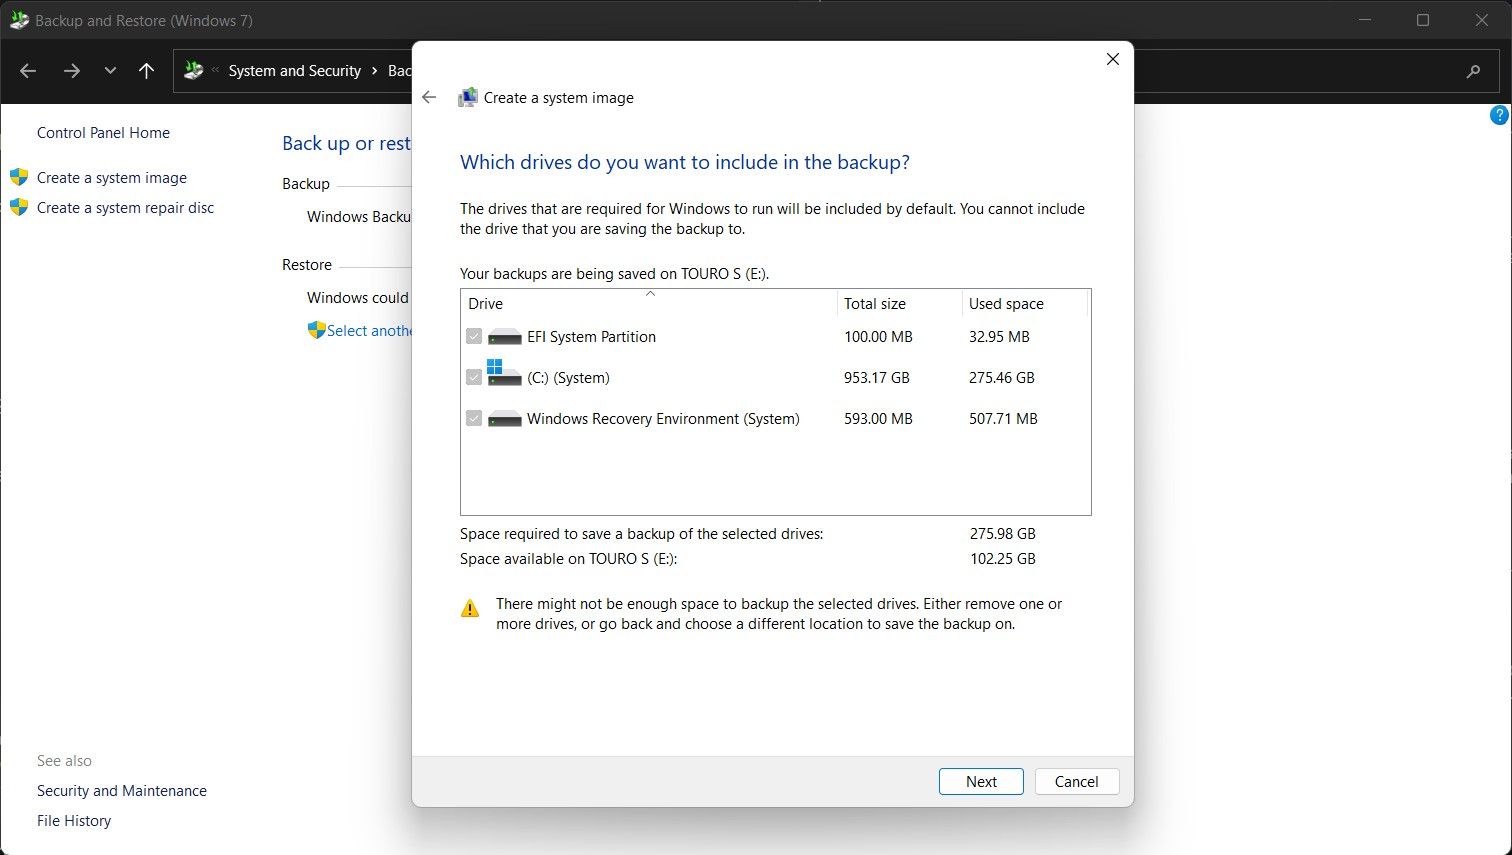
Select the partitions you want to back up, and click Next again. If you get an encrypted drive warning, click OK.
- Take a final look at your backup settings, and click Start backup to begin.
- You’ll have to wait a while, but the backup will finish. Click No when the wizard asks you if you want to create a System repair disc.
- Click Close to close the wizard and complete your Windows 11 backup.


These steps are for Windows 11, but the Backup and Restore tool has been in Windows since Windows 7. As such, you can follow these steps for Windows 7 and above.
How to restore a Windows 11 backup
Windows 11’s native backup tool will only let you restore the backup when reinstalling the operating system. This is because the tool makes a complete image of your system and restores it exactly as-is. As such, you will need to boot into a Windows 11 bootable drive, with either a bootable USB or a DVD, and make sure your external drive with the backup is connected to your PC.
This is usually done by pressing a key or combination of keys right after you press the power button to start your PC. Check your laptop or PC motherboard manufacturer’s website for the boot menu key specific to your computer. Once you’ve booted into the Windows 11 installer, you can follow the steps below to restore the backup.
- Ensure you’ve selected the correct language, time and currency format, and keyboard layout, and click Next.
- Click the Repair your computer option towards the bottom.
-
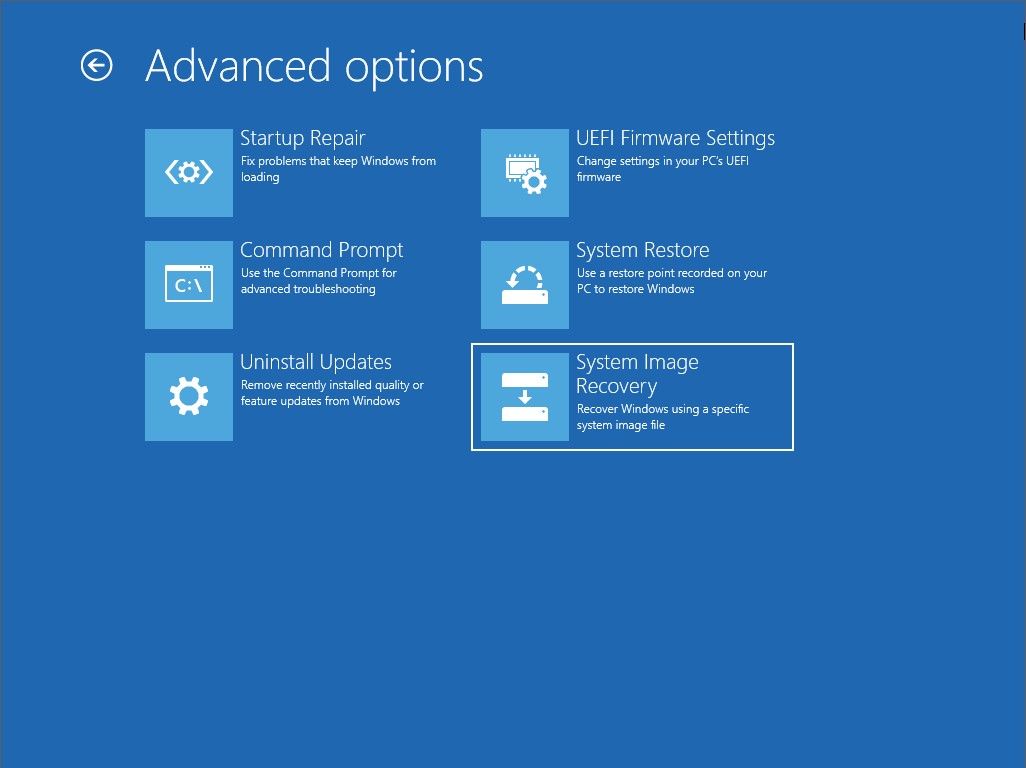
Click the Troubleshoot option and select System Image Recovery.
-
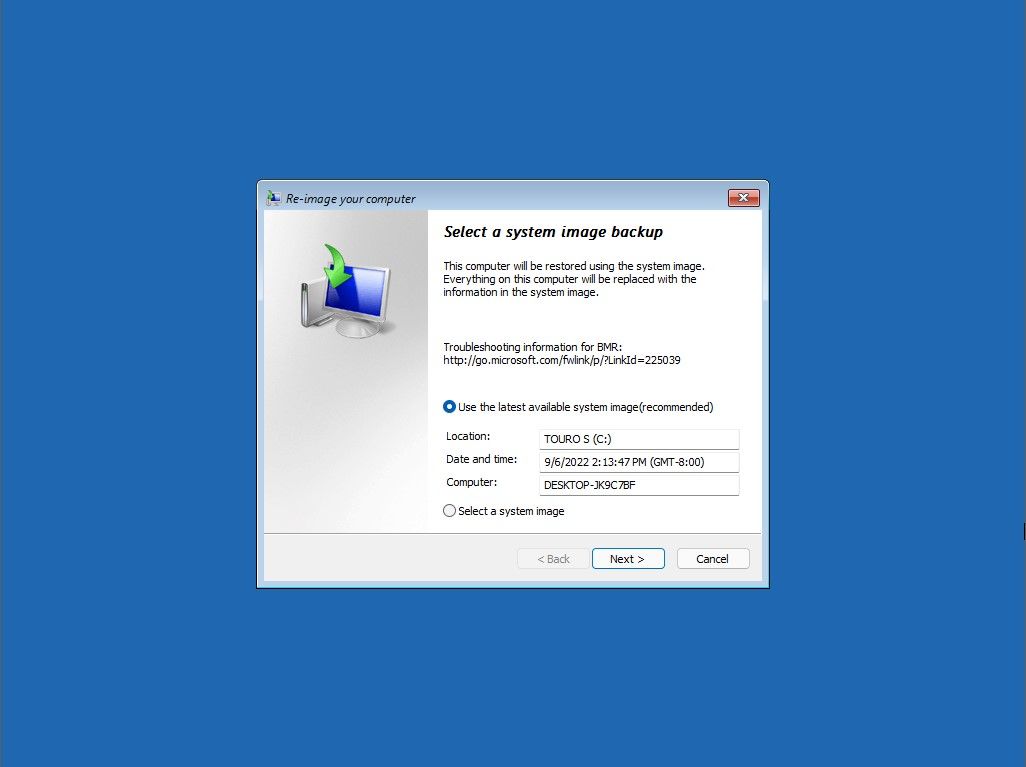
On the restore tool screen, the backup from the external drive will automatically be selected. Click Next.
- The next screen shouldn’t require any changes from you, so click Next.
-
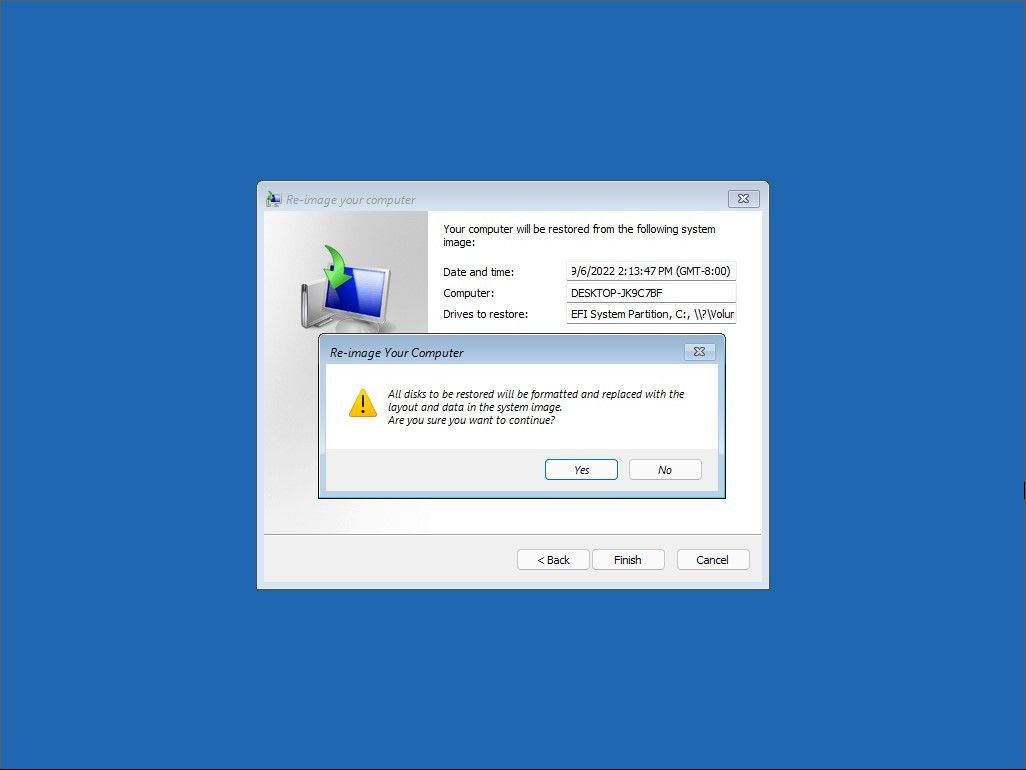
Click the Finish button to begin the restore, and click Yes to confirm.
- It will take a while for the restore to finish, and the system will boot into Windows 11 once done


Using third-party backup tools and external storage with Windows 11
While Windows 11 has a solid backup functionality built-in, some users may want additional features. For those users, plenty of third-party back-ups and restore apps are available. Additionally, if you have a lot of data, you might want to build network-attached storage with some of the best NAS drives available. You can deploy dedicated backup and data protection if you have a NAS, and it’s a great way to keep your data safe from any Windows 11 failures.