Live Transcribe is a valuable accessibility tool from Google that is available on all Android phones and tablets via the Play Store. It's free to use and helpful for people who are hard of hearing to use in everyday conversations. It's beneficial when paired with the accessibility features introduced in Android 14.
We show you what Google Live Transcribe can do and how to use it. This app is pre-installed on Google Pixel phones. You can download it from the Play Store if you use another Android device, like a top Samsung tablet.
What is Google Live Transcribe?
Live Transcribe transcribes speech in real time to your Android screen, making it easier for people with hearing impairments to engage in a conversation. Alongside the real-time text, it creates and saves a transcript of each conversation for up to three days.
The built-in algorithm identifies sounds and lets you know what's happening around you (such as birds chirping or the wind whistling). It has helpful accessibility features, like vibrating when your name is spoken. You can also add custom words and a secondary language for bilingual users.
Live Transcribe was created in partnership with Gallaudet University, a premier university for deaf people.
How to activate Live Transcribe on a Google Pixel
Live Transcribe is pre-installed on modern Google Pixel phones (Pixel 3 and above), the Pixel Tablet, and other Android devices. It doesn't appear by default in your app list, you can make it appear alongside your other apps and access it through your phone's Settings app.
If Live Transcribe isn't pre-installed on your device, install the app from the Google Play Store on devices running Android 6.0 and above. Here's how to use it:
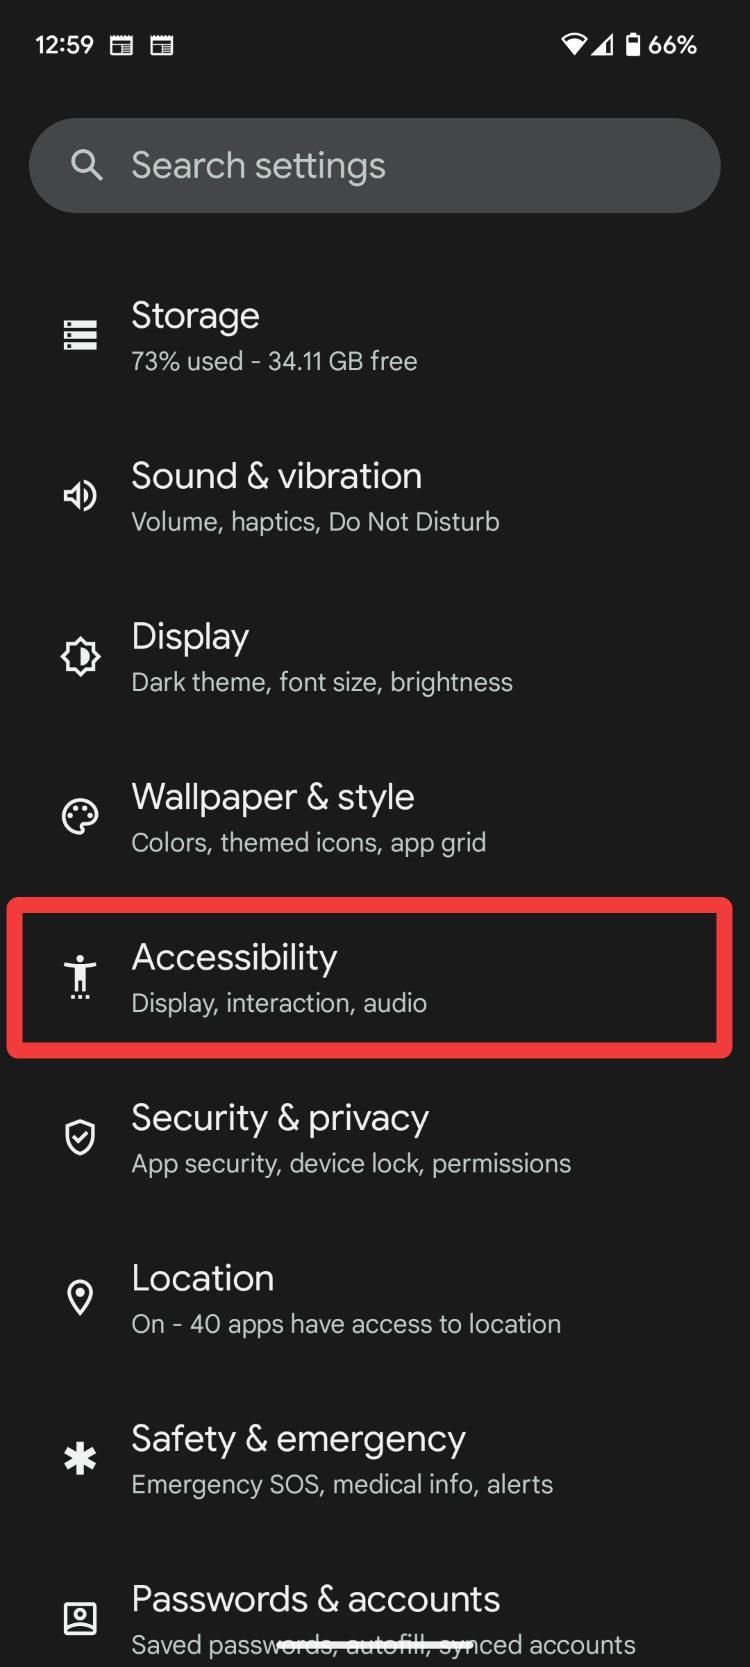
- Open your Android phone's Settings app.
- Scroll down and tap Accessibility.
-
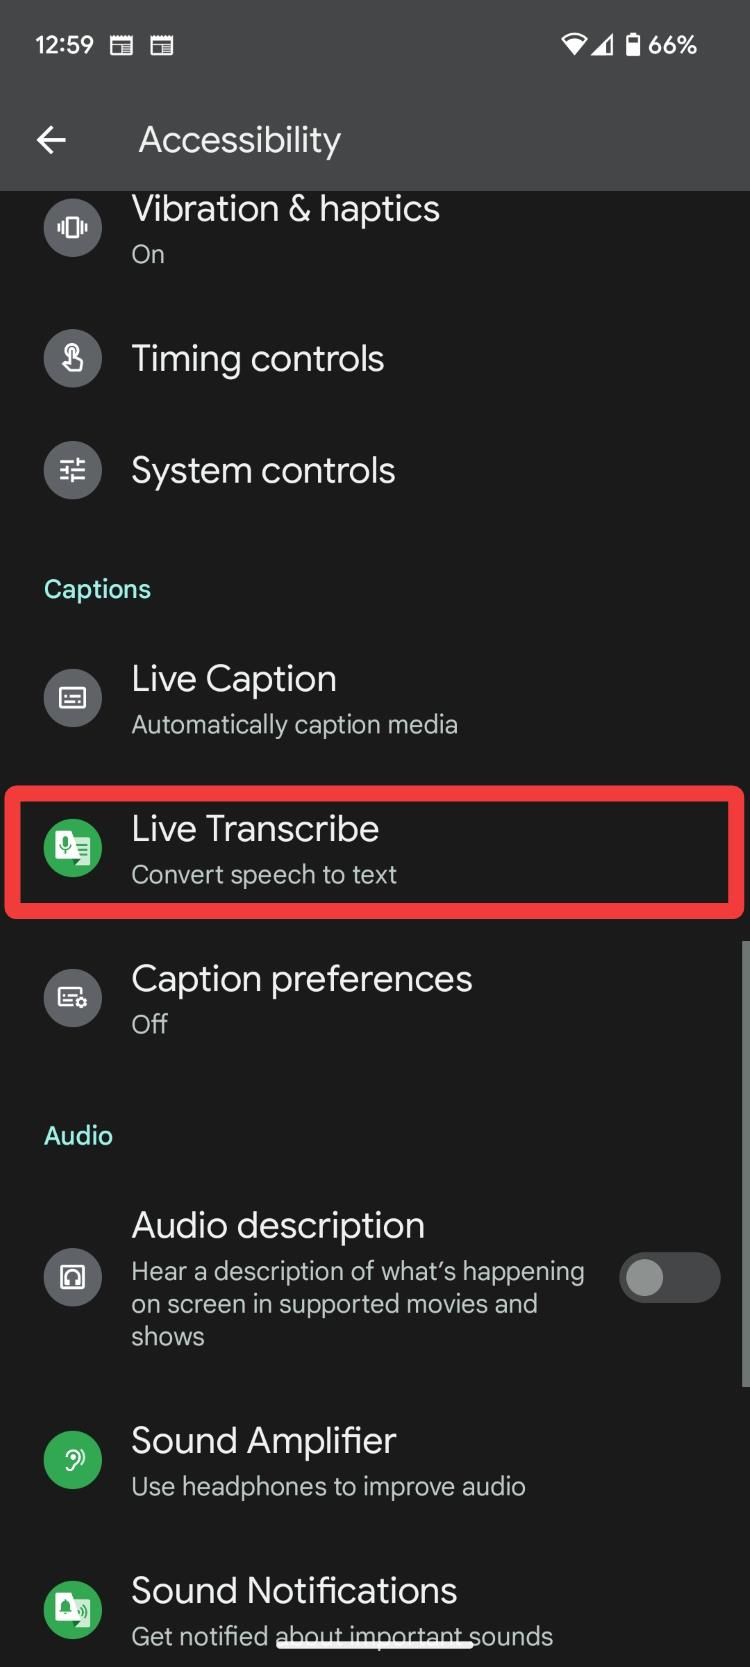
Scroll down and tap Live Transcribe under the Captions heading.
-
Tap Open Live Transcribe to open the app and start transcribing.
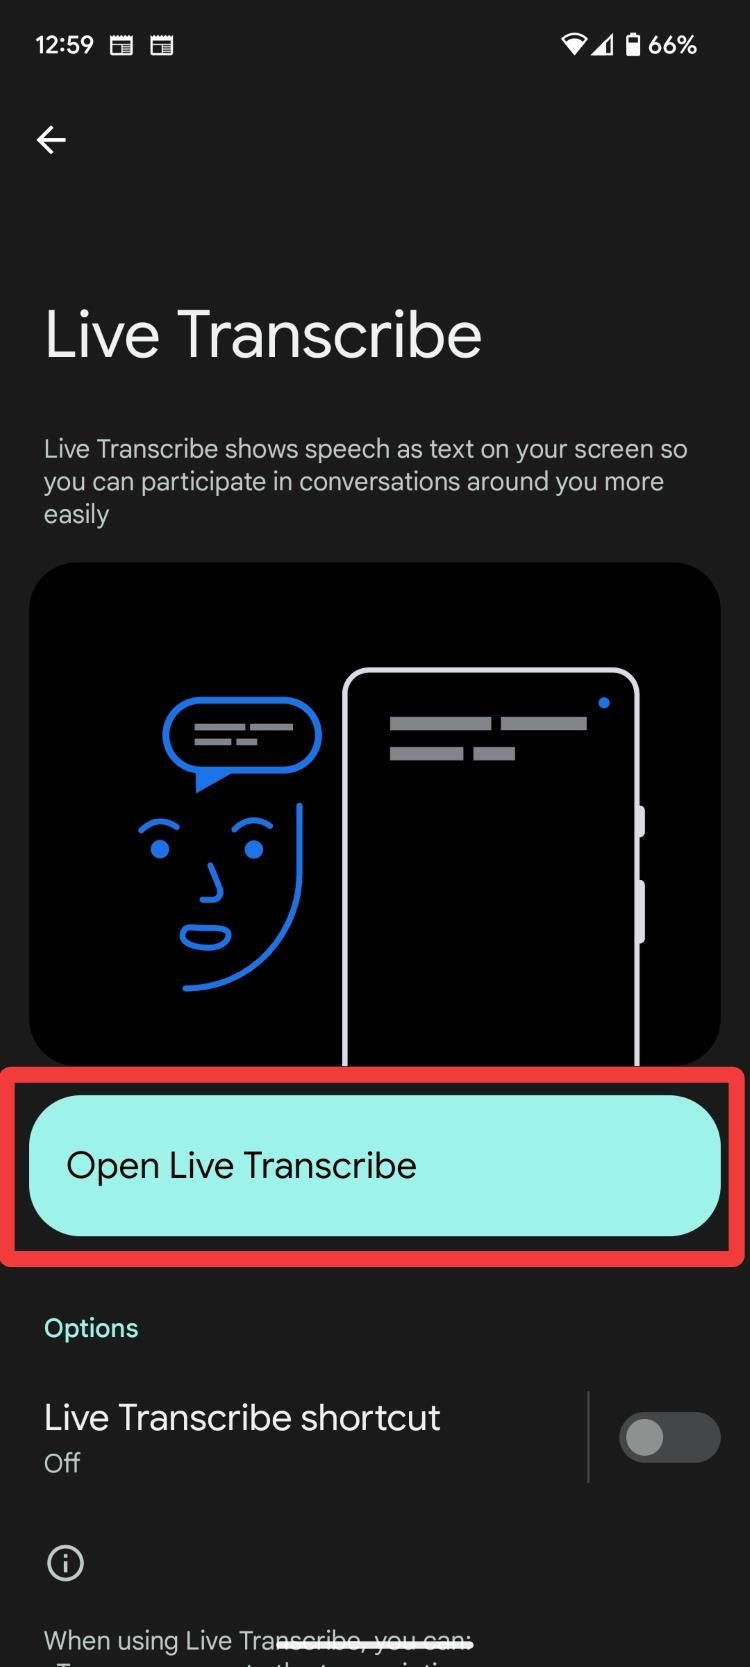
Toggle the Live Transcribe shortcut switch to display a floating icon to access Live Transcribe from anywhere. You can move this shortcut around the screen and temporarily hide it by dragging it to the edge of your screen.


How to activate Live Transcribe on a Samsung device
Modern Samsung devices have Live Transcribe built-in. Here's how to turn on Live Transcribe on a Samsung device:
If you don't see Live Transcribe, install the app from the Play Store
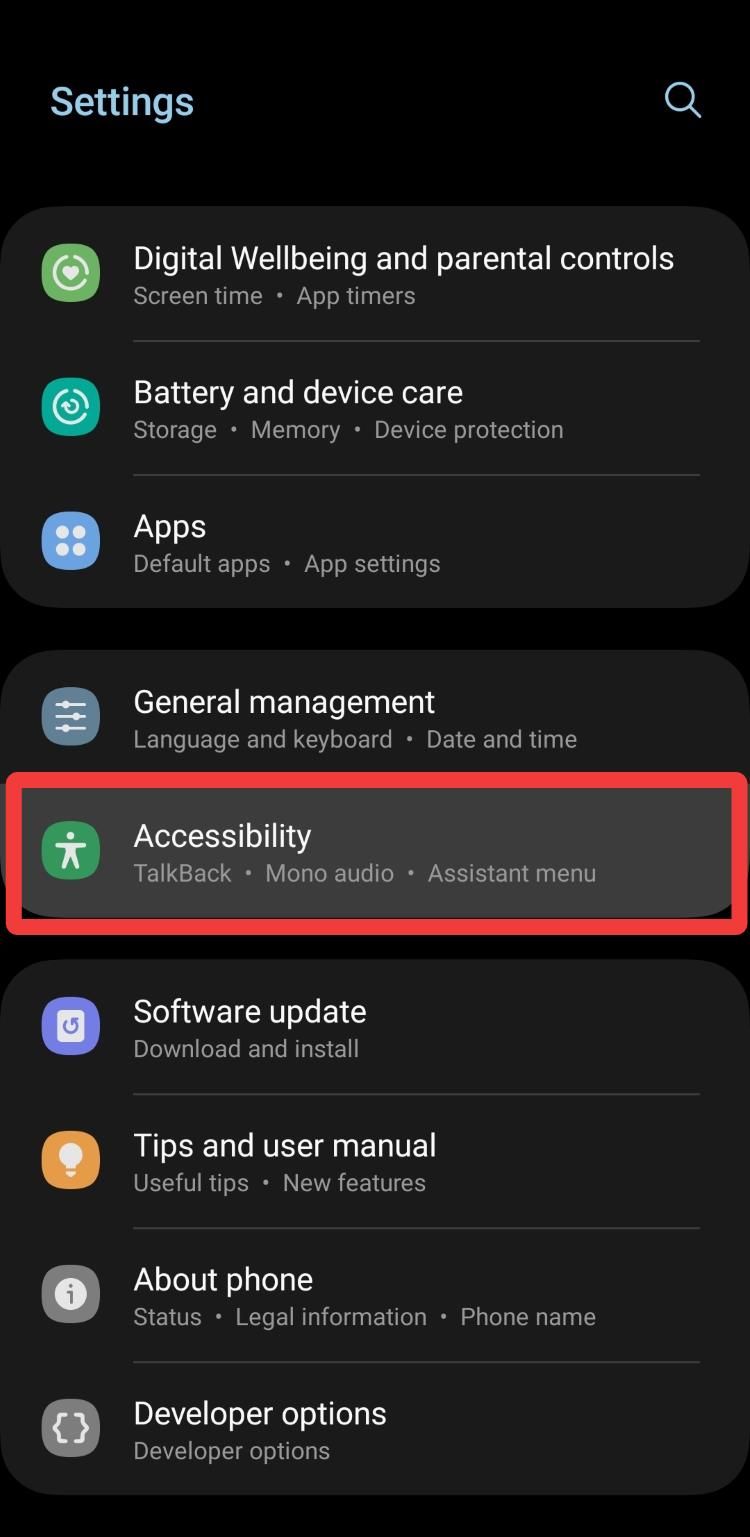
- Go to your device's Settings app.
-
Scroll down and tap Accessibility.
-
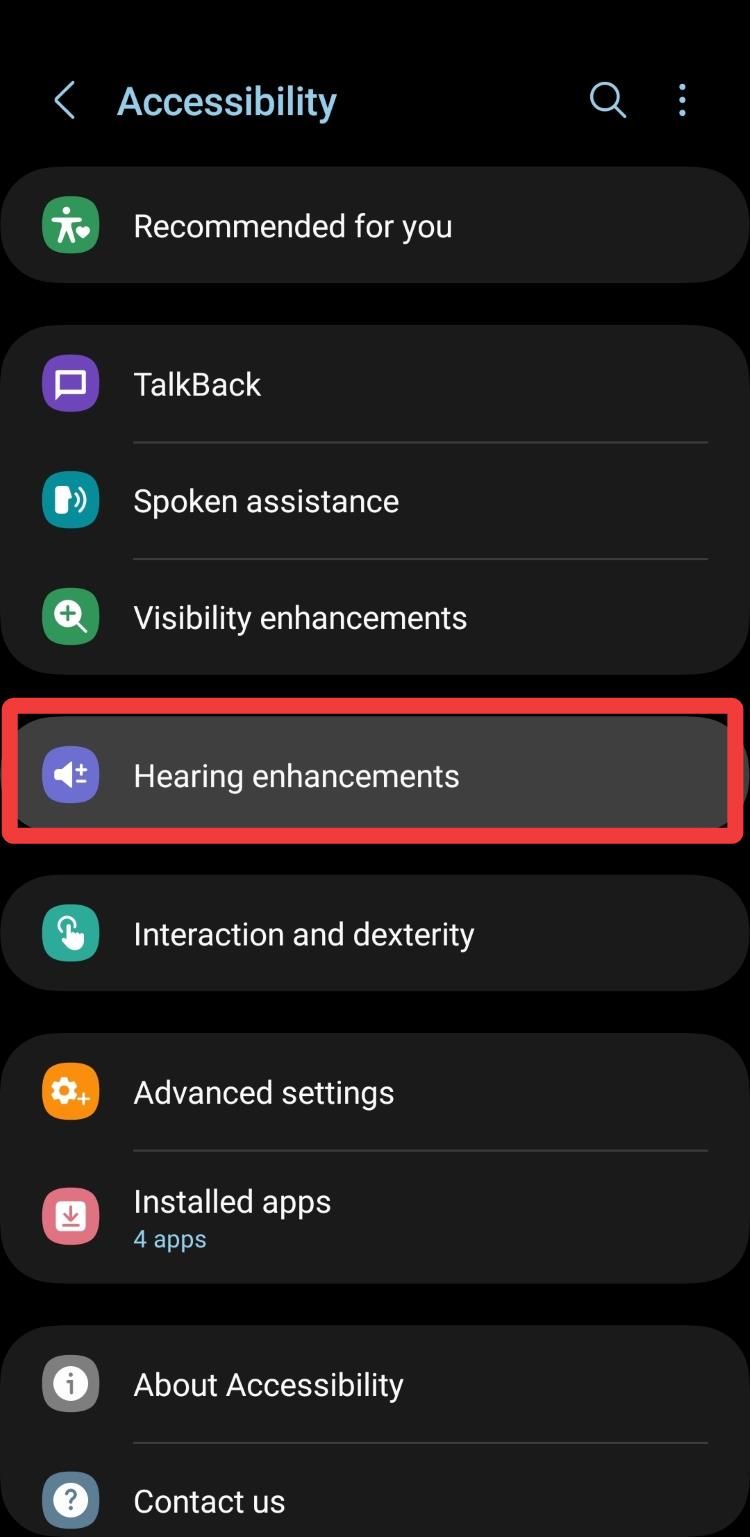
Tap Hearing enhancements > Live Transcribe.
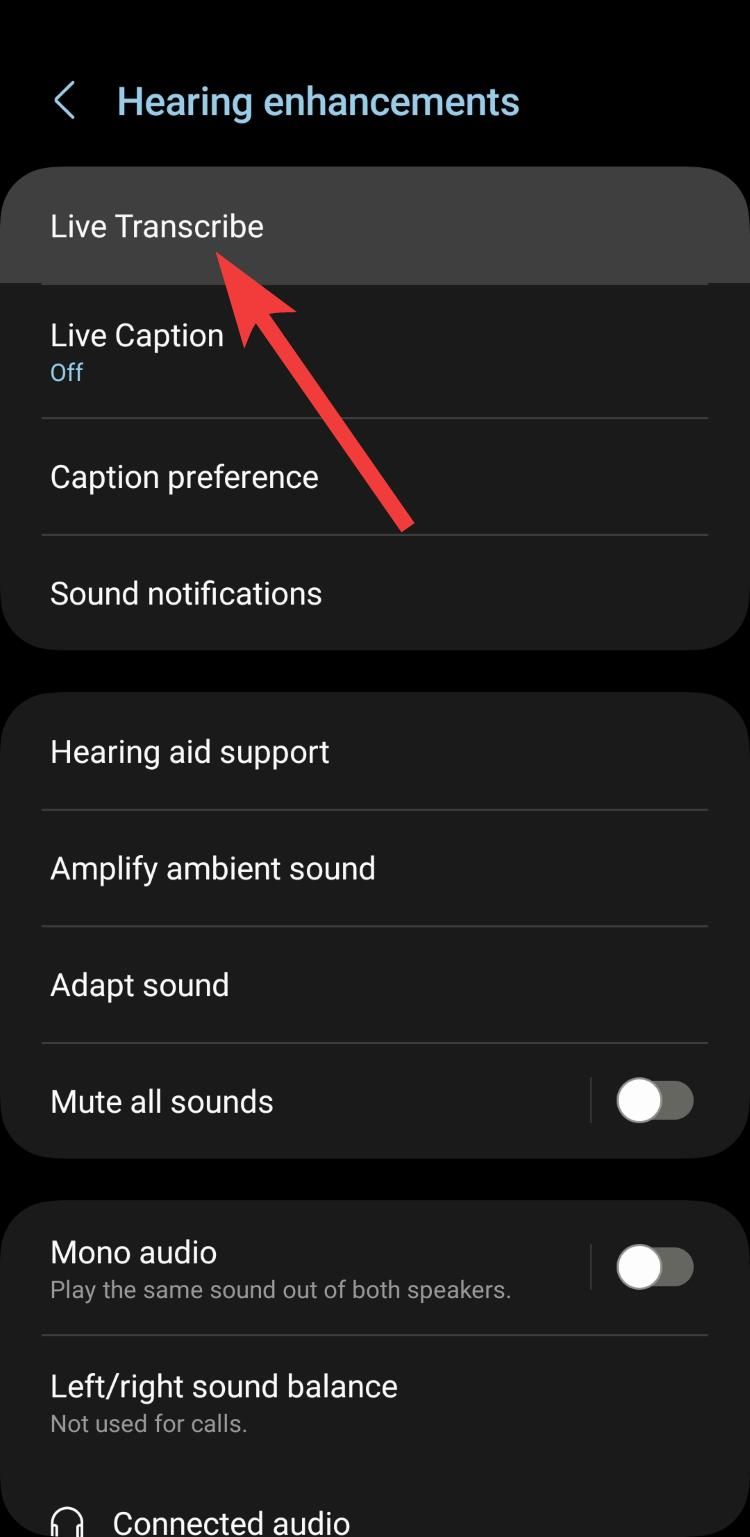
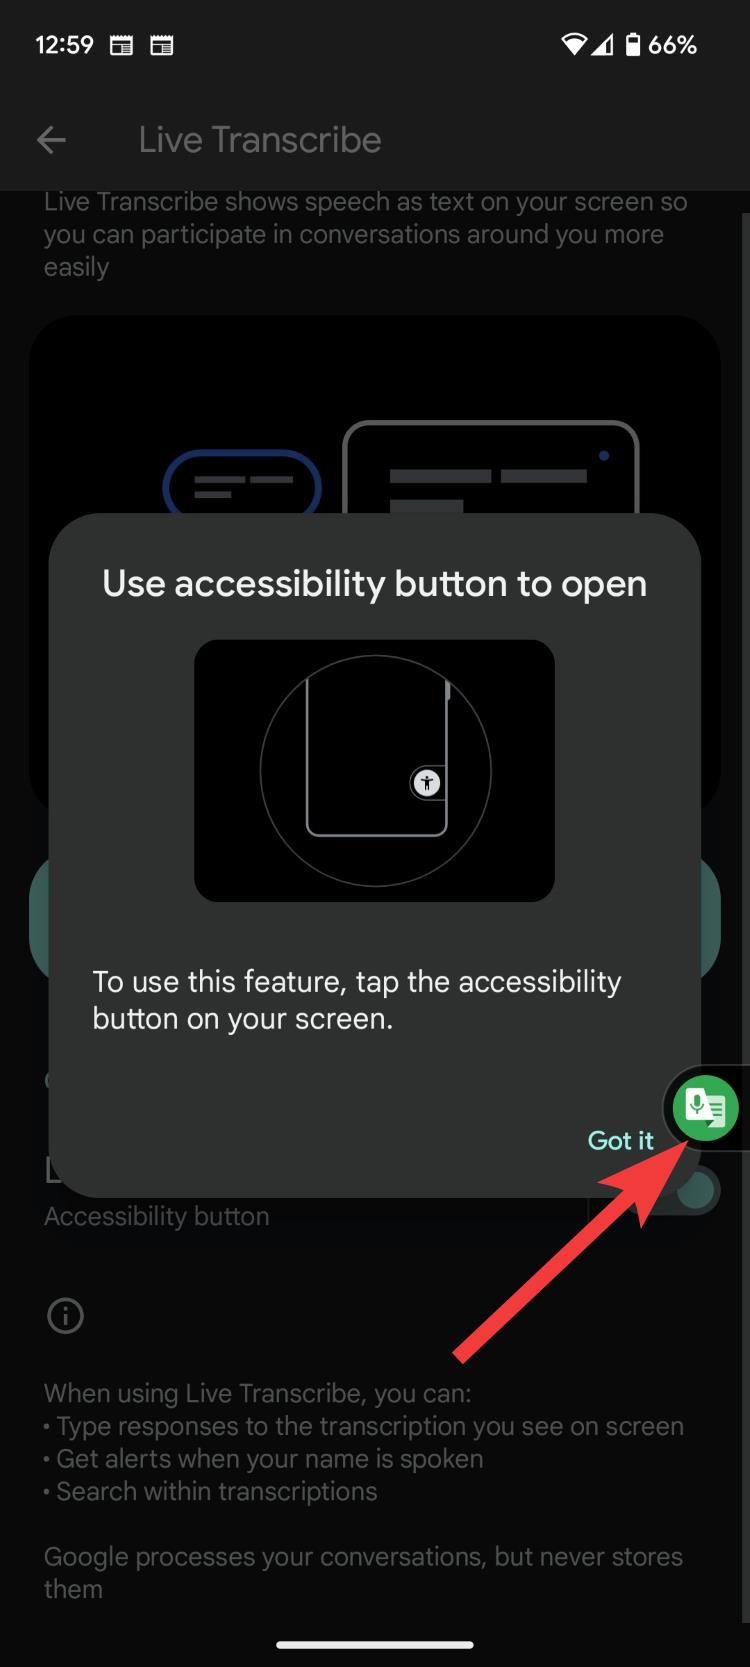
- Tap Open Live Transcribe to start the feature.
- Toggle on the Live Transcribe shortcut to bring up a floating app icon.


If you use the three-button navigation on your Samsung device, the Accessibility button containing the Live Transcribe shortcut appears in the lower-right corner of your screen.
How to use Live Transcribe on other Android devices
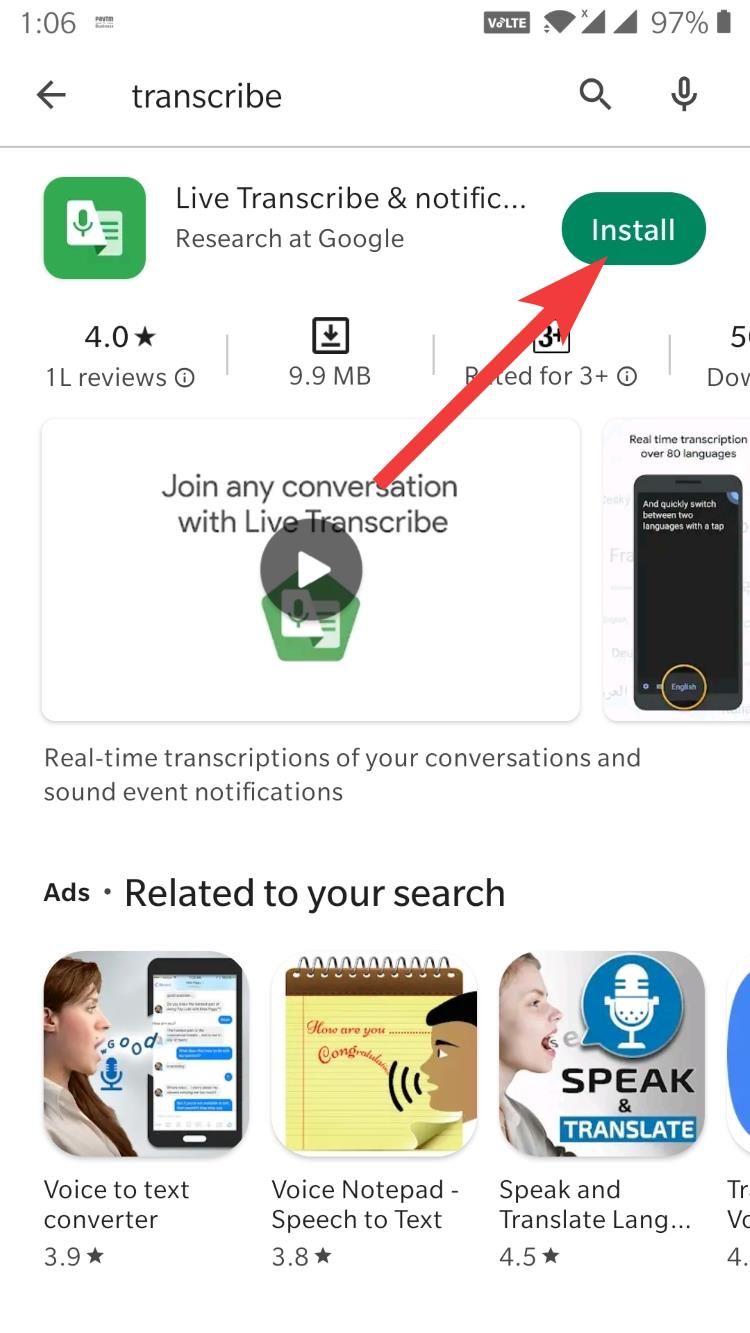
If the Live Transcribe app isn't pre-installed on your Android device, here's how to download and find it.
- Down the Live Transcribe & Notification app from the Play Store.
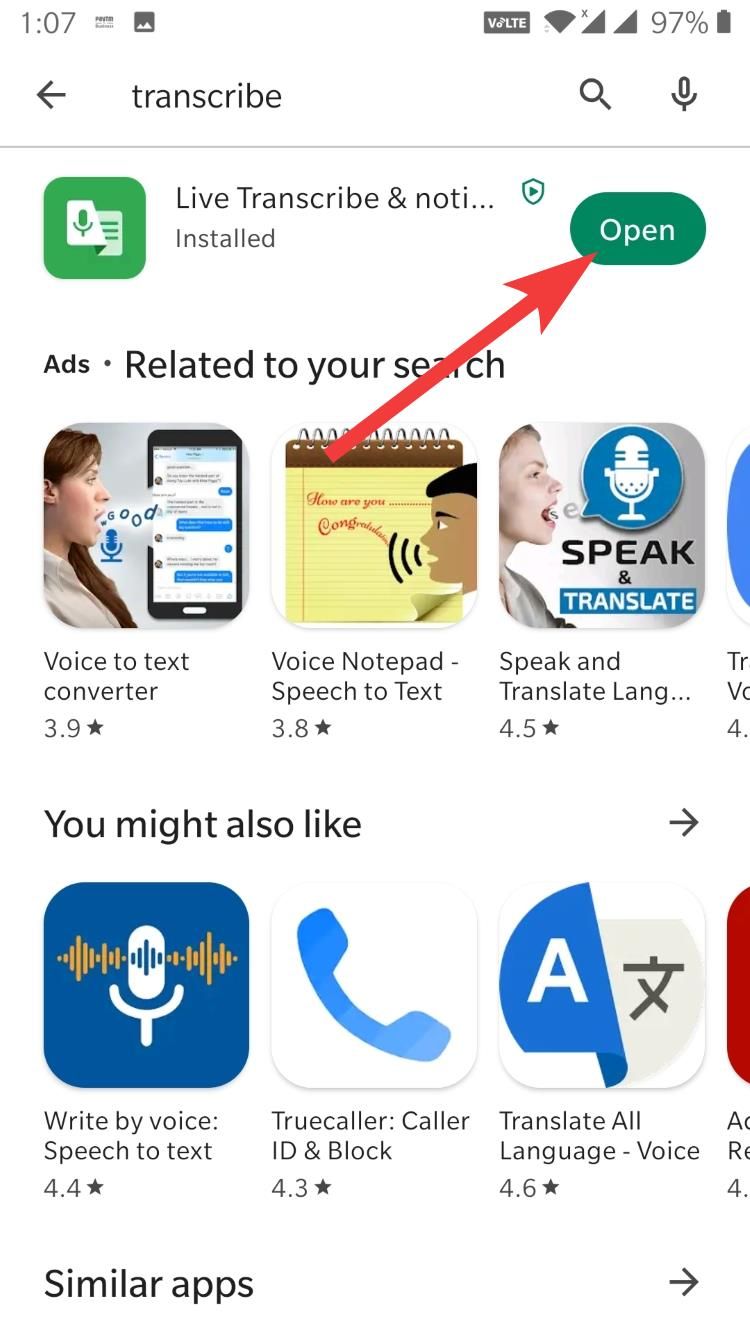
-
Open the app.
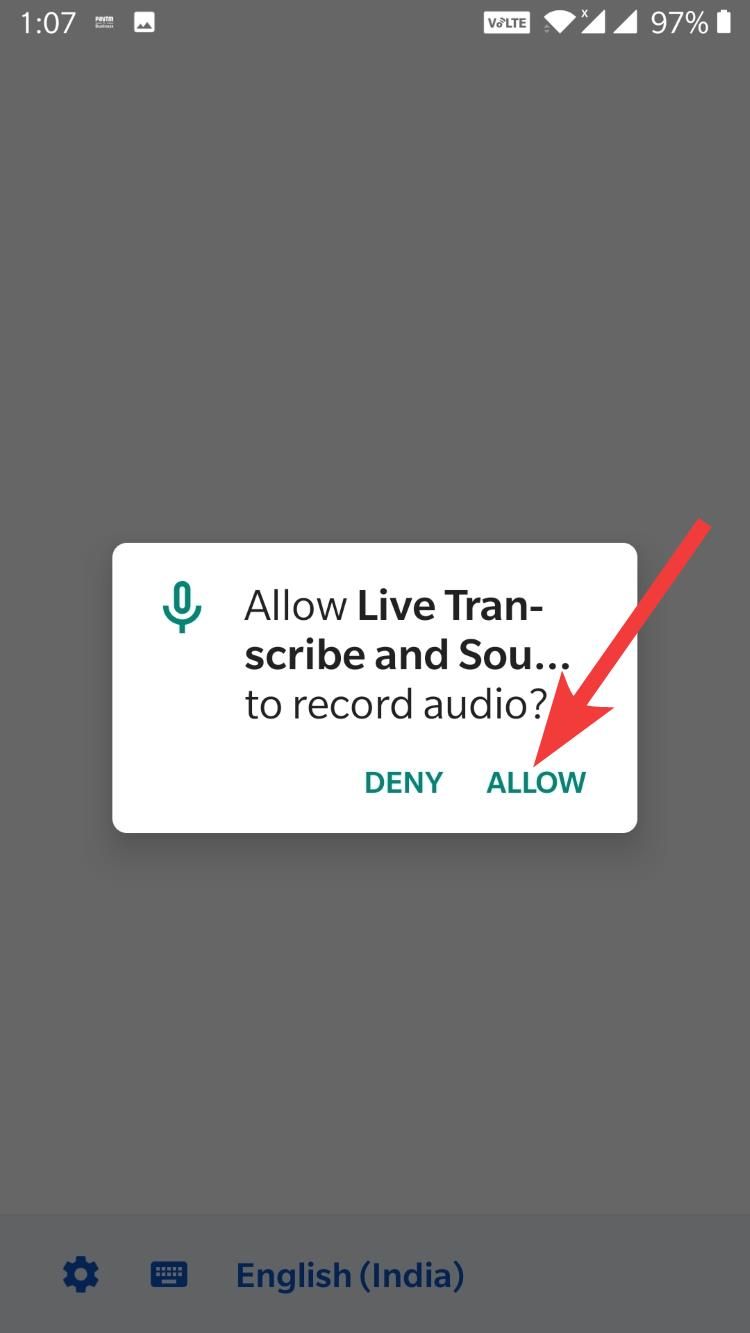
-
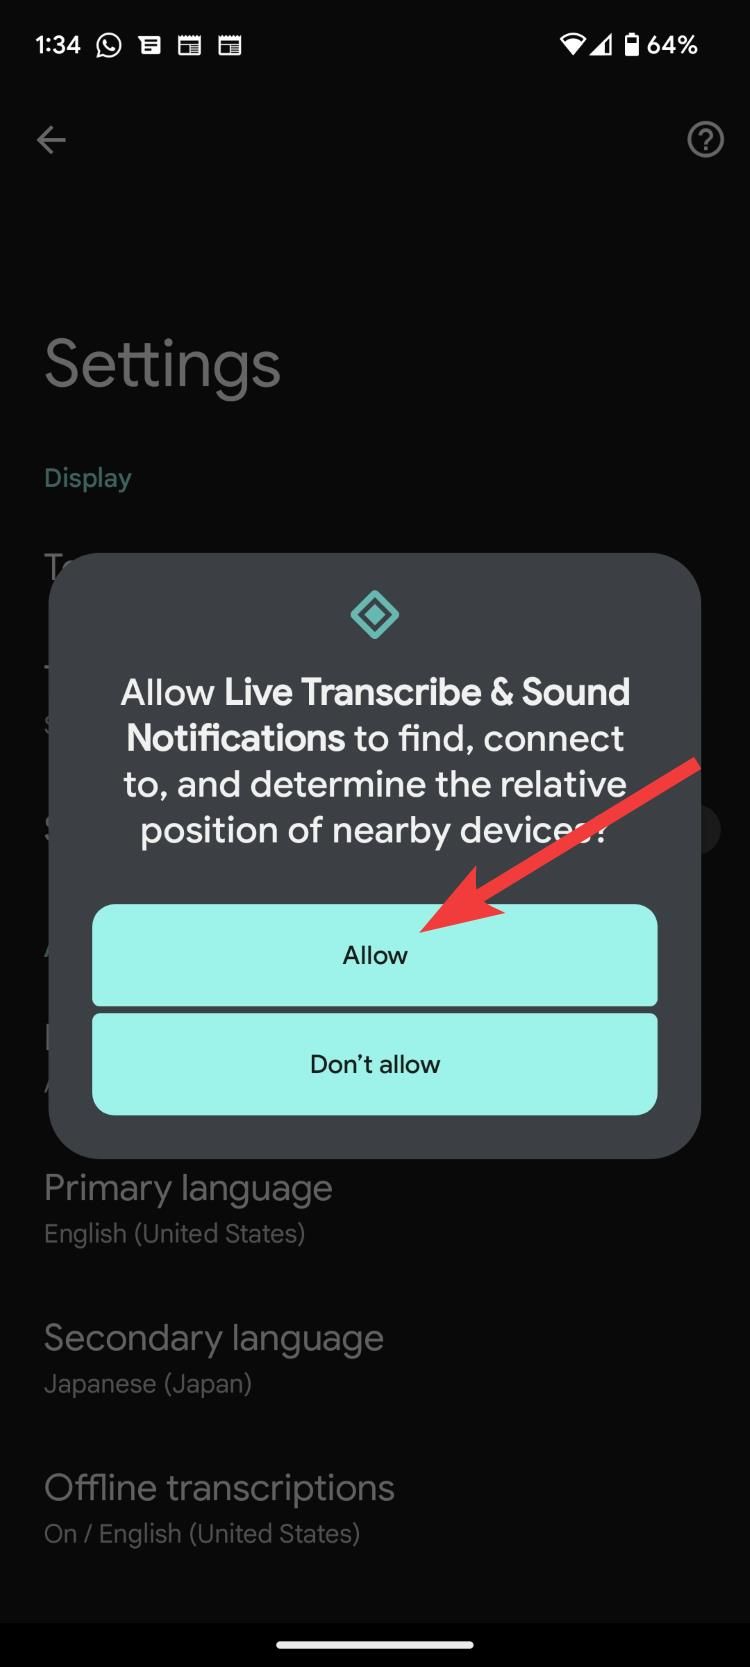
Grant the app permission to use your microphone.


You can now use Live Transcribe in the same way as Google Pixel or Samsung Galaxy devices.
How does Live Transcribe work?
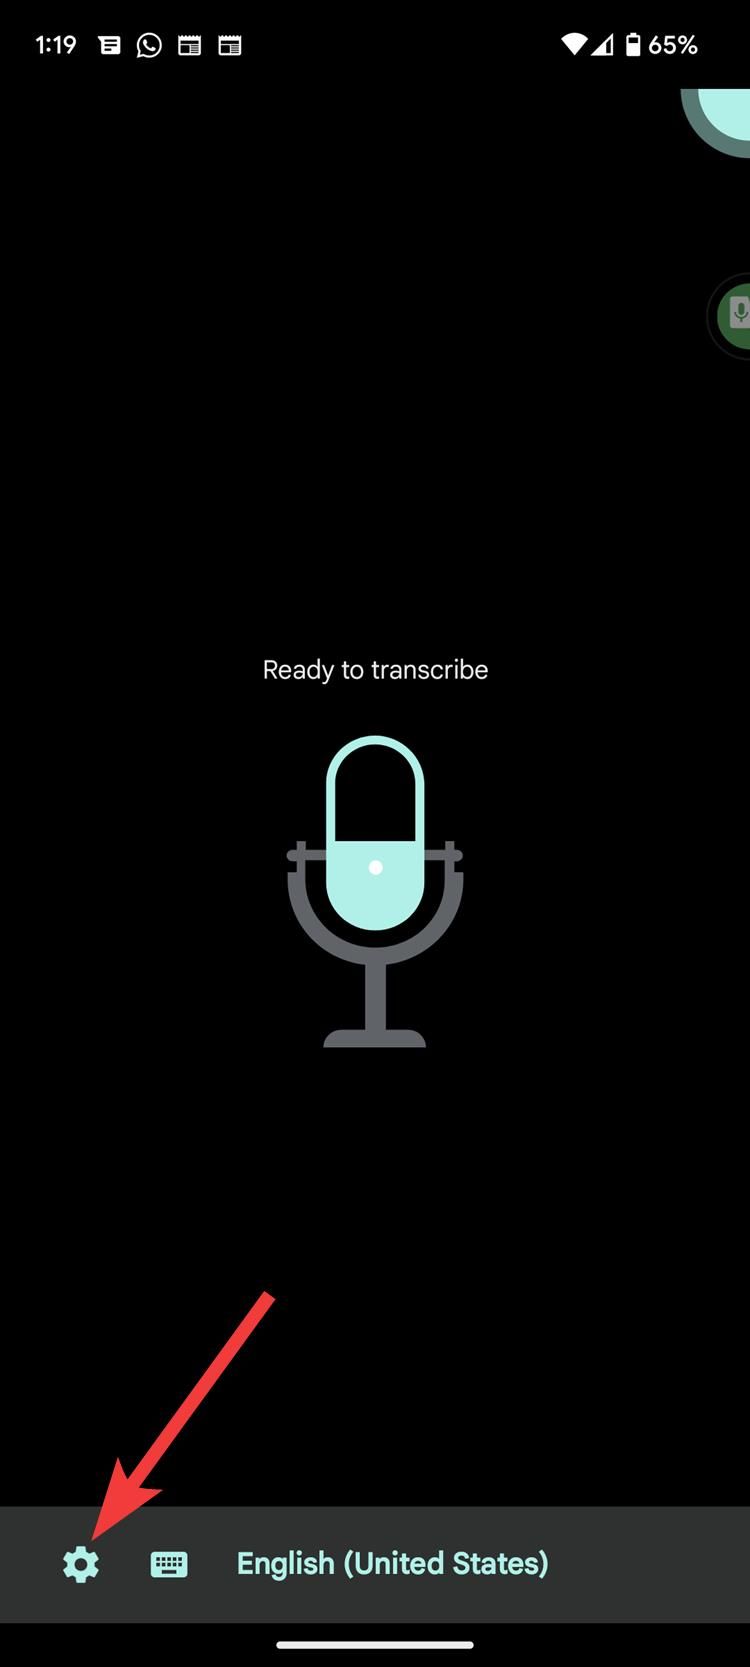
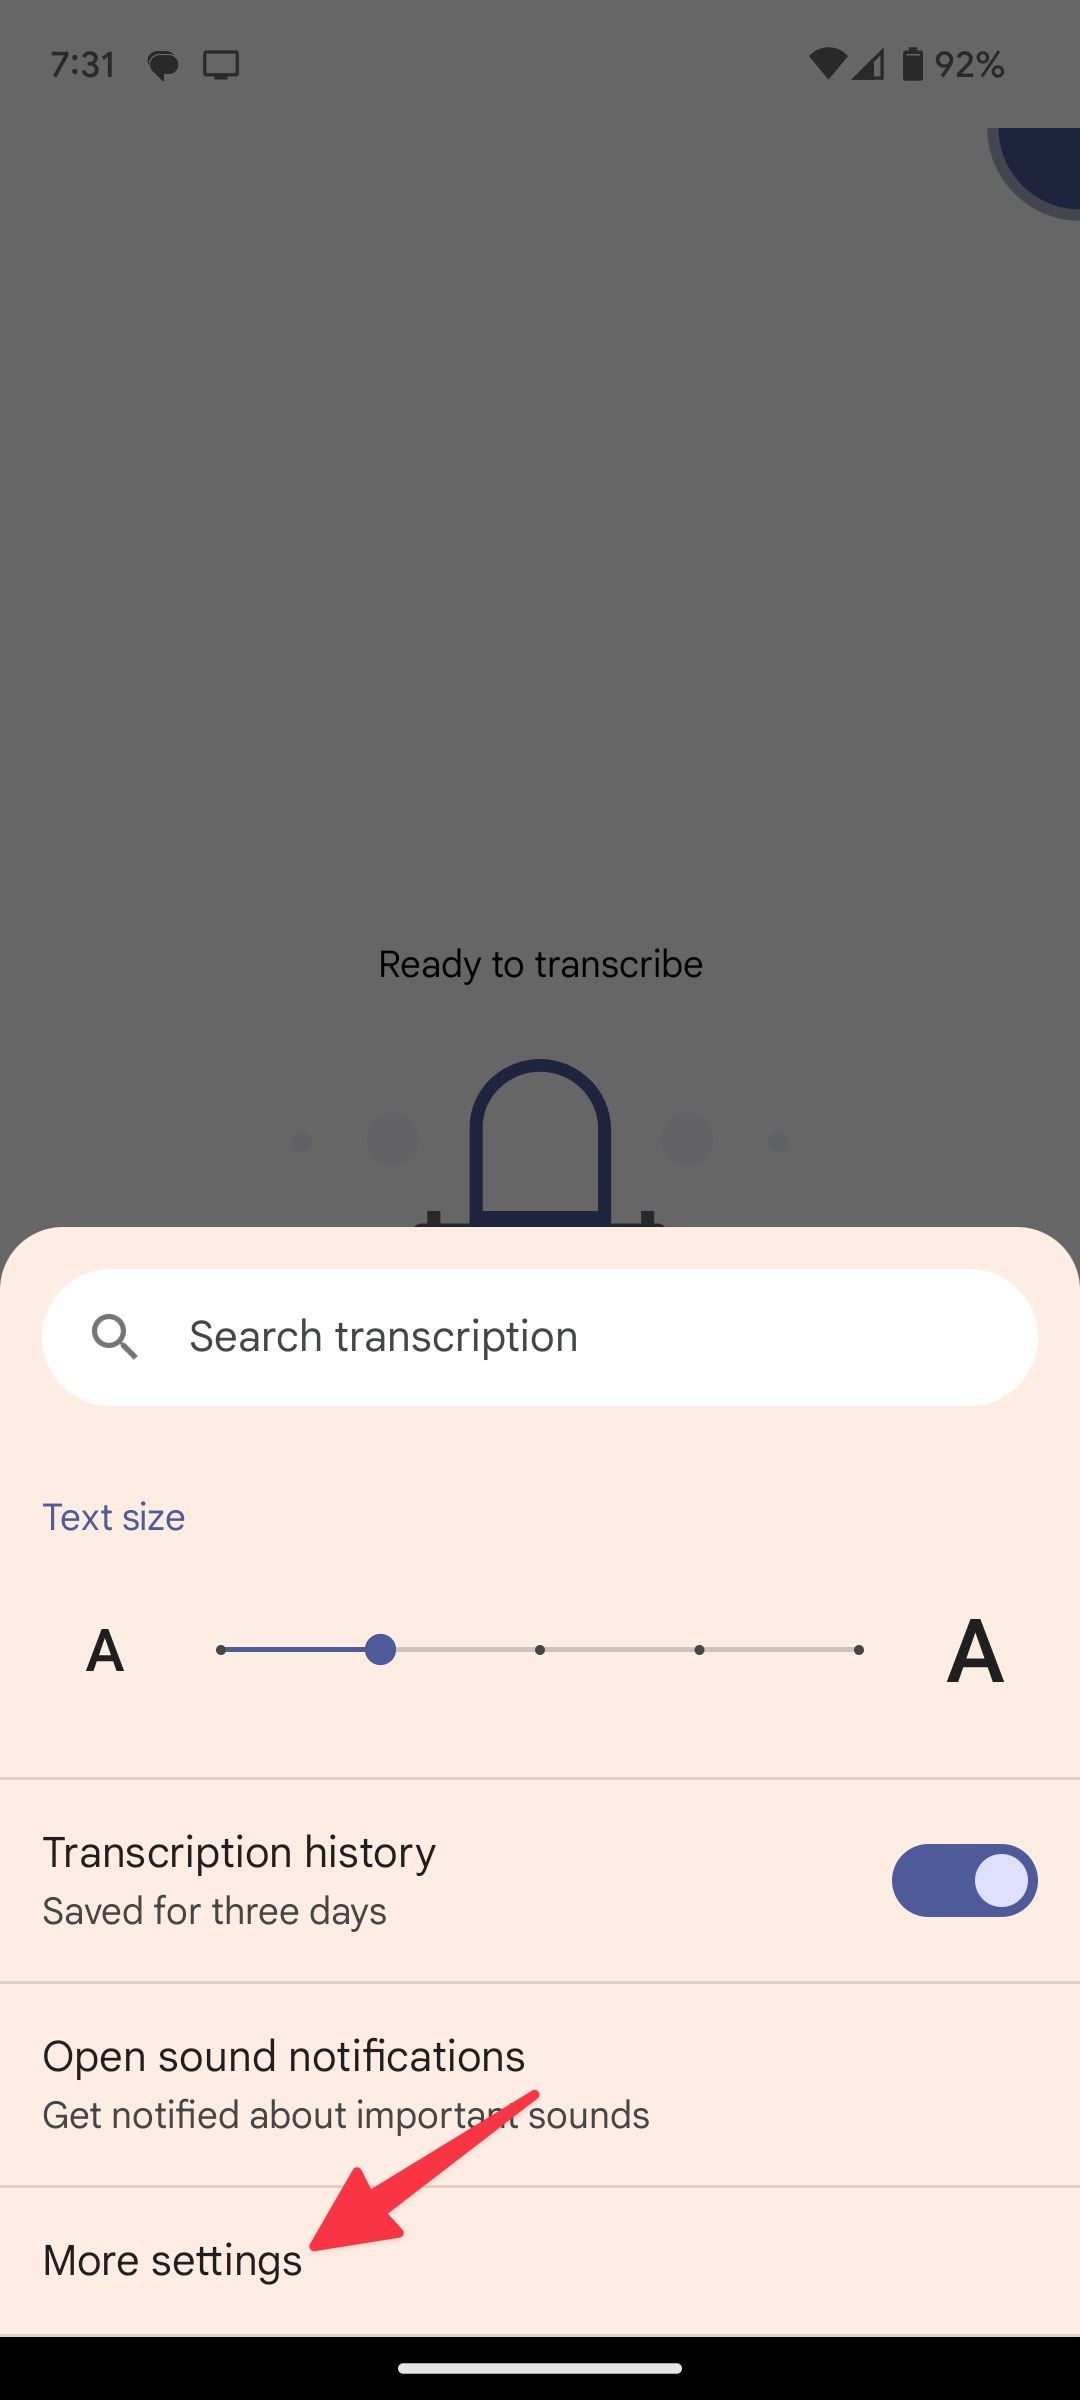
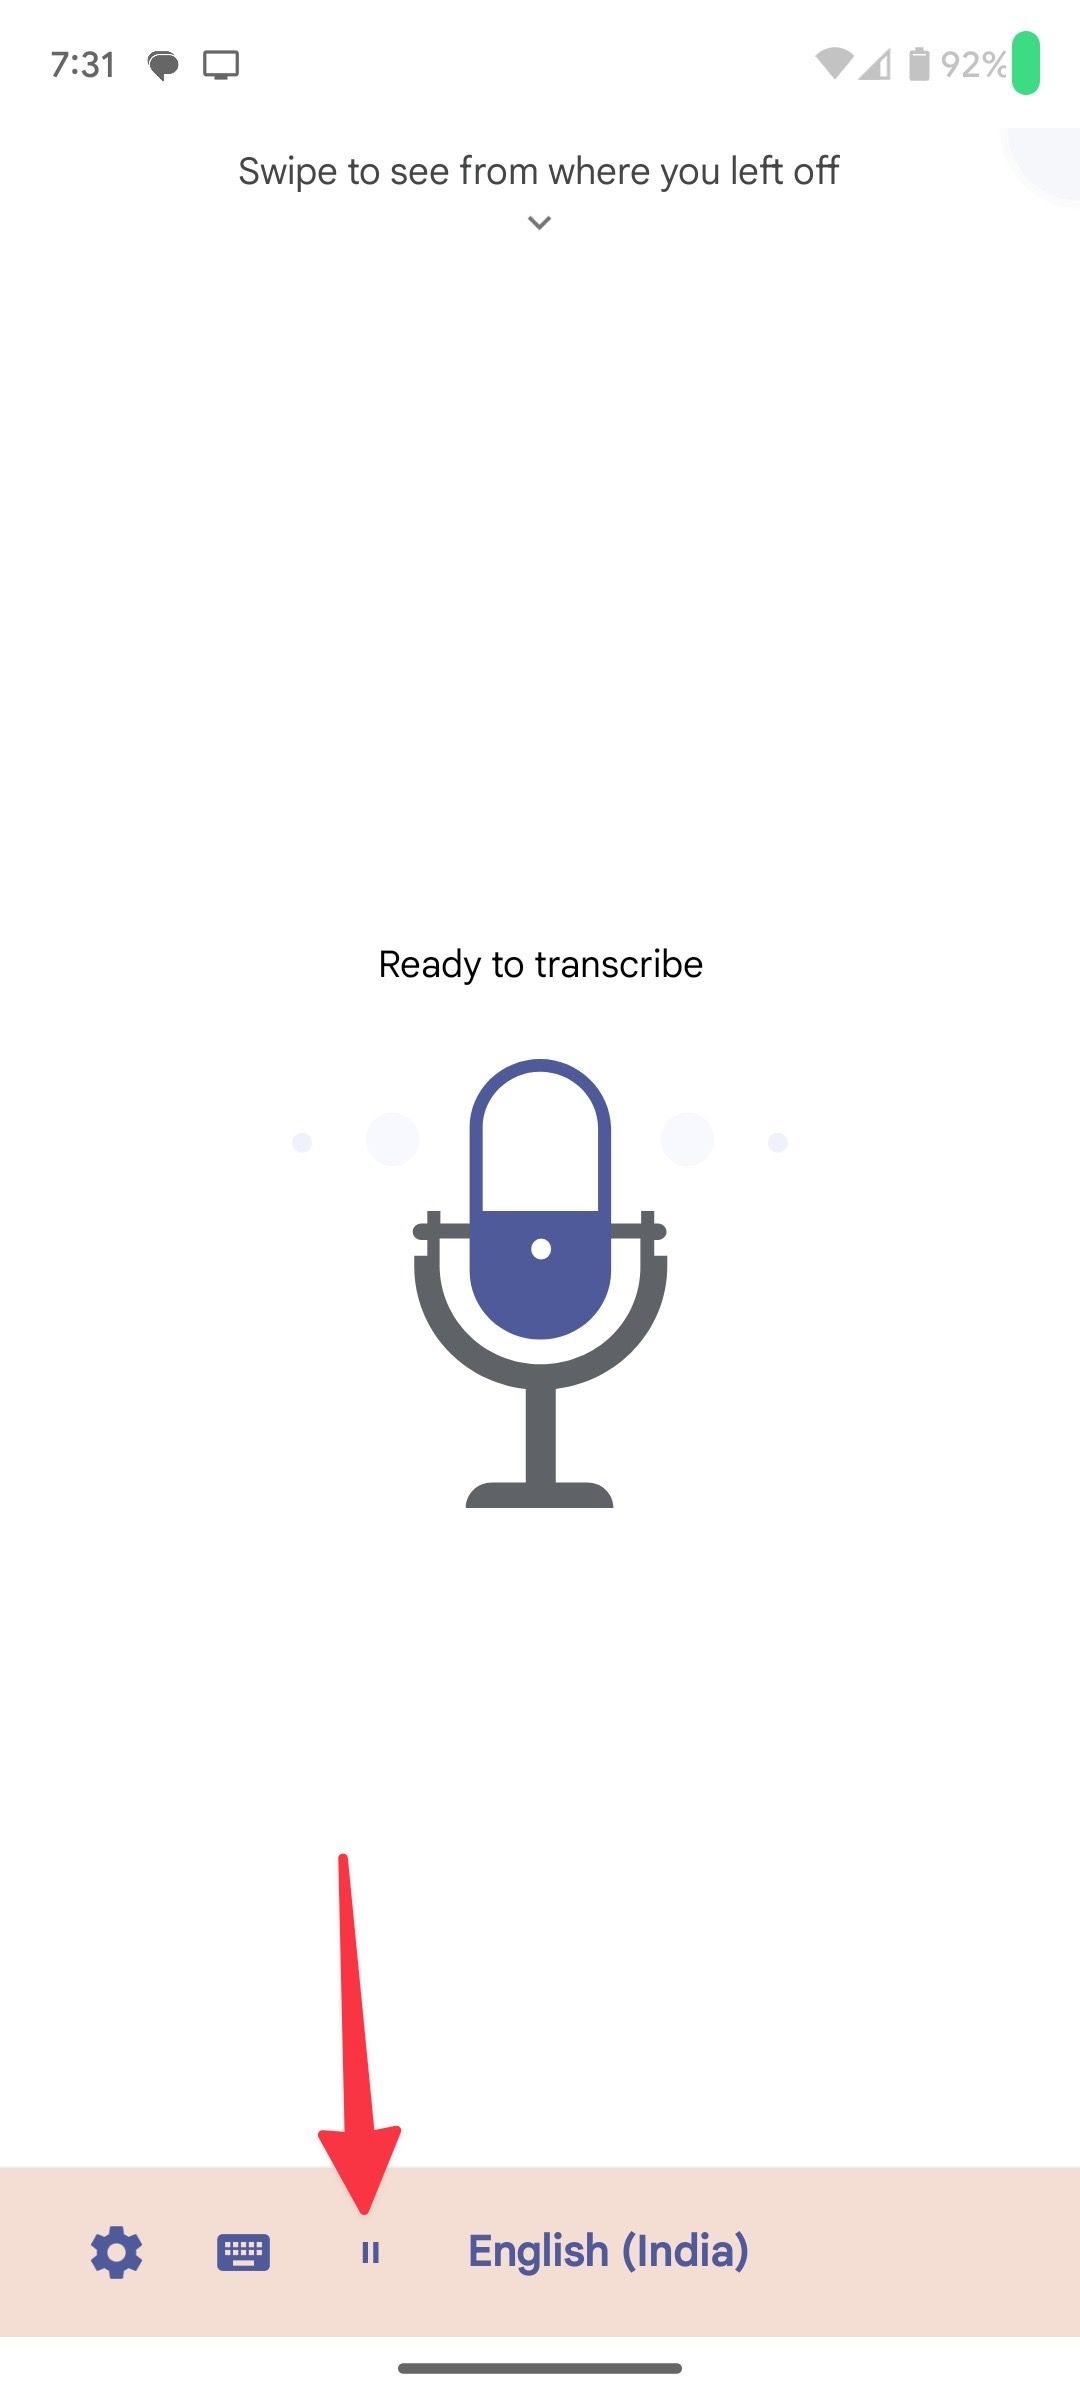
When active, Live Transcribe automatically captures any speech in the selected language and transcribes it in real time. You can tell it's ready when you see Ready to transcribe in the app's text window. Hold your phone near the speaker to capture their voice clearly.
The results may not be 100% accurate if the speaker struggles to speak coherently. People who have conditions that impact speech should check out Google's Project Relate. This project helps people with speech impairments communicate and interact with others using Google Assistant.
If you want to respond via text to a conversation, tap the keyboard icon at the bottom of the screen. A text window appears, and you can type your reply. The text replies are not added to the transcription. You must clear the text every time you want to respond.

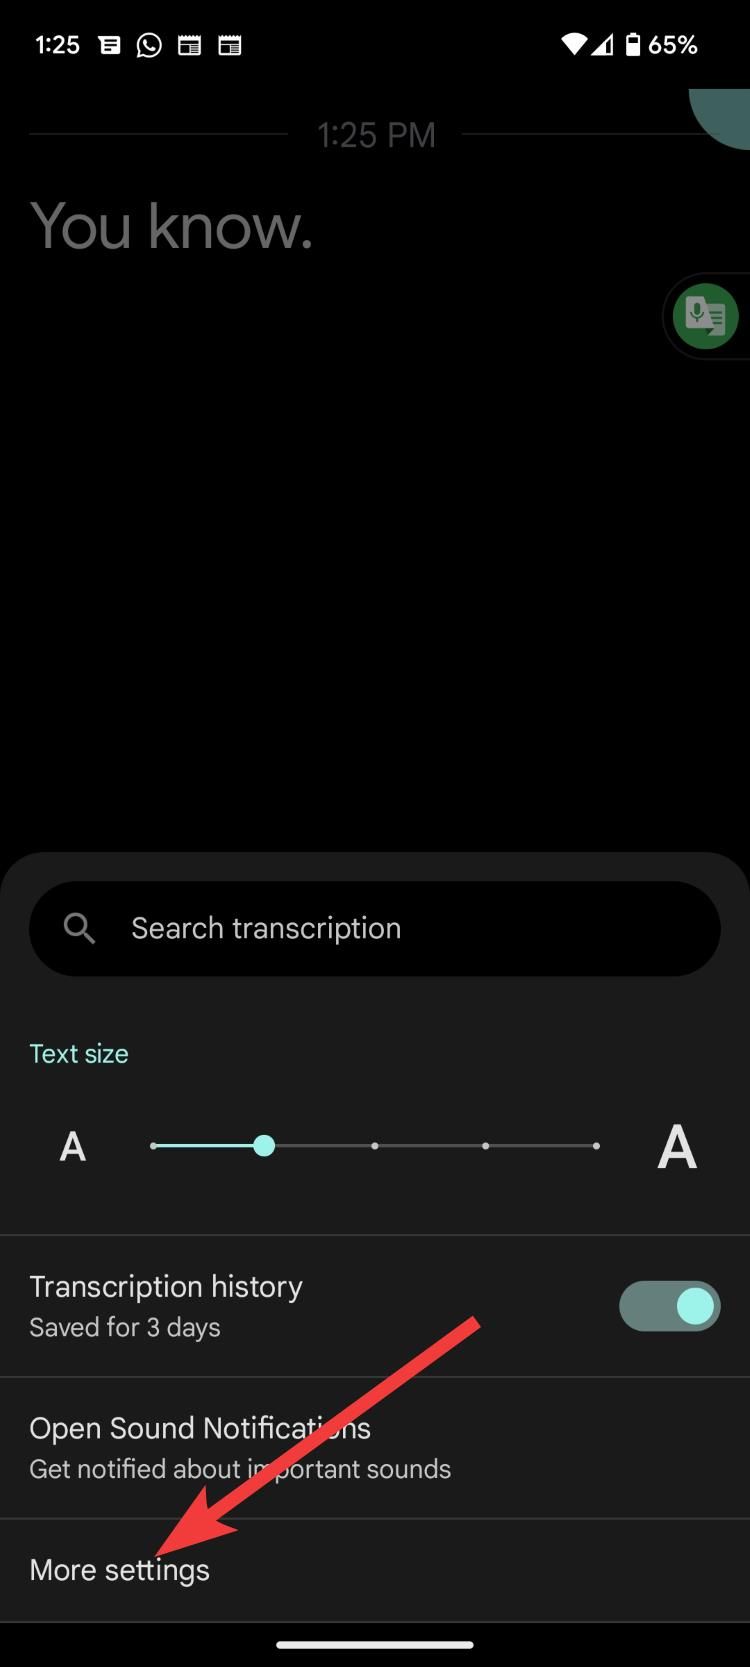
Tap the gear icon to open a menu where you can use the search bar at the top to search for the transcription.


Tapping More Settings from this screen opens advanced settings for Live Transcribe, which you can customize for a seamless experience.
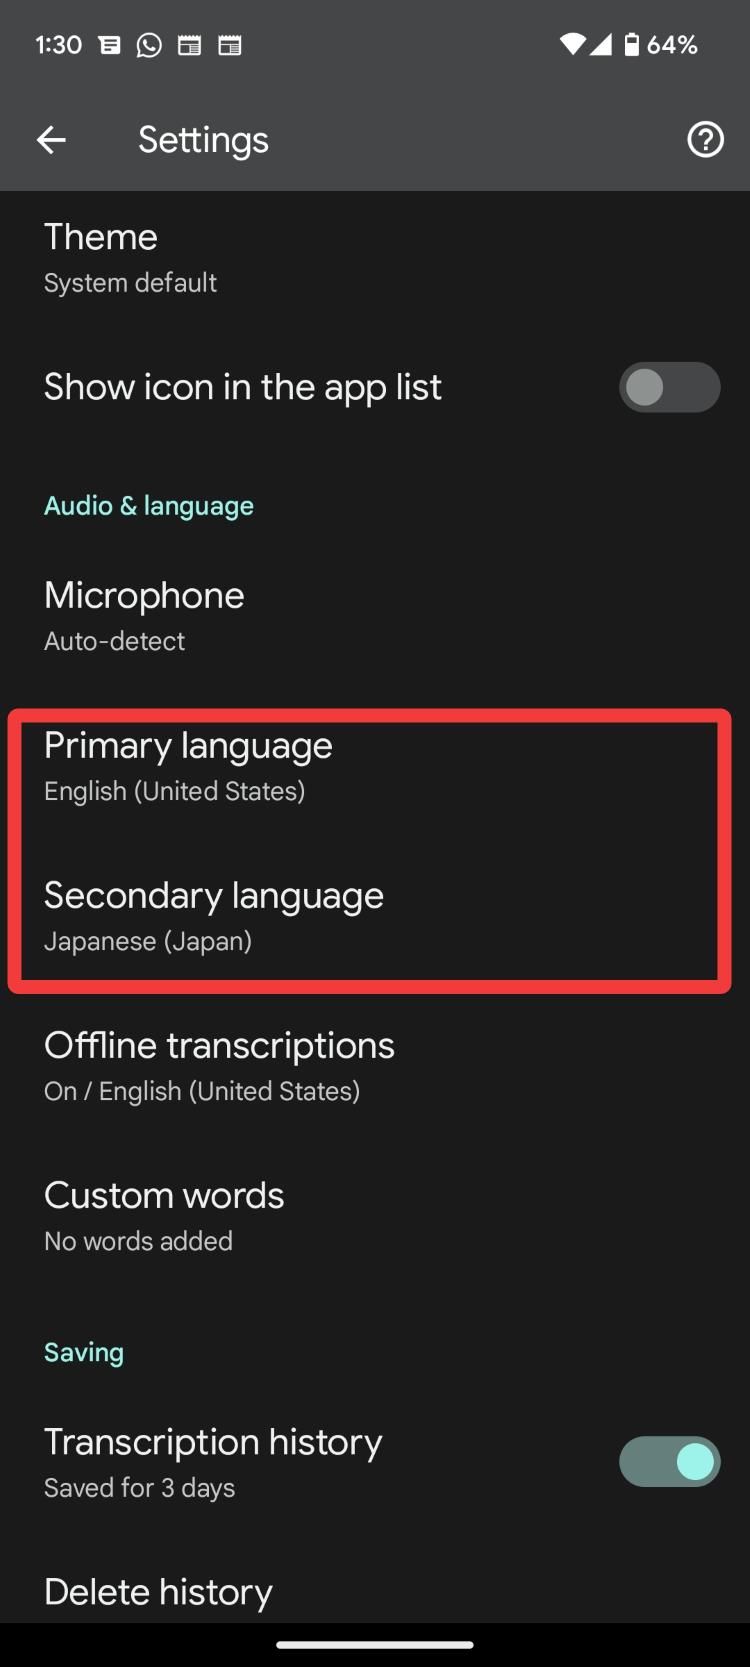
Set primary and secondary languages for Live Transcribe
There are 80 languages available on Live Transcribe (including local dialects for prominent languages). You can choose a primary language and a secondary one. To change the language settings:
- Tap the gear icon in the lower-left corner of the app.
-
Click More settings on the submenu that appears.
-
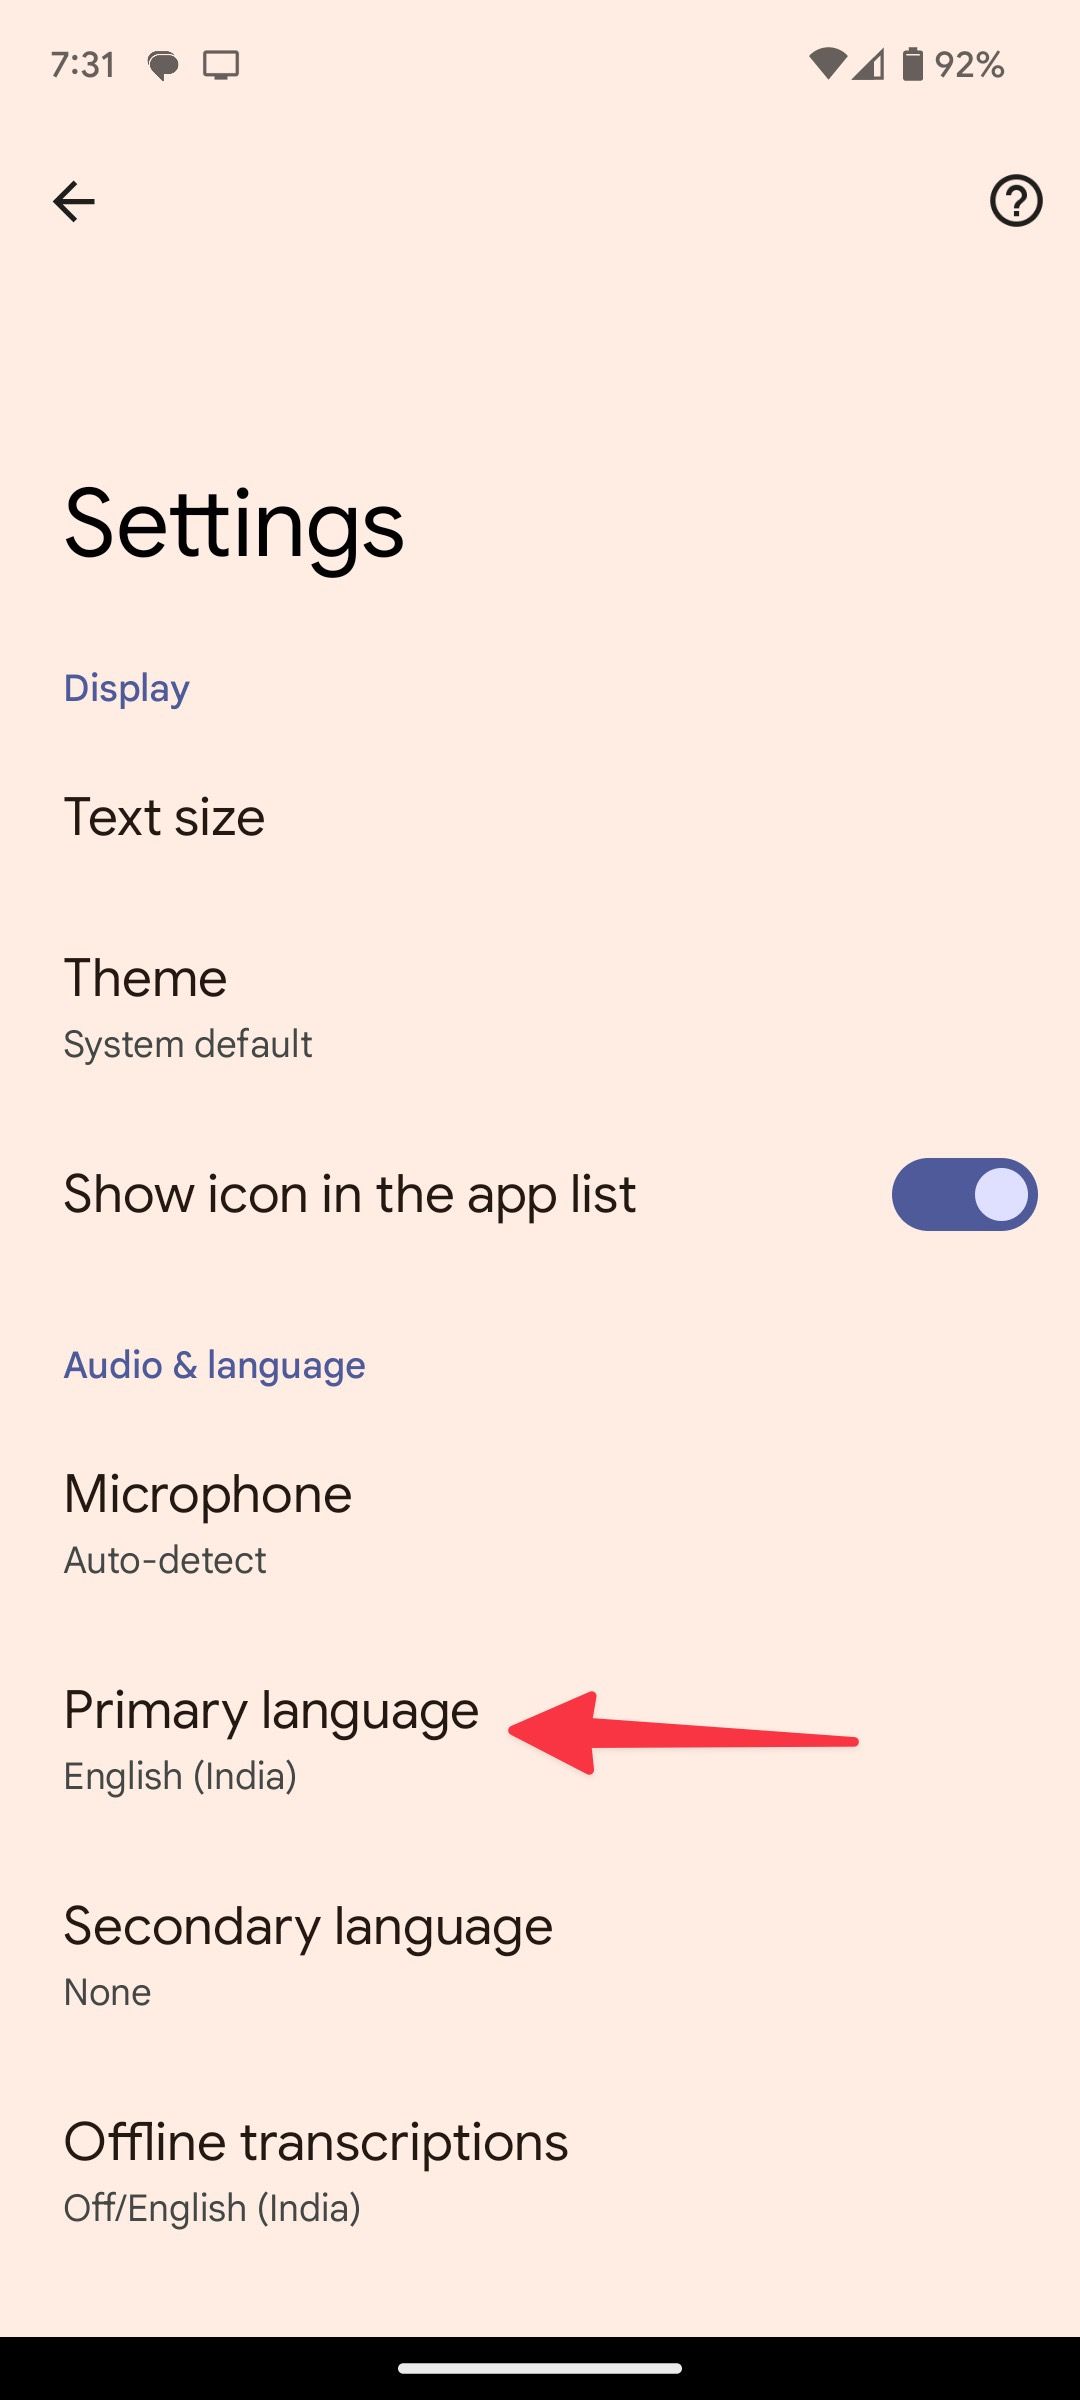
Select a Primary or Secondary language, depending on which you want to change.
- Scroll through the list and select the language you want to use.


Tap the language at the bottom of the screen to switch between your primary and secondary language on the app's home screen.
How to use Live Transcribe offline
By default, Live Transcribe needs an internet connection to work, but you can download your spoken language to use it offline. The selection is not as large as online languages.
Offline mode only works on Android phones with at least 6GB of RAM. It also works on any Pixel phone.
- Open More settings.
-
Tap Primary language
-
Tap the download icon beside a language to save it for offline use.
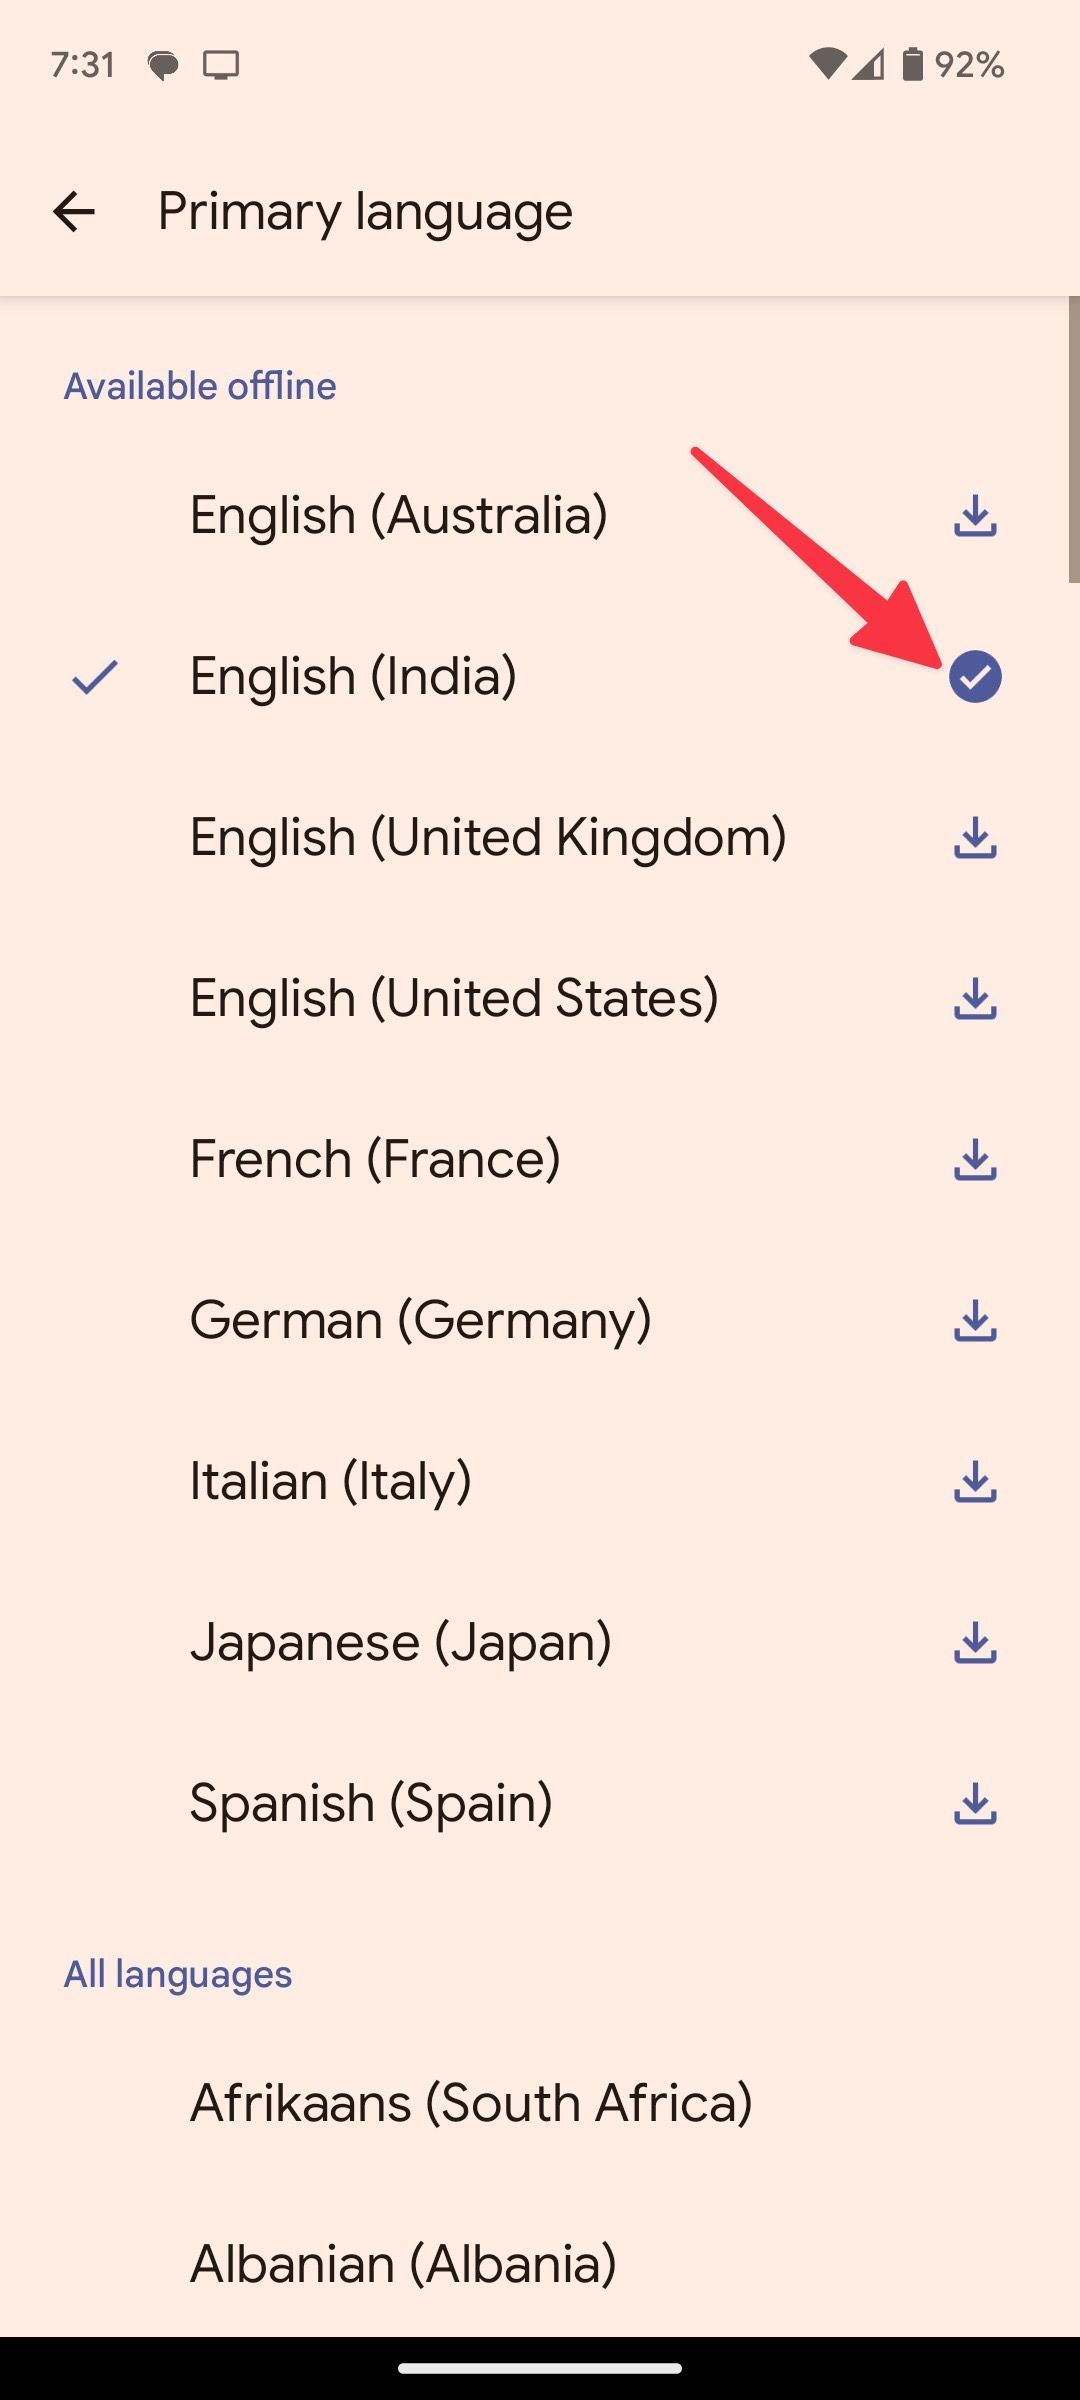


A checkmark beside the language confirms that it is available offline. If you don't see a download symbol, the language isn't available for you to download.
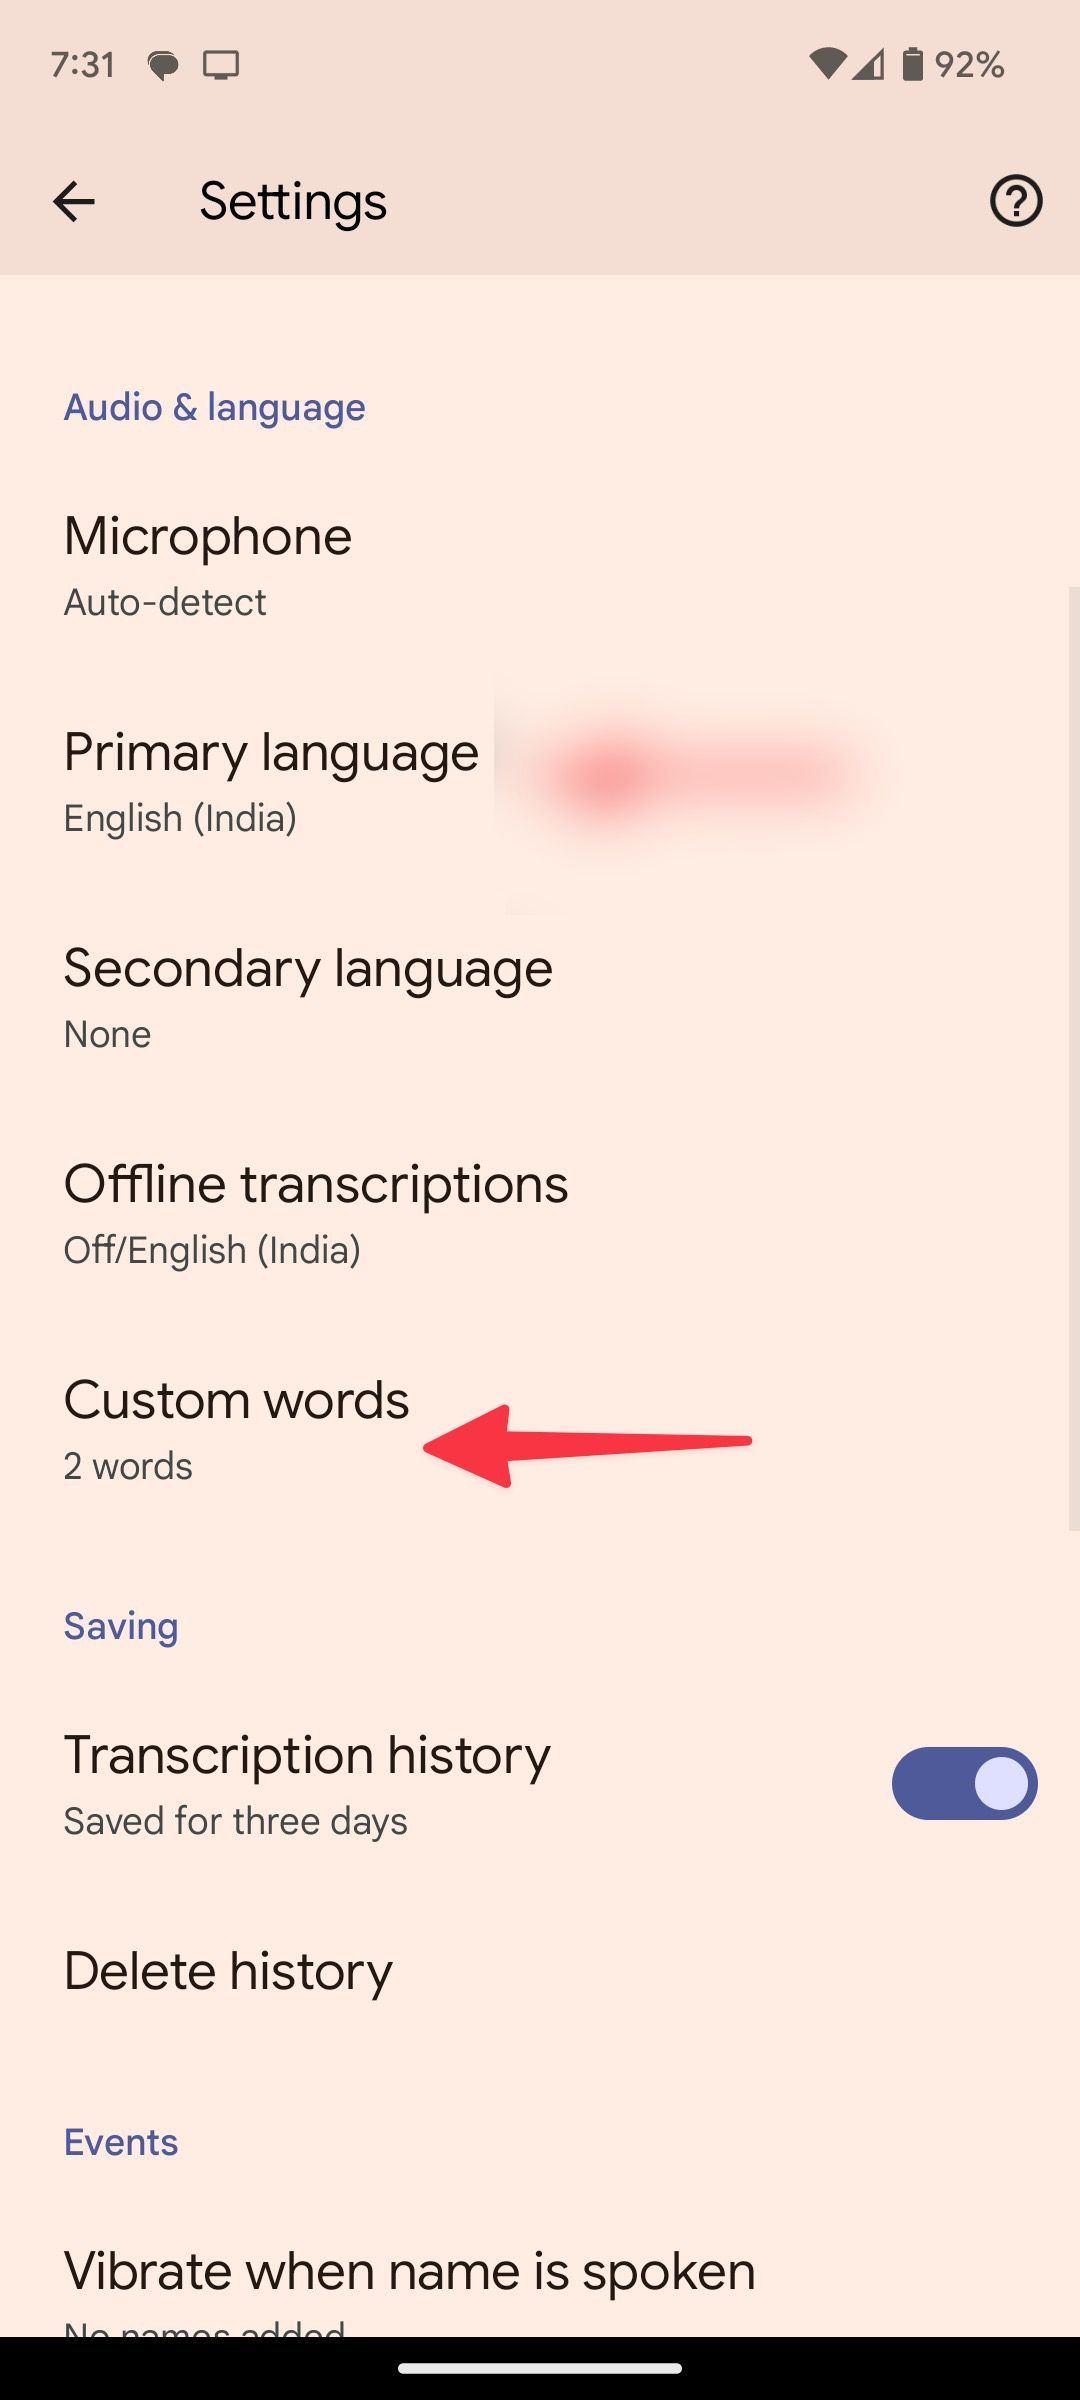
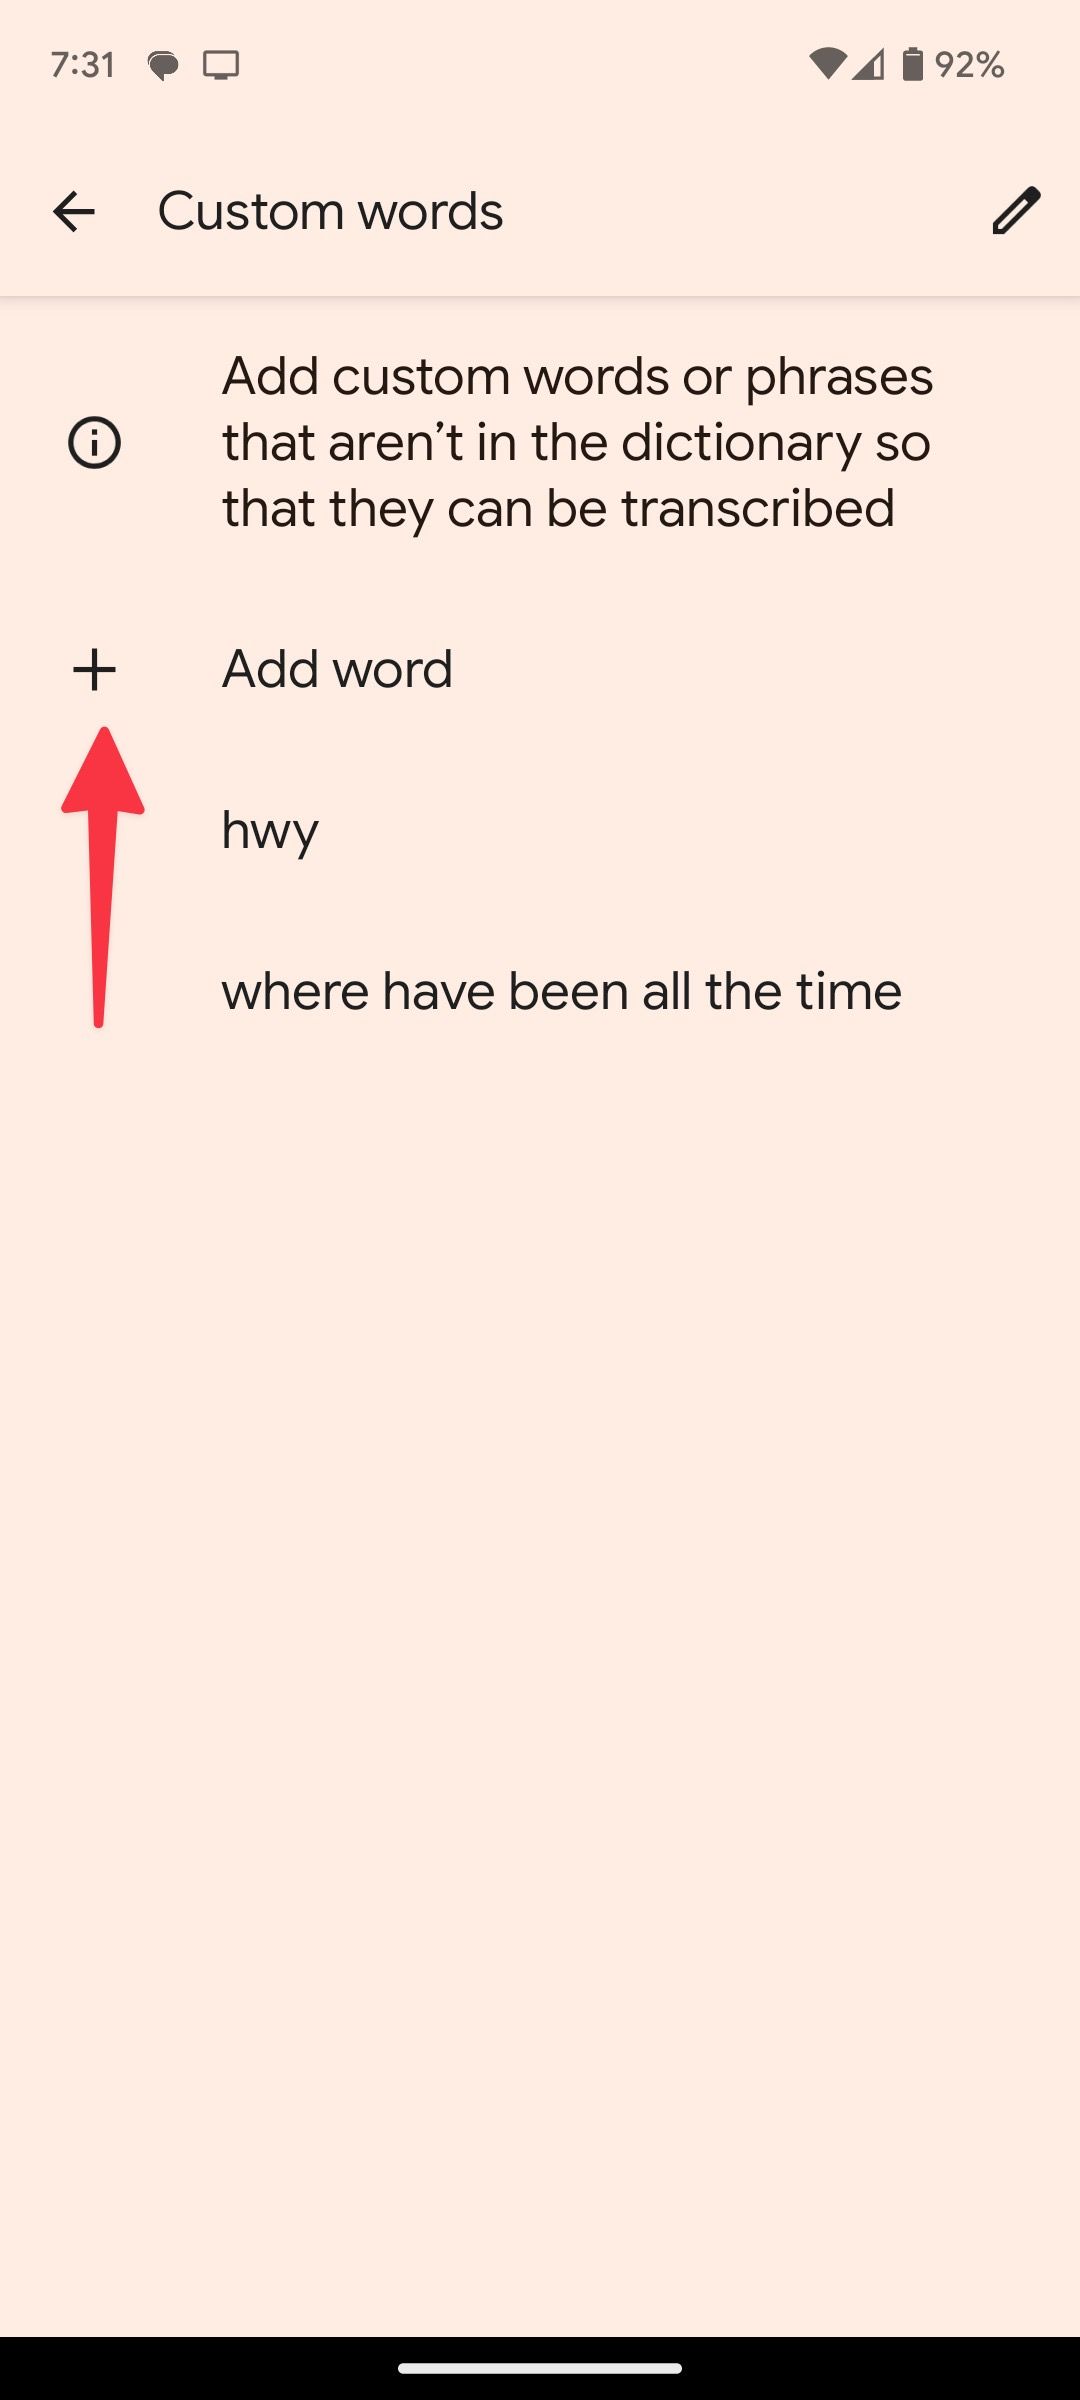
How to add custom words in Live Transcribe
You can create custom words in Live Transcribe, so the app can transcribe words that don't appear in its dictionary. Here's how to set them up:
- Open More Settings in Live Transcribe.
- Scroll to Custom Words.
- Add custom words or phrases that aren't in the dictionary.
-
Delete custom words from the edit menu at the top.


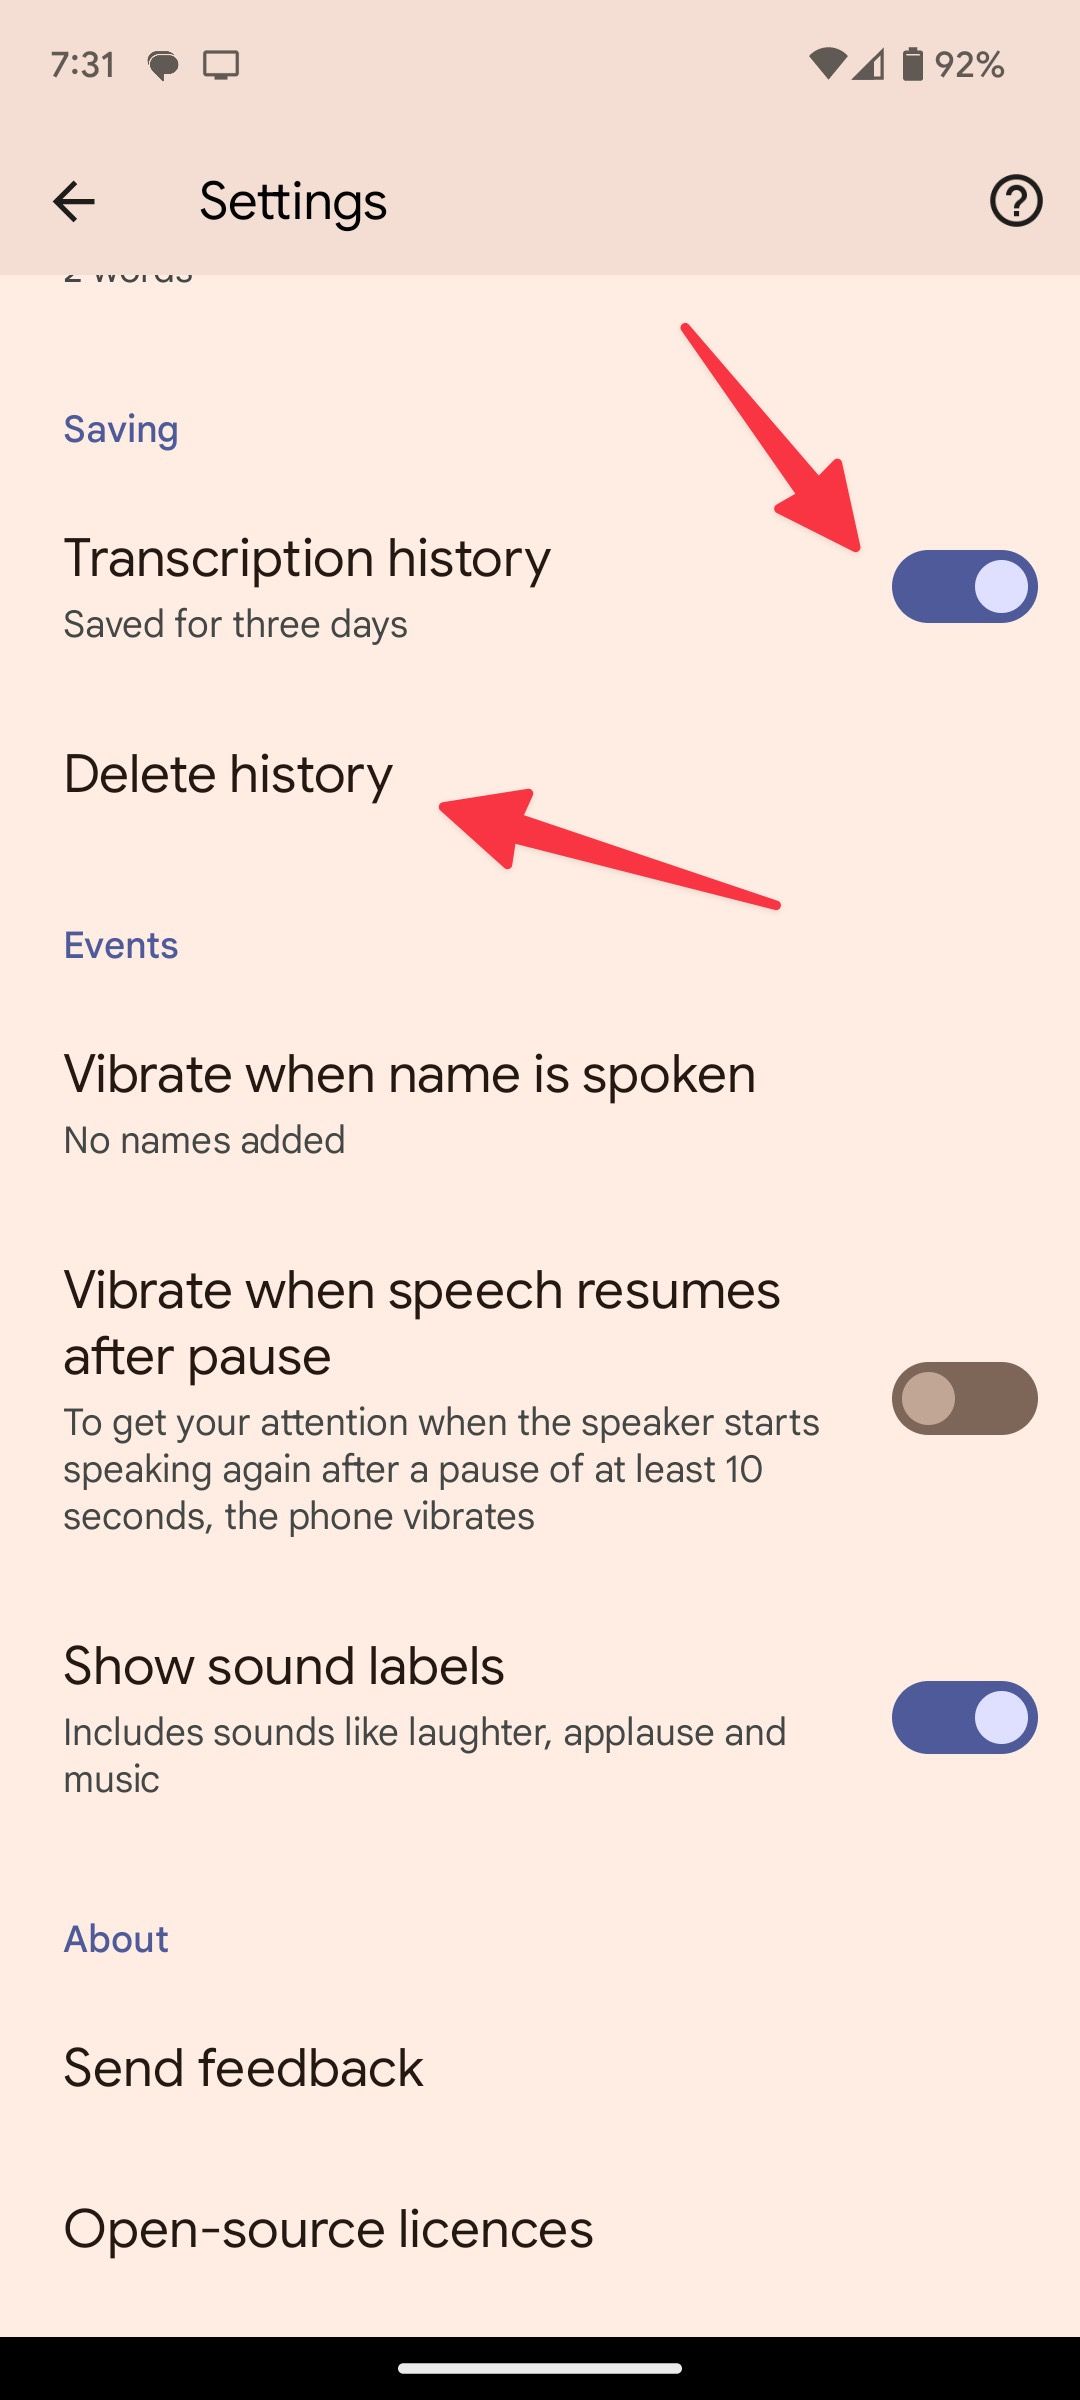
How to manage Live Transcribe history
Google saves Live Transcribe history for three days by default, but you can auto-delete history after 24 hours. You can also delete your current transcription history at any time. Here's how to set Live Transcribe to auto-delete after 24 hours:
- Open More Settings in Live Transcribe.
- Scroll down and turn off the Transcription history switch under the Saving heading.
-
Tap Delete history to clear your transcription history.

How to pause transcription for easier reading
Sometimes, it can be difficult to keep up with a live transcription. The hold button pauses transcription so that you can catch up.
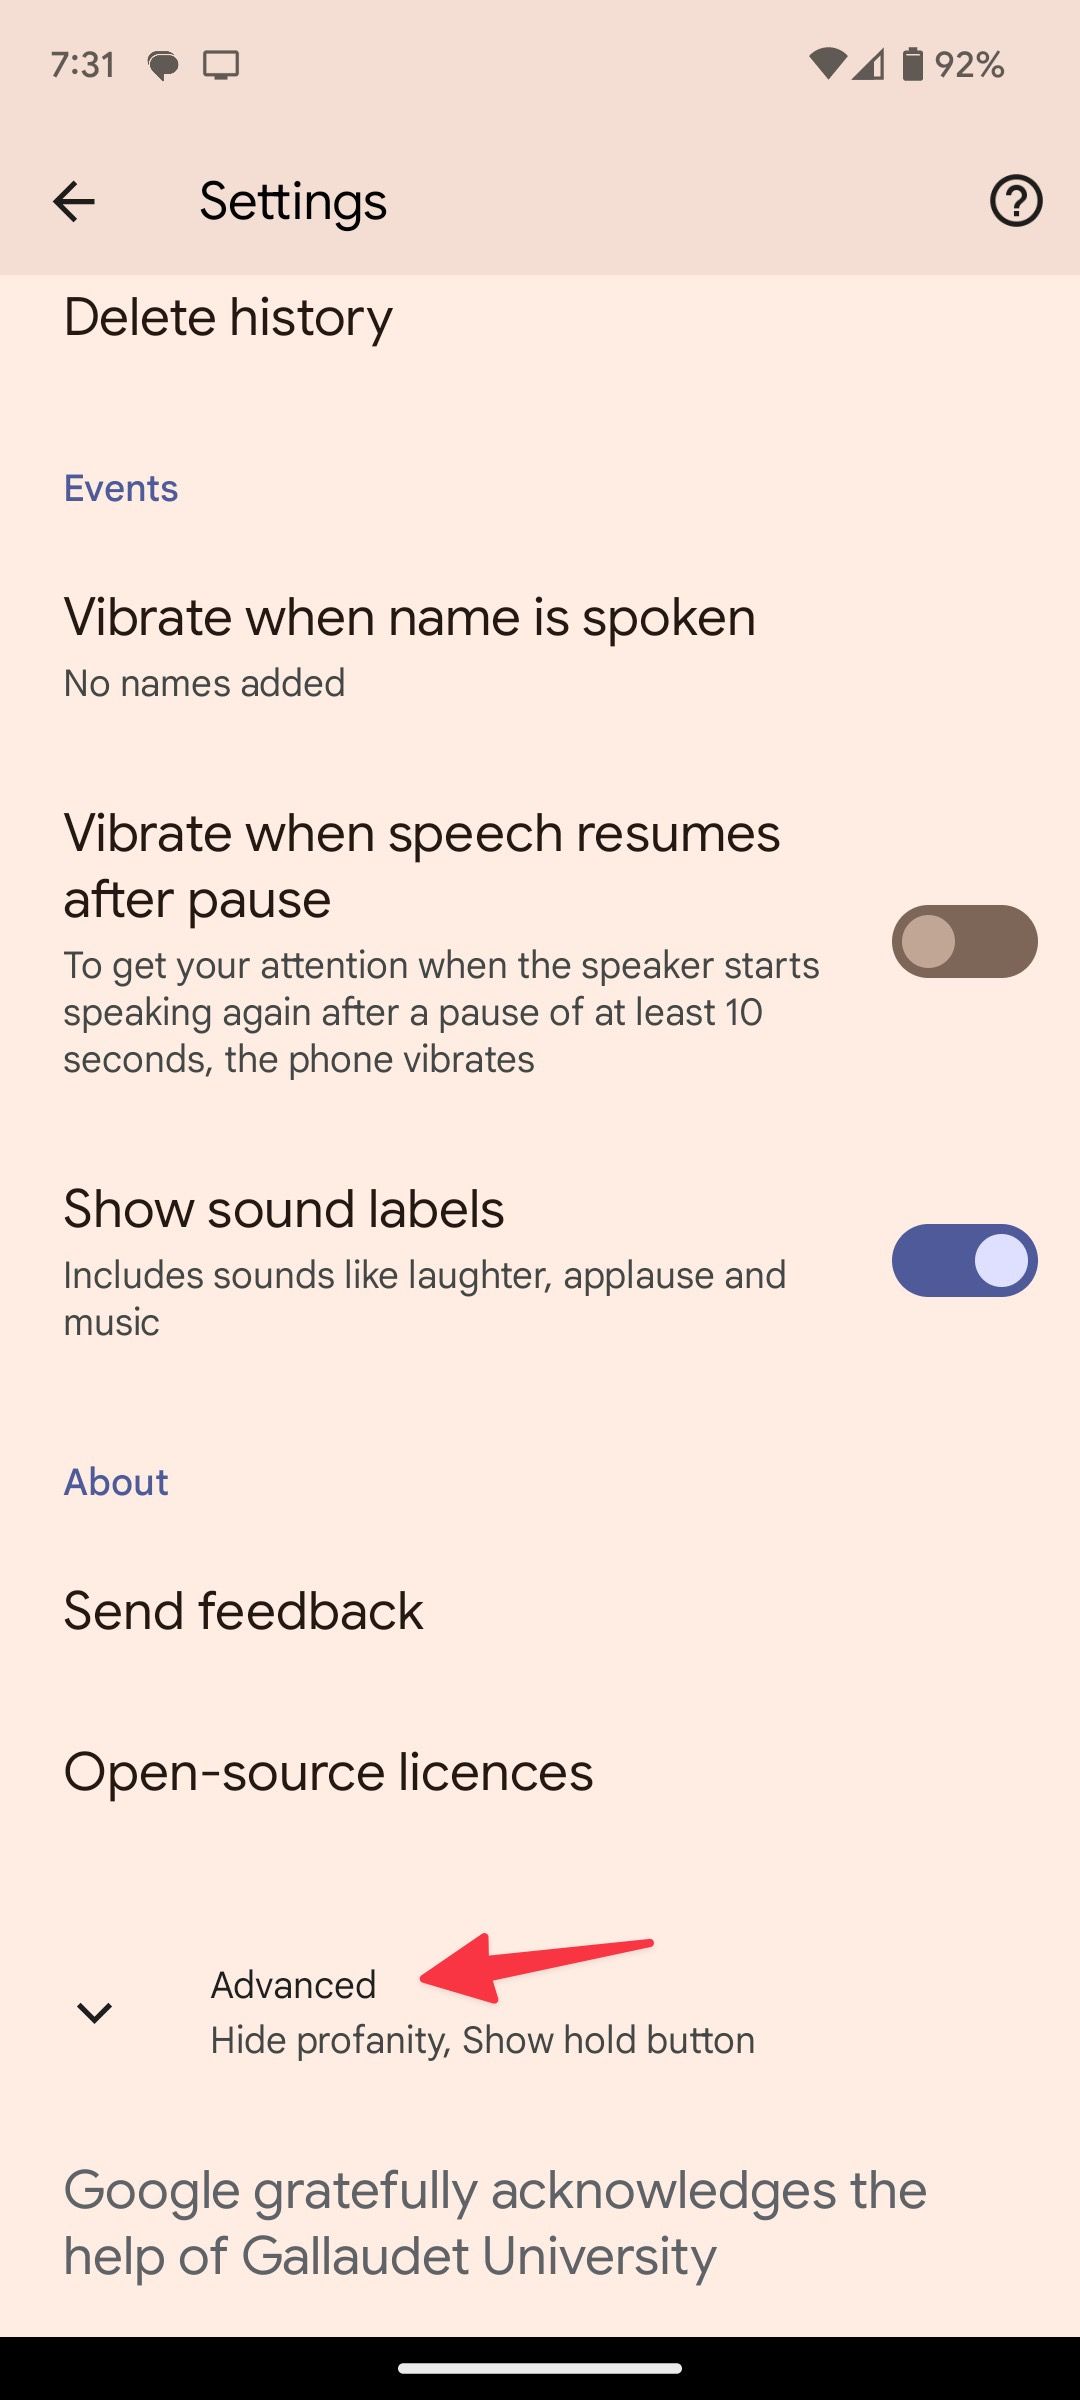
- Open Live Transcribe and go to More Settings (check the steps above).
-
Scroll down and tap Advanced.
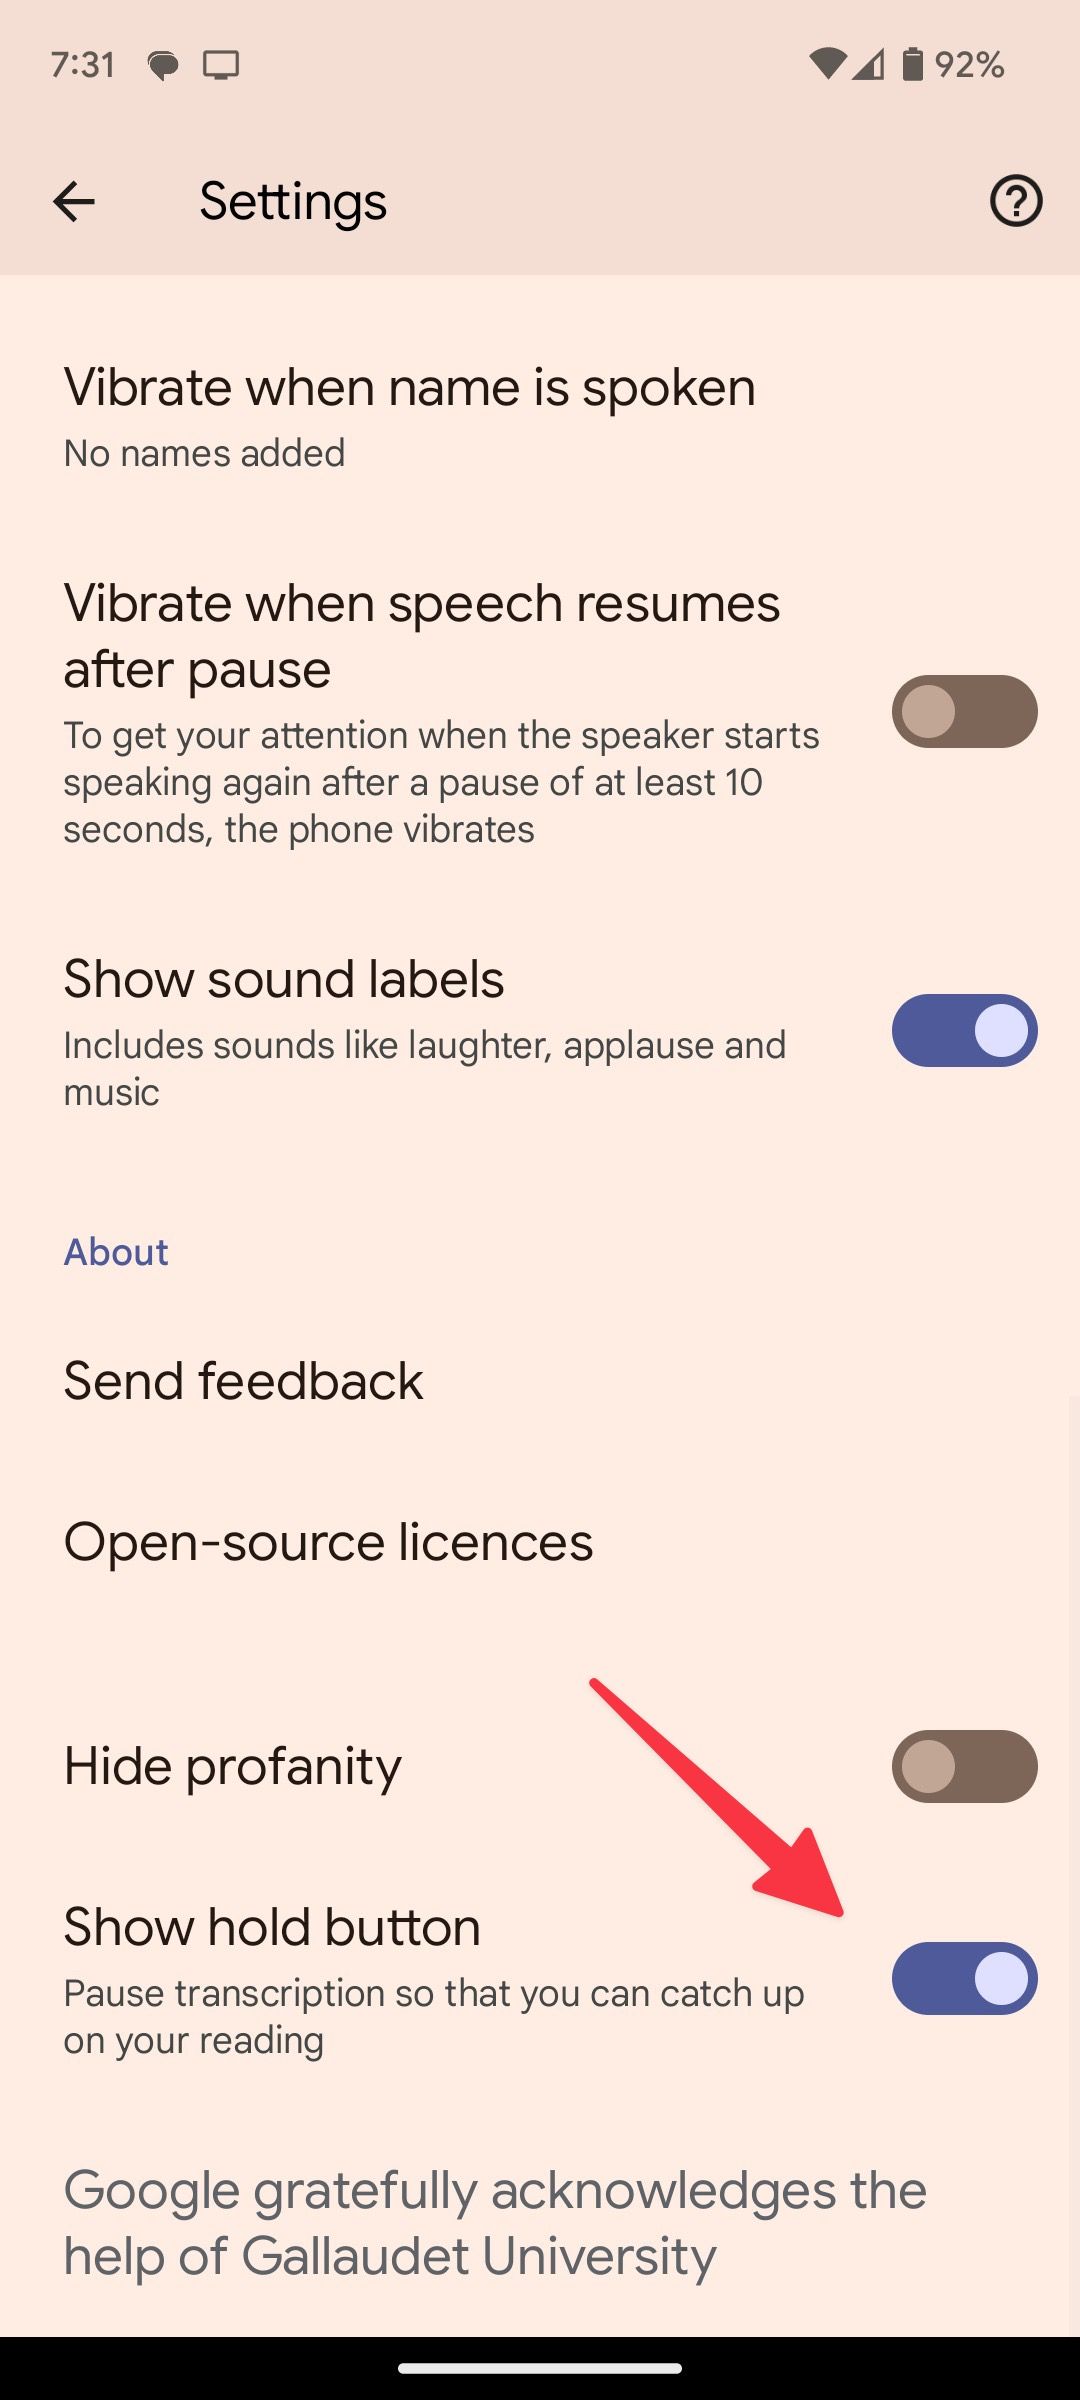
- Turn on the Show hold button switch.
-
Return to the main screen and check for a small pause button at the bottom. Tap this to pause the transcription.


Get the most out of Live Transcribe settings
Other settings can be adjusted in Live Transcribe. You can access these through the Settings and More Settings menu. Here's a breakdown of what changing these settings does:
- Text size: Adjust the text size of the transcription for easy reading.
- Open Sound Notifications: Pick up important sounds, like the doorbell or the phone ringing. You can manage these sounds and see when they occur in these settings.
- Theme: Adjust between light, dark, or the system default mode.
- Transcribe offline: Toggle on to transcribe without an internet connection. You need to download the desired language to use this feature.
- Delete history: Delete transcription history sooner by selecting this option.
- Vibrate when name is spoken: Add your name and other people's names to this section. The phone vibrates when it detects that name while transcribing.
- Vibrate when speech resumes after pause: Vibrate the phone if speaking resumes after a pause greater than 10 seconds.
- Show sound labels: Show audio descriptions in the transcription like laughter and applause, similar to closed captioning.
Use an external microphone in Live Transcribe
An external microphone lets your phone pick up more sounds from your surroundings. Adding one for use in Live Transcribe is simple.
- Plug an external microphone into your phone.
-
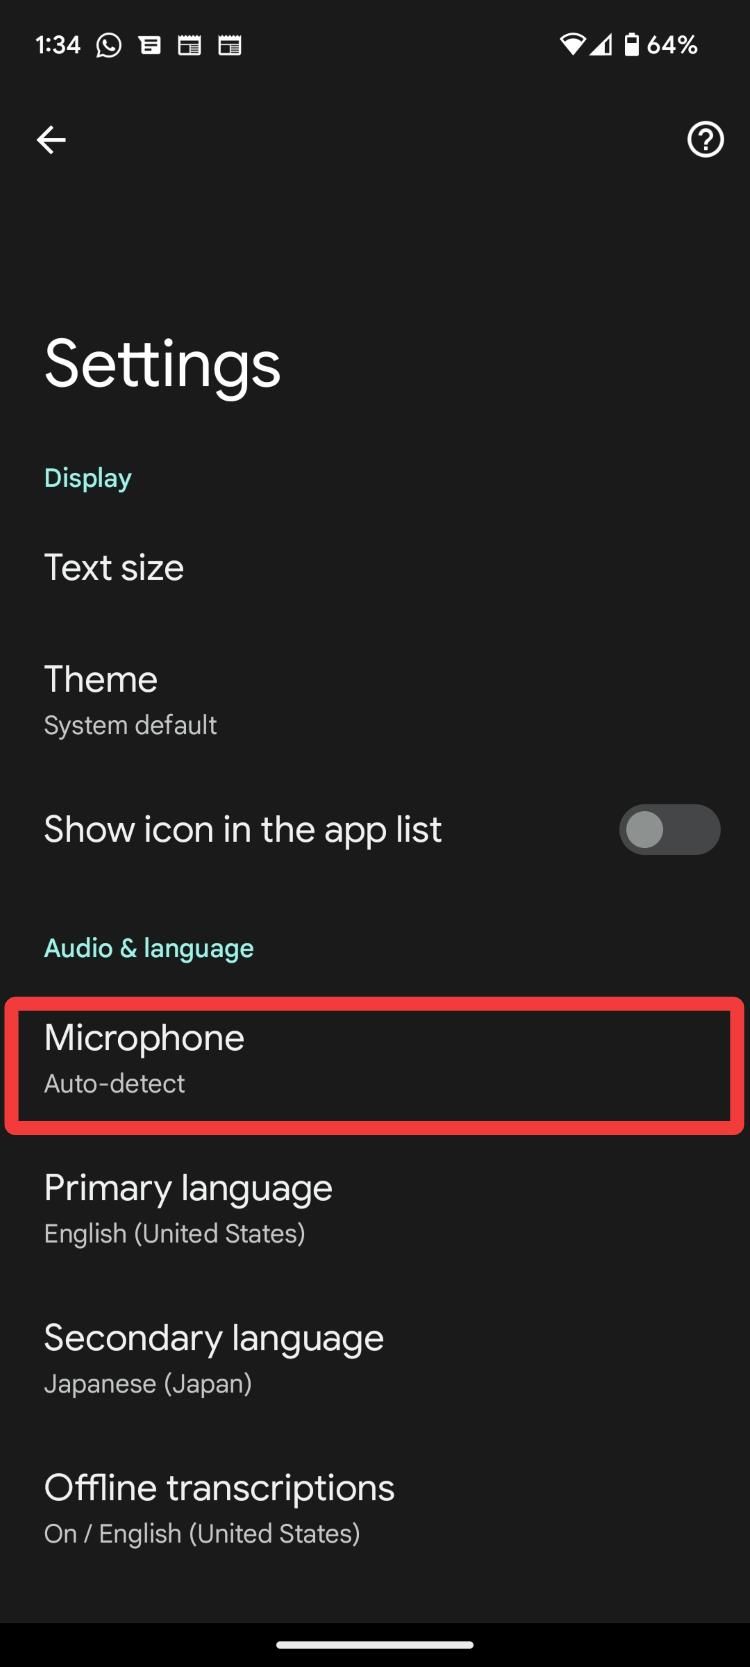
Tap the gear icon and tap More settings.
- Under Audio & language, select microphone.
-
Allow the permission.
-
Tap the microphone you want to use.
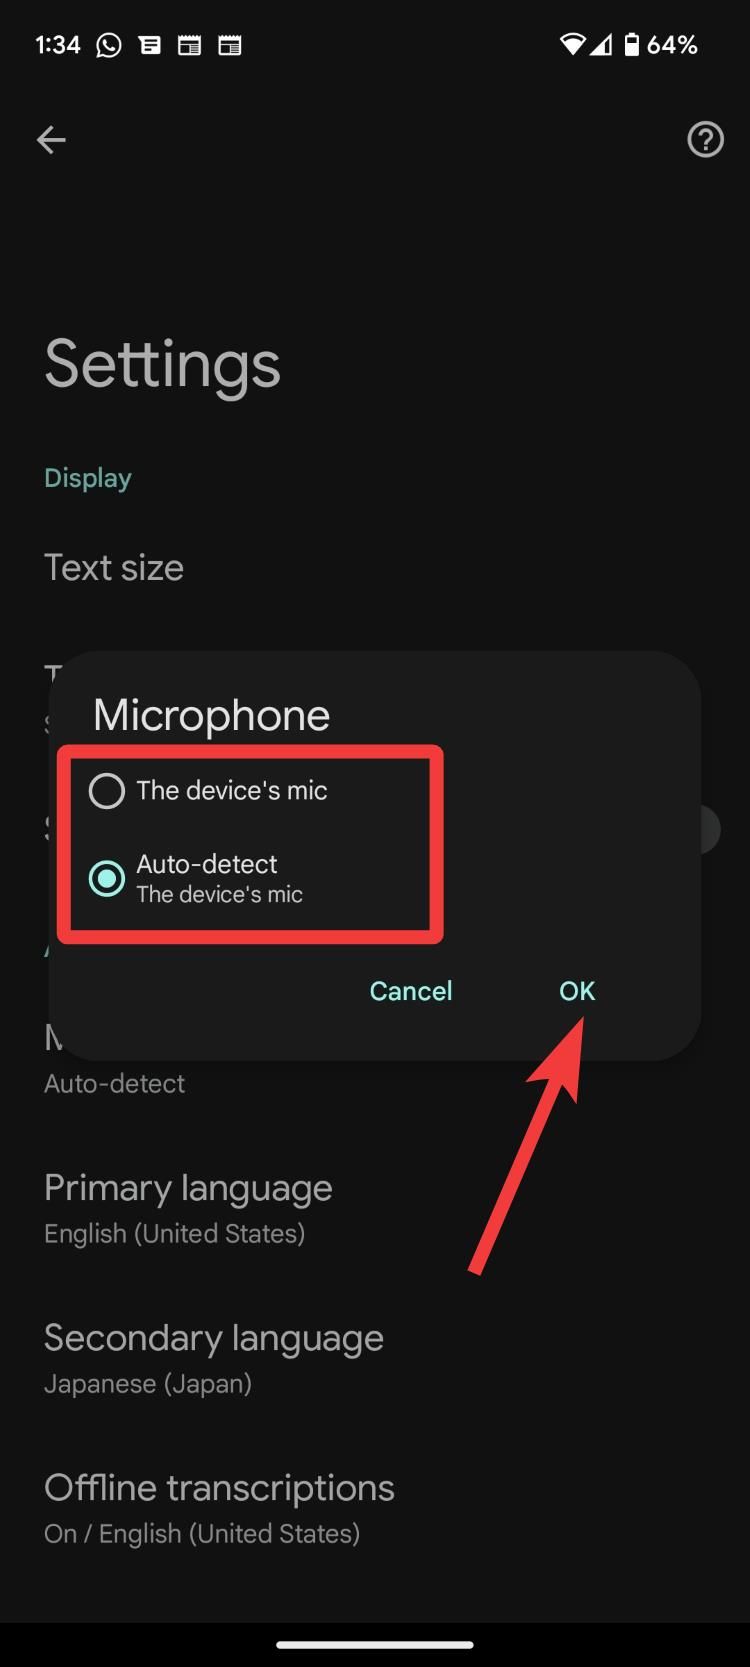


You may see two options: a phone mic and an external microphone. By default, Auto-detect is activated.
Enable the Live Transcribe icon in the app drawer
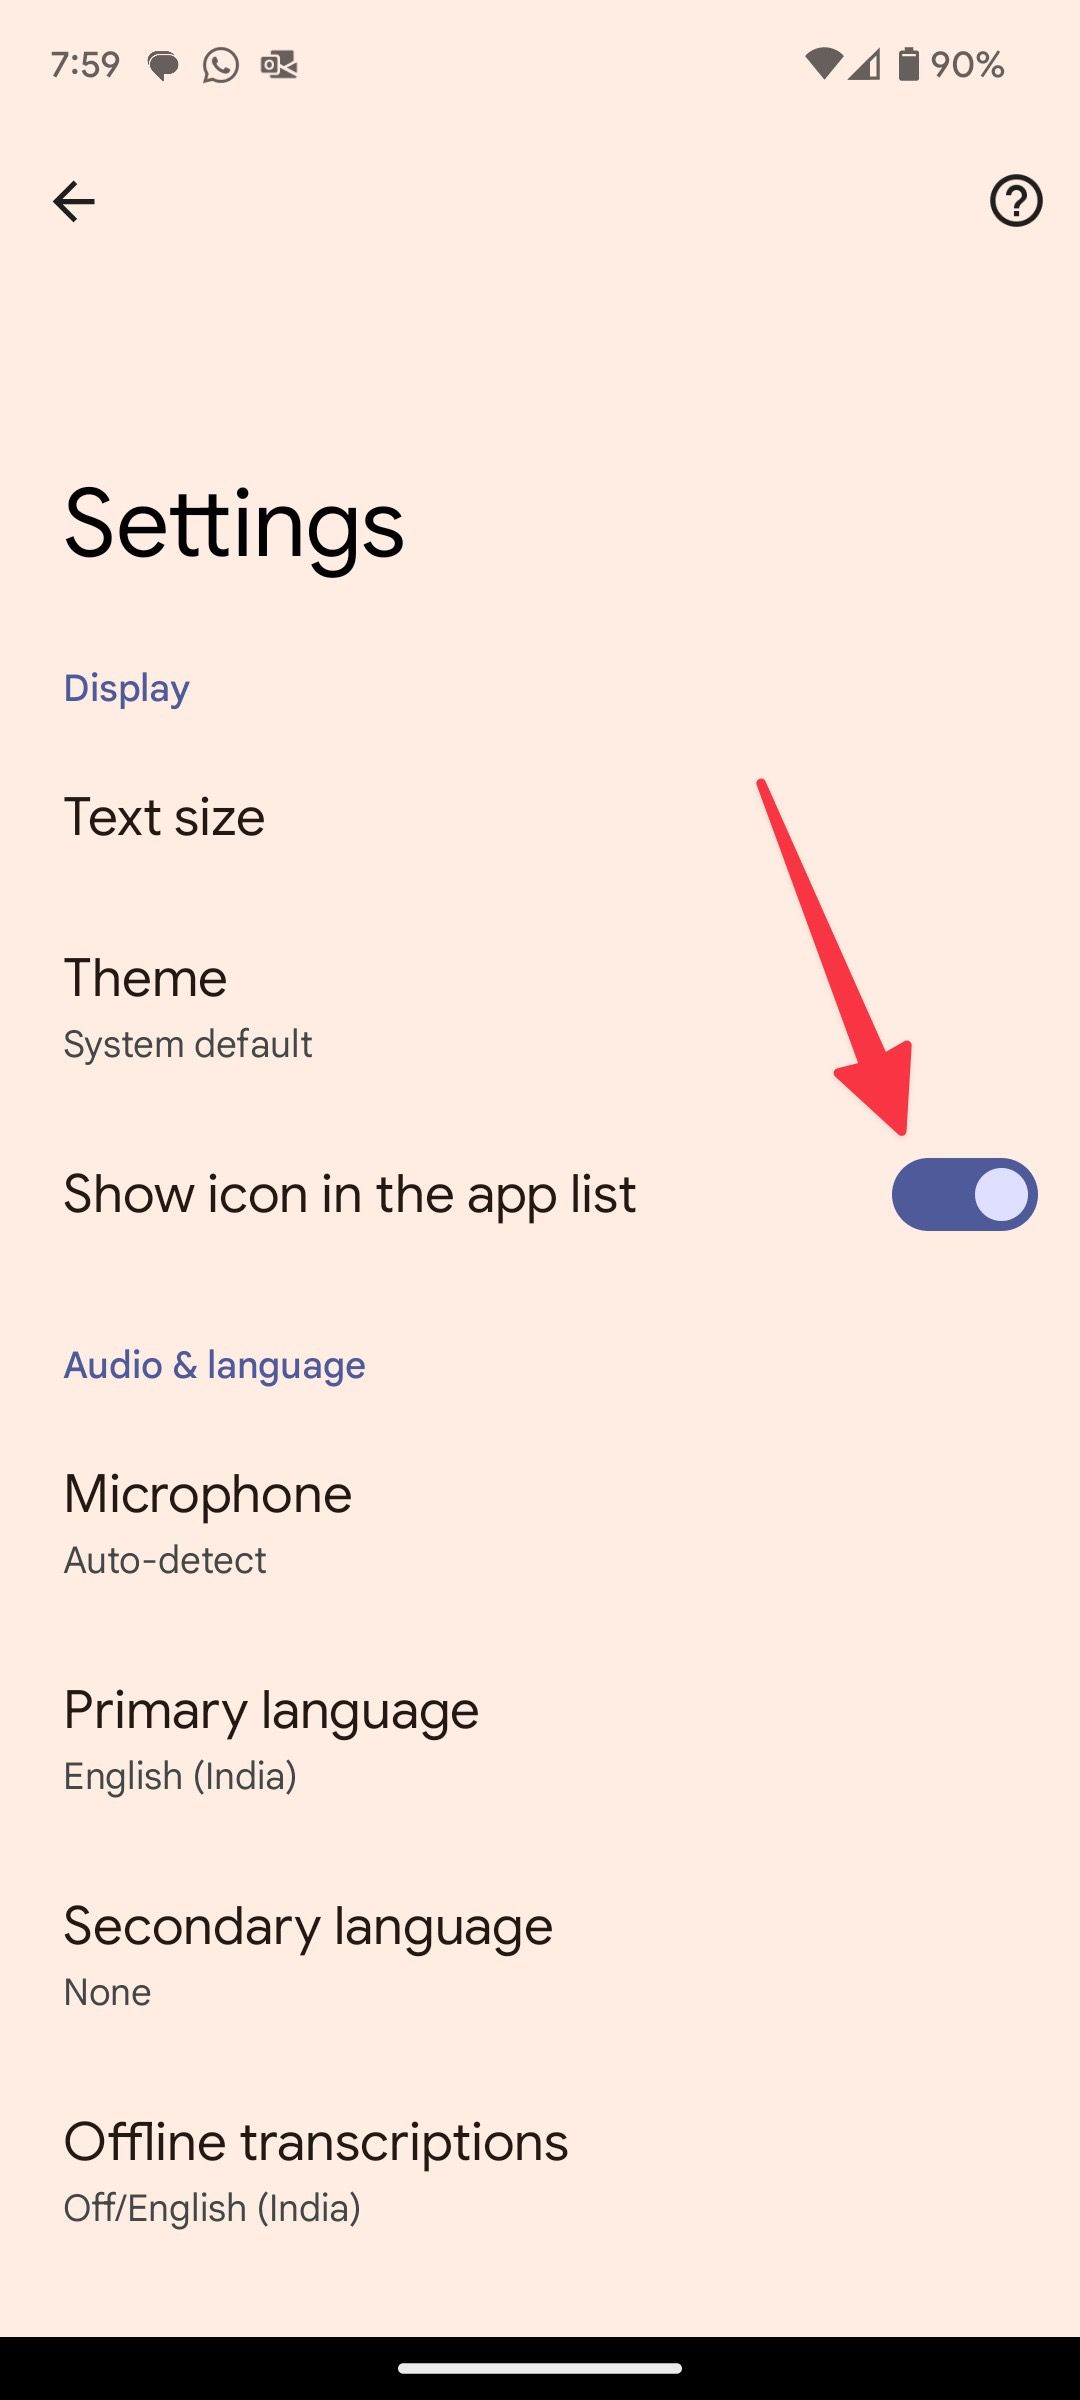
If you don't want the shortcut cluttering your screen, activate the Live Transcribe app icon in your app drawer for quick access.
- Head to More Settings in Live Transcribe (check the steps above).
-
Turn on the Show icon in the app list toggle.

Live Transcribe is just a tap away on your Android phone's home screen. So far, we have talked about using Google's Live Transcribe on Android. What about iOS and desktop systems? Let's talk about them.
Can you use Live Transcribe on a Mac or PC?
There isn't an official Live Transcribe app on Windows or Mac. You could install Live Transcribe on Windows using the Windows Subsystem for Android or an Android emulator on Windows and macOS. However, the last time we checked, the app refused to work on WSA and an emulator (BlueStacks).
There aren't many free alternatives for the Mac. Most transcription apps on the App Store are meant for iOS and iPadOS. Only a few can be installed on macOS. Also, most Android apps won't let you sign in unless you use the WSAGAScript, which installs Windows Subsystem for Android with Google Services.
Here are some alternative transcription apps for macOS and Windows devices.
Otter: Transcribe Voice Notes
Otter records, transcribes, and stores meetings. It can also transcribe in real-time and store notes (supports English only). If you are hearing impaired and attend many meetings, you'll catch two birds with one net using Otter.
The free version gives you about 300 minutes of transcription time per month. The Pro subscription gives you 1,200 minutes and better transcription accuracy. Otter has monthly and yearly subscription plans, which cost $17 and $100, respectively.
The app is available on Android, iOS, and iPadOS, but you can use the web app on macOS and PC. If you own an M1 MacBook, install and run the iPadOS app.
Dictation - Speech to text
Dictation is a free app that supports over 40 languages and has no cap on the number of minutes you can transcribe. While the free version shows ads, you can purchase the Pro version to remove them.
It's available across all devices in the Apple ecosystem, including macOS. There's a Dictation app on the Windows store and a web app, Dictation.io. They're from different developers but work well.
Transcribe - Speech to Text
Transcribe is a paid Live Transcribe alternative for macOS. You get 15 minutes of free trial upon signing up, after which you'll need to sign up for the Pro subscription. Monthly and yearly Transcribe subscriptions cost $13 and $100, respectively.
Free Live Transcript
Free Live Transcript is a simple, free, and open source web app. The app uses Chrome's and Safari's Web Speech Recognition API specification to generate transcripts, so you can use it on a Mac and a PC.
The app allows you to toggle between caps and small letters, edit your sentences on the go, and copy the transcript. It's not as feature-rich as Live Transcribe and only supports transcription in English, but it gets the job done.
Can you use Live Transcribe on iOS?
Google hasn't released Live Transcribe on iOS, but a few alternatives, albeit paid ones, can get the job done. A few of them are the ones listed above:
- Otter: Transcribe Voice Notes
- Transcribe • Live Voice Caption
- Live Transcribe (Not Google's)
- Dictation - Speech to text
- Transcribe - Speech to Text
Live Transcribe holds the ability to transform lives
Live Transcribe is a simple but powerful accessibility tool that can help those who are hard of hearing or struggling with short-term memory loss. Google has made improvements to its accessibility tools in recent years. For those with visual impairments or dyslexia, the Reading Mode app makes reading more accessible.