This root does not work for Froyo. If you're reading this now, chances are very high that you already have Froyo or something higher, in which case stop and don't run steps from this method. For Froyo root, see this post instead.
Note: If your EVO software version starts with 1.47.651, we have an updated post with an updated SimpleRoot version right here.
EVO 4G owning ladies and gentlemen, if you've been waiting for a simpler full root that, unlike the first version of unrevoked, offers full write access to /system from within Android, you are in luck.
Simple Root
Thanks to Mast3rpyr0 and jiqqaman from xda forums, we now have a single GUI application with a friendly 3-button interface that gives you full root on your EVO (I lied about the 1 click - it's… 3 clicks!).
Mast3rpyr0 started the job by automating the previously complicated 2-step root process (courtesy of toastcfh), and jiqqaman finished the job by wrapping the scripts into a simple application.
For those wondering, because this root unlocks certain parts of the Android system for writes, unlike the first unrevoked method, Simple Root will allow you to flash recovery, custom ROMs, and remove those annoying Sprint apps. In fact, if you flash most custom ROMs, they won't even have any Sprint apps included by default.
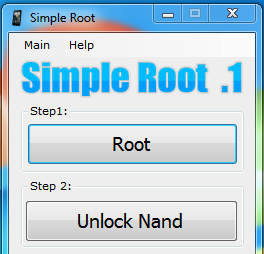
Check it out:
Couldn't look any simpler, could it?
I've been watching the creation of both the scripts and the app for a while, and within the last day it finally reached a stable version, ready for public consumption.
Installation
Both steps 1 and 2 will WIPE your phone - be sure to back up anything you don't want to lose. The SD card will not be touched though, so your photos and everything else stored on it should be OK. But back up anyway!
After finishing with step 3, running programs requiring root still doesn't work - you have to install a custom ROM like DamageControl or Fresh by downloading the ROM image, rebooting into recovery by powering up the phone while holding the up or down volume button and installing from there.
If you ever have odd problems, boot loops, or anything wrong, reboot into recovery and flush the cache.
- First, make sure you are running Windows.
- Then download and install the Microsoft .NET 4.0 framework - you can get it from here.
- Install HTC Sync, although I couldn't confirm this requirement, because I'd already installed it before. You can get it from here.
- Now head over here for the latest Simple Root download link. Be warned: it's 340MB+ because it contains 2 full OS images.
The rest of the information below is directly from the author - be sure to read it:
What exactly does this do?
Exactly what it say, Root your EVO in 3 Steps.
How do you use it?
Make sure your phone is on USB Debug mode. (MENU > Settings > Applications > Development > USB debugging = Checked ) Click the buttons starting from Step 1.
Why the large file size?
This includes all the .img and .zip files that are needed to root. (2 PC36IMG.zip @ ~ 170MB = 340mb) and a couple of other smaller files. I decided to add them to make things more simple and avoid having to explain where to get these files.
Youtube Example
sorry for all the video splits...not my fault, blame youtube.
Video quality might be bad, give them a few to process 720p version
Part 1-1 - https://www.youtube.com/watch?v=GAqTEAWxh7U
Part 1-2 - https://www.youtube.com/watch?v=578jDEJ6M_c
Part 2-1 - https://www.youtube.com/watch?v=I-FbYqPOrpg
Part 2-2+3 - https://www.youtube.com/watch?v=qk7lBDpSp-A
Download:
Official Page (or mirror) | Full (Download this if you never used this program before)
If you have download this program before, please read this
Simple Root In Action - My Root Attempt
Once you start the application, you are presented with 3 buttons, which you are supposed to press in order (follow directions that come with each button!!!).
I connected my phone and did all the steps. They were all very straightforward and happened exactly as described.
After step 1, I had a properly rooted phone, capable of running android-wifi-tether.
After step 2, I could remove Sprint apps. Note that even though I had full root, I still couldn't flash recovery via ROM Manager for some reason. Thankfully, successful recover was flashed in step 3.
After step 3, I could install custom ROMs, though still not via ROM Manager - I had to install DamageControl - the ROM of my choice - by manually booting into recovery (hold the down or up key while powering the phone on).
I'm currently running DamageControl 3.2, removed all the annoying Sprint apps, installed the latest Wireless Tether For Root Users (albeit, after uninstalling the one that came with DamageControl), and made a full phone backup using Nandroid. My phone is really close to perfect now - I just wish the battery would last longer (this ROM is supposed to optimize for battery life, btw).
Radio Baseband Update
After flashing and reflashing all of the above, you may want to make sure you end up with the latest radio image. If you need more information about what the radio is all about and why you should keep it up-to-date, head over here and here.
You can download the current latest radio update by going here.
Share your success stories in the comments and happy rooting!