Quick Links
Storage space is getting cheaper, whether you're talking about phones or computers. It used to cost astronomical amounts of money to get even 1GB of storage. As storage has become cheaper, files sizes are increasing. A photo taken with the Pixel 2 might be nearly 10MB, and that adds up over time. 4K video? We're talking many gigabytes.That's why many of us have gotten serious about backing up data, and the cloud is only half the equation. You should also have local copies of all your important files, and a network attached storage (NAS) machine is a good way to do it. We've talked about Synology's NAS devices a few times on AP and Rita already reviewed the DS416play. This is a company that takes mobile integration seriously with more than a dozen Android apps that work with its line of DiskStation NAS boxes. That's why we (Ryan, Cody, and Jordan) have been testing the latest generation of DiskStation models to see how they fit into our digital lifestyles. We're overall pretty impressed.
Introduction and setup (Ryan)
Most computers in this day and age come with SSD storage built in. You probably get a few hundred gigabytes of that, or maybe a terabyte if you spend big. Spinning drives might not be as fast, but the capacities are much higher. You can get as much as 10TB in a consumer-level hard drive, which has made it feasible to basically never delete a file again. That's a lot of data to leave lying around on a mechanical drive that will one day die, and that's where NAS boxes come in.
A NAS (or network attached storage) is basically a tiny computer with an advanced storage controller. You add a few hard drives, and the NAS makes the storage available on your network to all connected devices. NAS boxes come in all shapes and sizes, from tiny two-bay enclosures to larger versions suited for rack mounting. The specs of the "computer" bits also vary widely.
You might consider investing in a NAS box as opposed to a regular external hard drive if you have a lot of digital content that you don't want to risk losing. If I had a dollar for every external hard drive I lost to a mysterious failure, I'd have... well, I could get a cup of coffee. But it happens more than I think it should. Even without the sketchiness of those external enclosures, the bare drives you install in your PC will eventually go belly-up as well. Some people are willing to set up their own RAID arrays, but many of the solutions are clunky and prone to failure. A NAS box takes care of all the hard work for you.
RAID arrays come in various types, most of which support redundancy at the expense of space. By using some drives for "parity," you can rebuild a RAID array in the event a drive fails. Some types of RAID even allow you to recover from multiple drive failures. Synology's signature RAID setup, and the one we have been testing, is called SHR/SHR2 (Synology Hybrid RAID). SHR allows for more flexibility in drive capacity, and it supports two-drive redundancy in larger arrays. It also offers the most file management and recovery features when paired with a Synology NAS. When you add drives to your NAS for the first time, you have the option of traditional RAID levels, but SHR is probably your best bet.
One of the most important features of a NAS is that it handles all the maintenance of your RAID array automatically. Your drives are checked continuously for bad sectors, and the array gets a full parity check every few weeks.
You use the DiskStation Manager (DSM) for setup and most device management. We'll get into this in-depth later, but the gist is DSM acts as the operating system for your NAS. You access it via your web browser, but it looks and works a lot like any other desktop OS.
To access the files on your NAS, you need to connect to it from another device. The easiest way to do so is just to find it on your LAN and add it as a network location. You'll need to set up a username and password when configuring the NAS, so be prepared to enter that when connecting to it. You can also just load up DSM to see your files, and this comes with the benefit of plugging into device features like the photo gallery and video player with hardware decoding. There are also more packages (programs) for DSM available online. You can install media tools like Plex, an office suite, mail servers, and more on your Synology NAS.
These devices are powerful, and there are a plethora of ways to use them. We'll tell you about how we use these devices, how they interact with Android, and if they're worth the price. But first, let's talk about DSM and Synology's Android apps a bit more.
DiskStation Manager (Cody)
Initial setup for DSM only takes a few minutes. It basically consists of entering a username and password for an account, selecting a schedule for automatic updates, and optionally setting up an account on Synology's website to enable QuickConnect. Through QuickConnect, you can assign a name to your Synology NAS and connect to it from anywhere on the Internet without setting up port forwarding or messing with any other firewall settings.
If you're completely new to setting up a personal server, some of these steps might not be completely intuitive, but the step-by-step process should be easy enough for most people.
As a part of the setup procedure, Synology will recommend a standard set of first-party apps, or "packages" as they're called here. These are the server-side components for many of the apps that can be installed on a phone. This step can be skipped.
DiskStation Manager
At this point, initial setup is complete and the main interface of DSM appears. It looks and behaves a lot like any Windows, Linux, or macOS desktop. There are icons on the desktop, moveable windows, a button at the top-left for launching apps. At the top-right corner, there are buttons to display notifications, edit or switch user profiles, search, or toggle Synology's widget panel.
The widget panel is one of the nice little perks of DSM. It's basically a configurable dashboard with an assortment of different blocks. I've set mine up to show available storage, system health, a resource monitor, and a list of scheduled tasks. Other panels that can be added include: Connected Users, File Change Log, Recent Logs, and Backup.
There's really not a lot to say about the DSM interface itself. Since it's so much like a regular desktop, there's basically no learning curve. But unlike most major operating systems, this one doesn't need to be over complicated or packed full of extras. In fact, there are really only three types of things you'll do once DSM is up and running: Change settings in the Control Panel, install and run packages/apps, and maybe organize your files.
Control Panel
Make no mistake, for as simple as Synology makes it to set up and use DSM, it's still a network appliance with a lot of features hidden under the hood. The Control Panel is home to most of the system-wide settings that determine how the NAS behaves. Just like the Control Panel on Windows or System Preferences on macOS, most of the pages here are only going to be seen once – basically set it and forget it. However, if you need to manage users or configure shared folders frequently, you can create shortcuts by dragging icons from the Control Panel to the Desktop.
There's a basic mode containing just the things most users will want to set up, like groups and user accounts, shared folders, some basic network settings, and other maintenance tasks on the Synology. You can also switch to an advanced mode with many more options if you want to monkey with everything. This is where you can join a domain, set up LDAP, enable a DHCP server, configure advanced privileges for applications and user access, and more.
While most users will probably run through most of the settings and never look back, we should probably highlight a few that everybody should look at from the beginning.
- Users – Naturally, you'll need to add users if there are going to be a few people working with the same NAS. If there are going to be a lot of people, you may even need to create user groups and configure different permission levels for everybody.
- External Access – If you didn't configure QuickConnect during the initial setup, it's extremely useful for accessing your Synology from the Internet. Once it's configured, you can open a browser to https://<account_name>.quickconnect.to and immediately reach your login window. Alternatively, you may prefer to set up port forwarding with your router and use DDNS to maintain connectivity.
- Notifications – If you want to know about events taking place on your Synology devices, it's possible to get emails, web notifications through Chrome or Safari, and mobile notifications through the DS Finder app.
- Hardware & Power – There are several individual settings of note in this screen. There are fan speed controls, some toggles to turn on/off audible beeps, Wake-on-LAN can be enabled if it's going to be useful, and there's even a slider (with scheduling options) to adjust the brightness of the power indicator LED.
- Update & Restore – It's a good idea to set a schedule for DSM to perform automatic updates. You don't have to auto-update, but it's a good practice for the sake of security. You'll probably want the scheduled time to occur during hours that nobody will be using the NAS.
Package Center
People often dismiss a NAS as just a basic file server, and that's true for some of the products on the market; but one of the things that makes a product like a Synology NAS more valuable is the ability to also run apps. Synology offers quite a few first-party packages, and DSM allows users to also add third-party sources and manually install apps.
During the initial setup, Synology recommends a few of its own apps for immediate installation. Package Center naturally contains most of the same apps in a section of recommendations. From here, you can browse through organized categories for other packages or search by names and keywords.
There are too many packages to discuss all of them, but there are a few categories and specific packages that will be invaluable to some people. Probably one of the most popular uses for a NAS is for storing TV shows and movies, so you may want to install the Plex Media Server or Synology's own Video Station. If you're in the Apple ecosystem, you may want to install the iTunes Server package. You can install Download Station to automate some downloads, or grab the Active Directory Server if you're looking to set up directory service. Developers and designers will appreciate version control software like SVN and Git, or database software like MariaDB (a MySQL fork). If you're really looking to go all out, there are even packages for the Apache web server, a couple of CMS options, and even runtimes for several development platforms like Java, Node.js, and Python. These and many other packages are available through Synology's standard directory.
You can see a full list of packages on Synology's website. Most packages are free, but a few like the app to enable exFAT access are going to cost some money. Just remember that some packages aren't going to be supported on every Synology NAS, so you may want to check model numbers and make sure the packages you want to use will be supported on a model you're considering.
Third-party packages and repositories
Since some packages aren't developed by Synology, the certification process can sometimes overlook newer NAS models, meaning a package may work just fine, but it won't show up in the list of installable apps. This was a problem for me when I wanted to install Plex Server. When I began testing the DS718+, it was new enough that it had not been added as a supported model. I simply had to download the correct package installer from Plex's website and load it manually. Plex is now officially supported on this model.
When you're looking for more applications to install beyond what Synology has certified, it might be time to add a third-party package repository. The most popular third-party server is SynoCommunity, which hosts several popular packages like Vim, Home Assistant, ffmpeg, SickBeard and SiCKRAGE, Mercurial, Mono (open source .Net runtime), and many more.
Adding external sources is as simple as opening Settings, switching to the Package Sources tab, and adding a new url to the list. You'll be reminded that adding a new source also adds a new security certificate, which is a good reminder that not all servers and apps are necessarily trustworthy, so be very careful and only add third-party sources that you trust.
If you can't find what you want to run from an external server or a manually installed package, and maybe the runtimes for other platforms like Java or Python aren't going to cut it, there's one more popular alternative: Docker. This is a platform for running containerized apps –basically cross-platform software. From a user perspective, it's like running a miniature virtual machine. Setup and use of Docker is a huge topic all on its own, and too big to discuss in this review.
Synology apps (Jordan)
Synology has a slew of apps available for Android. Each one of them taps into a specific part of your DiskStation via the packages we mentioned earlier. The list is quite extensive, such that I had to create a separate Synology folder to keep myself sane. I'll be going through each of these one by one, walking you through the connection between Android and your NAS. The only apps that I will not be covering in this section are the DS router app (used for the Synology routers), DS cam (for monitoring IP camera feeds; I don't have the means to test this), MailPlus (I don't have a domain set up in order to test this email app), and VPN Plus (another router app; one that I use liberally, but does not tie into the DiskStation).
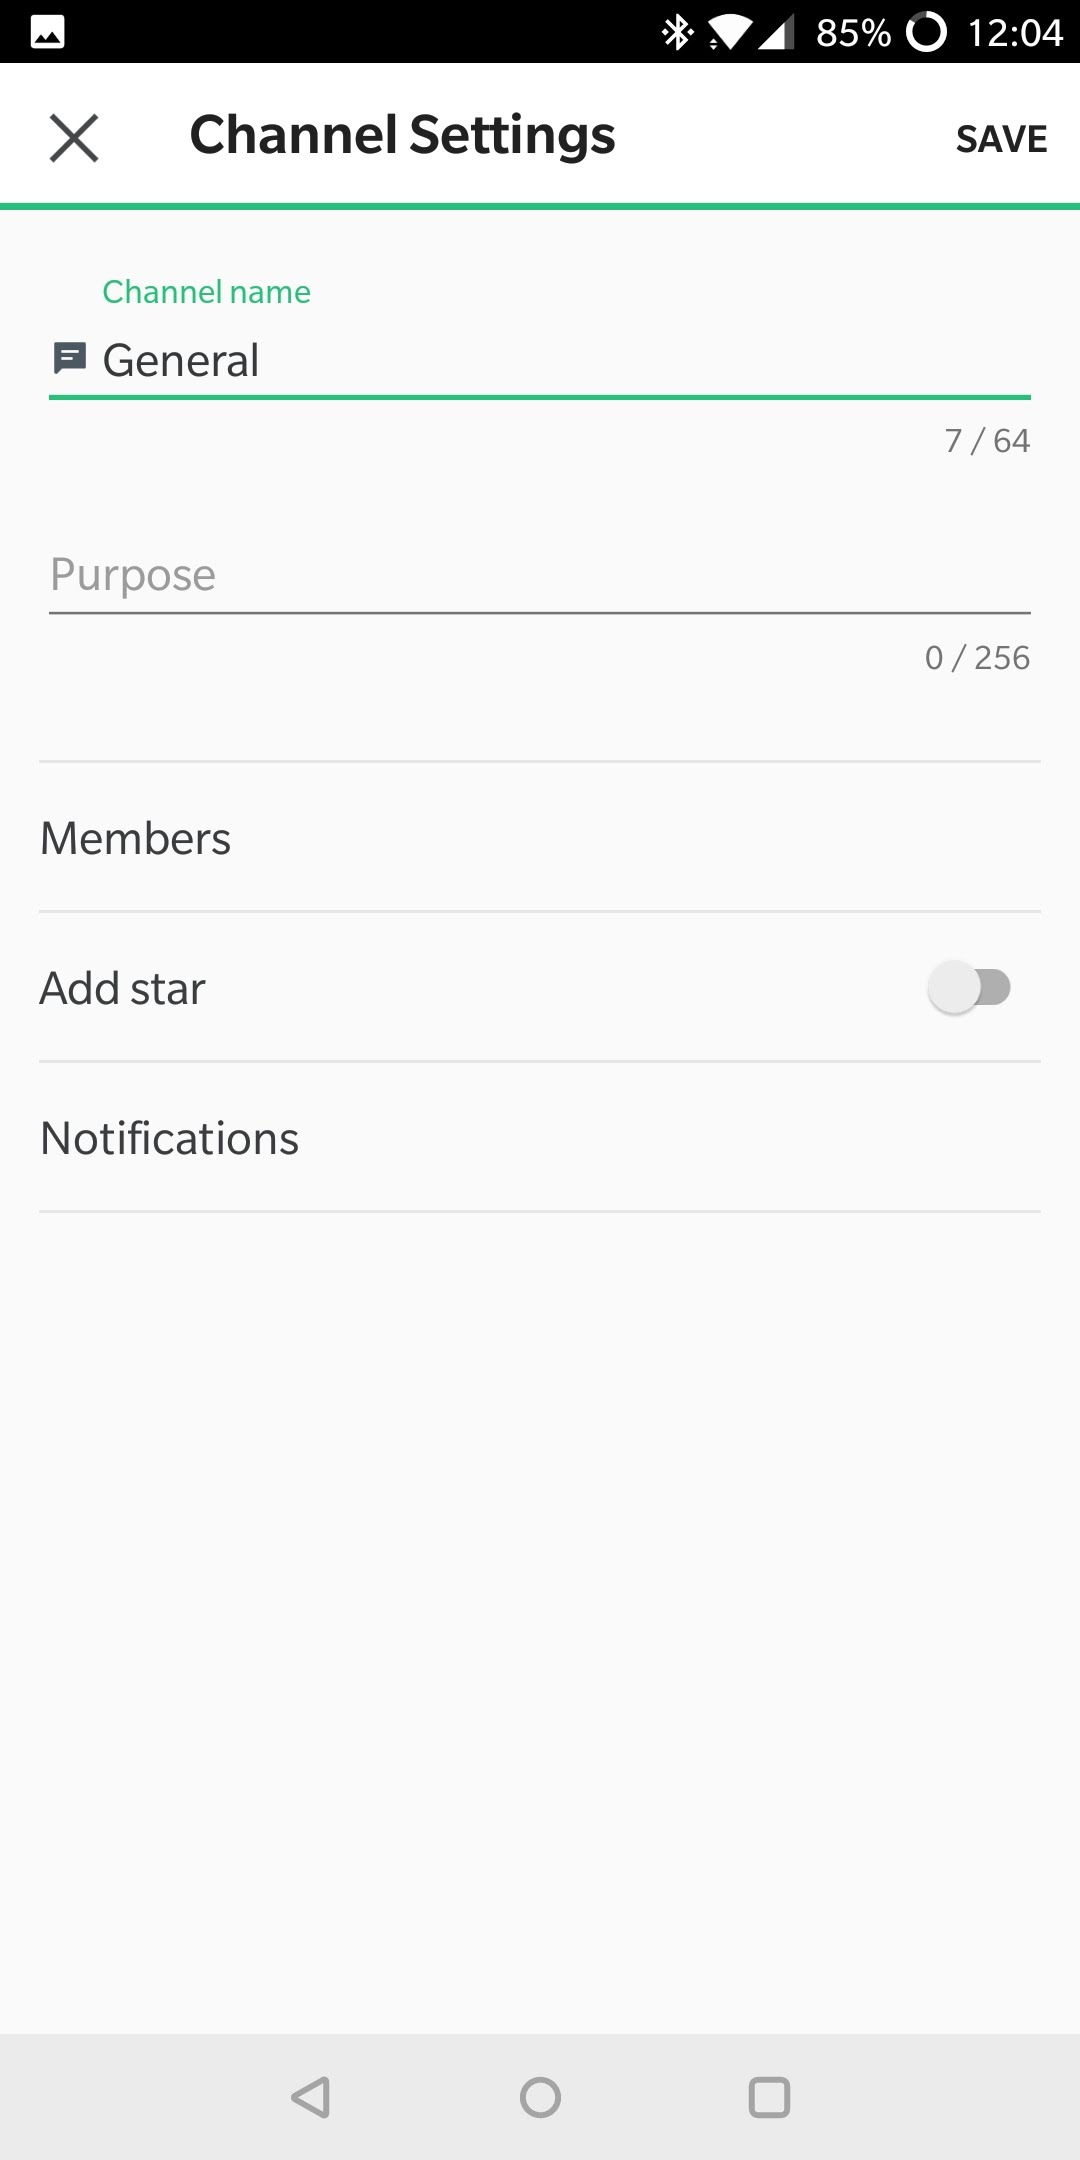
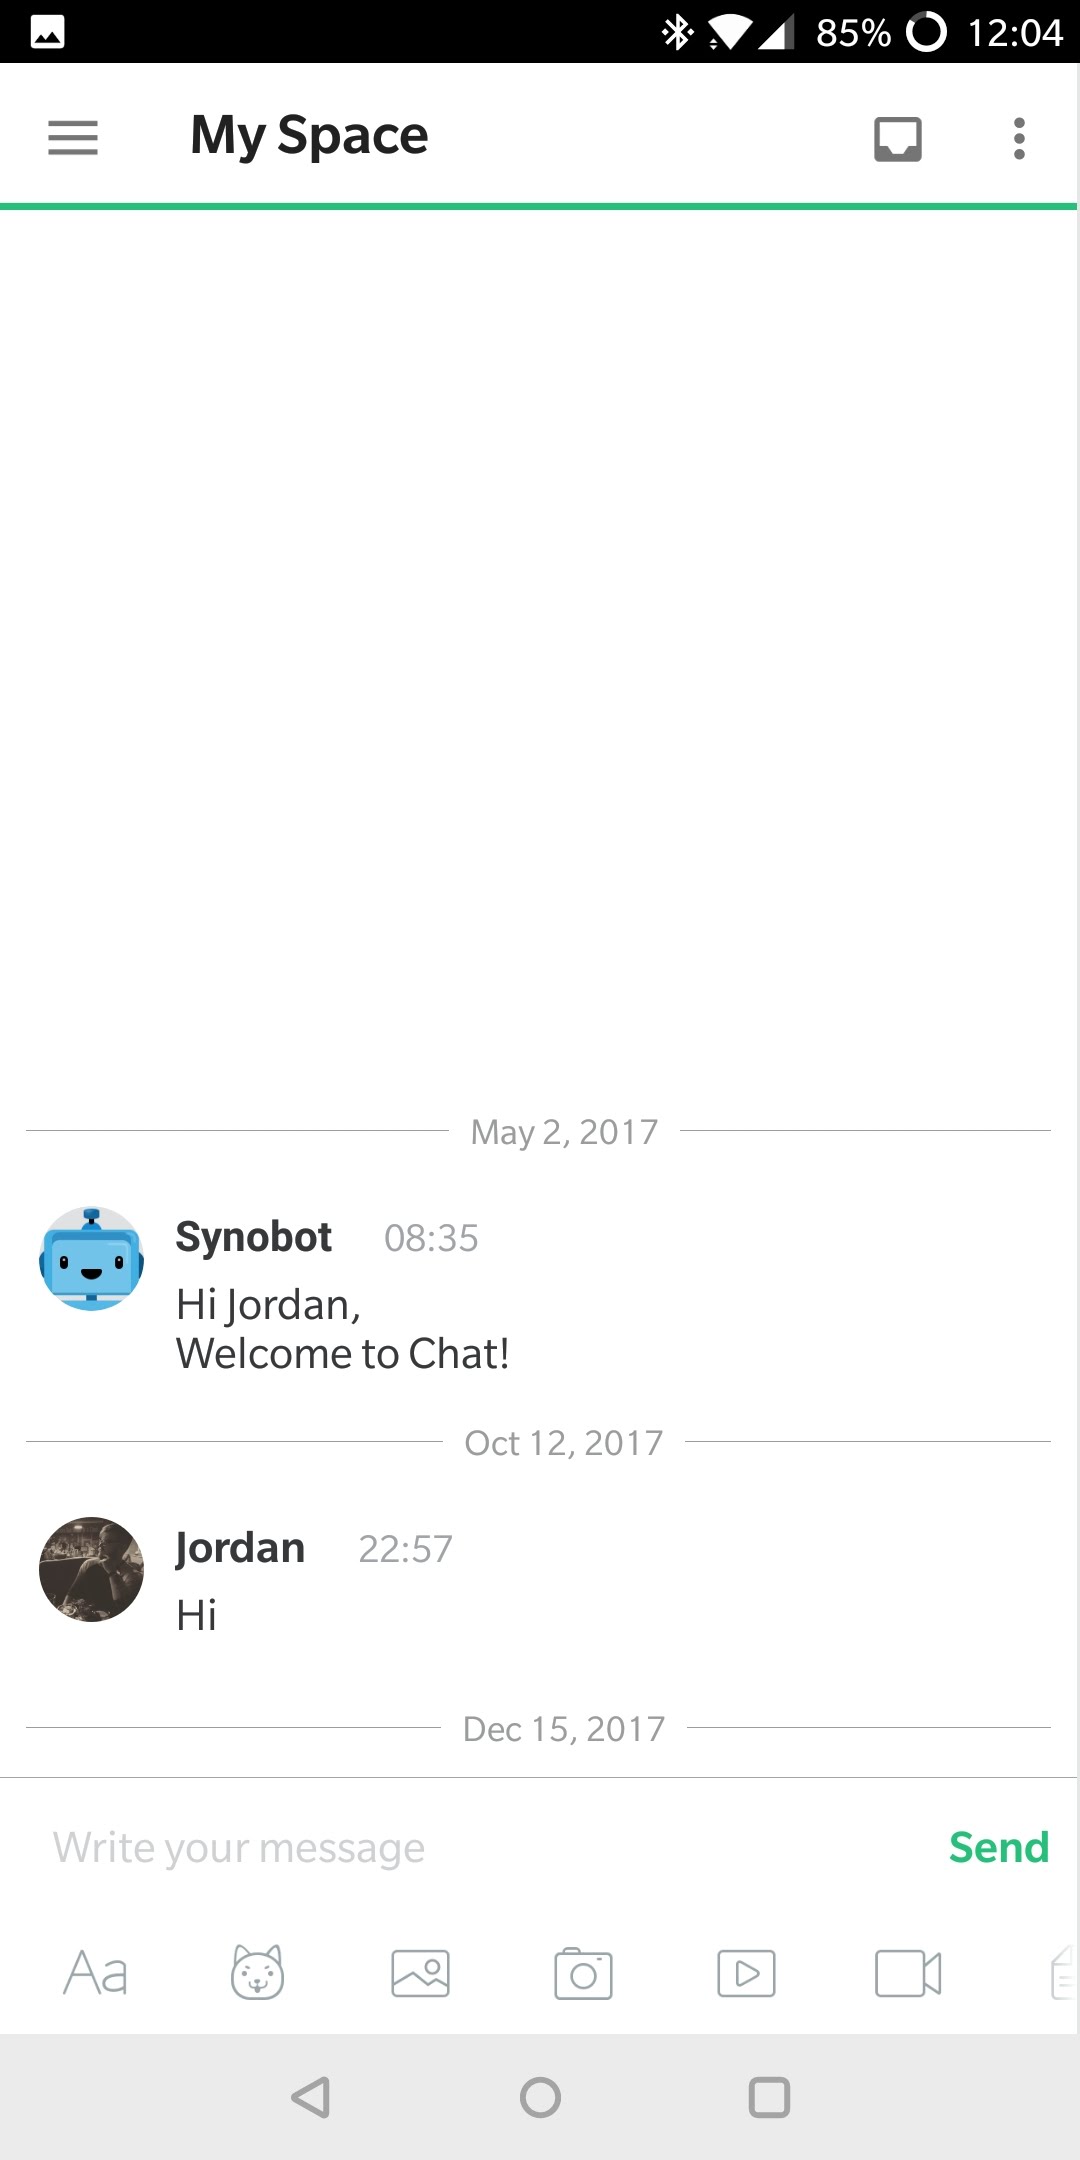
Chat
Chat is a lot like Slack. It's a professional internal communications program that supports multiple users (after setting them up in DSM) and channels. Each of the latter can be customized with names, general descriptions, permitted members, and notification settings. Like any good communication server application, admins can pin messages to the channels, as well as see what files have been uploaded or the links that users have pasted in chat.


This is aimed at organizations or groups who use Synology NASs as primary or secondary servers. It lacks some of the functionality that you may be used to seeing in Slack or Discord, but everything in Chat is hosted on your DiskStation (or other Synology product) and thus in your control. I can certainly understand the appeal, but I recommend passing on this app for personal DiskStation use.
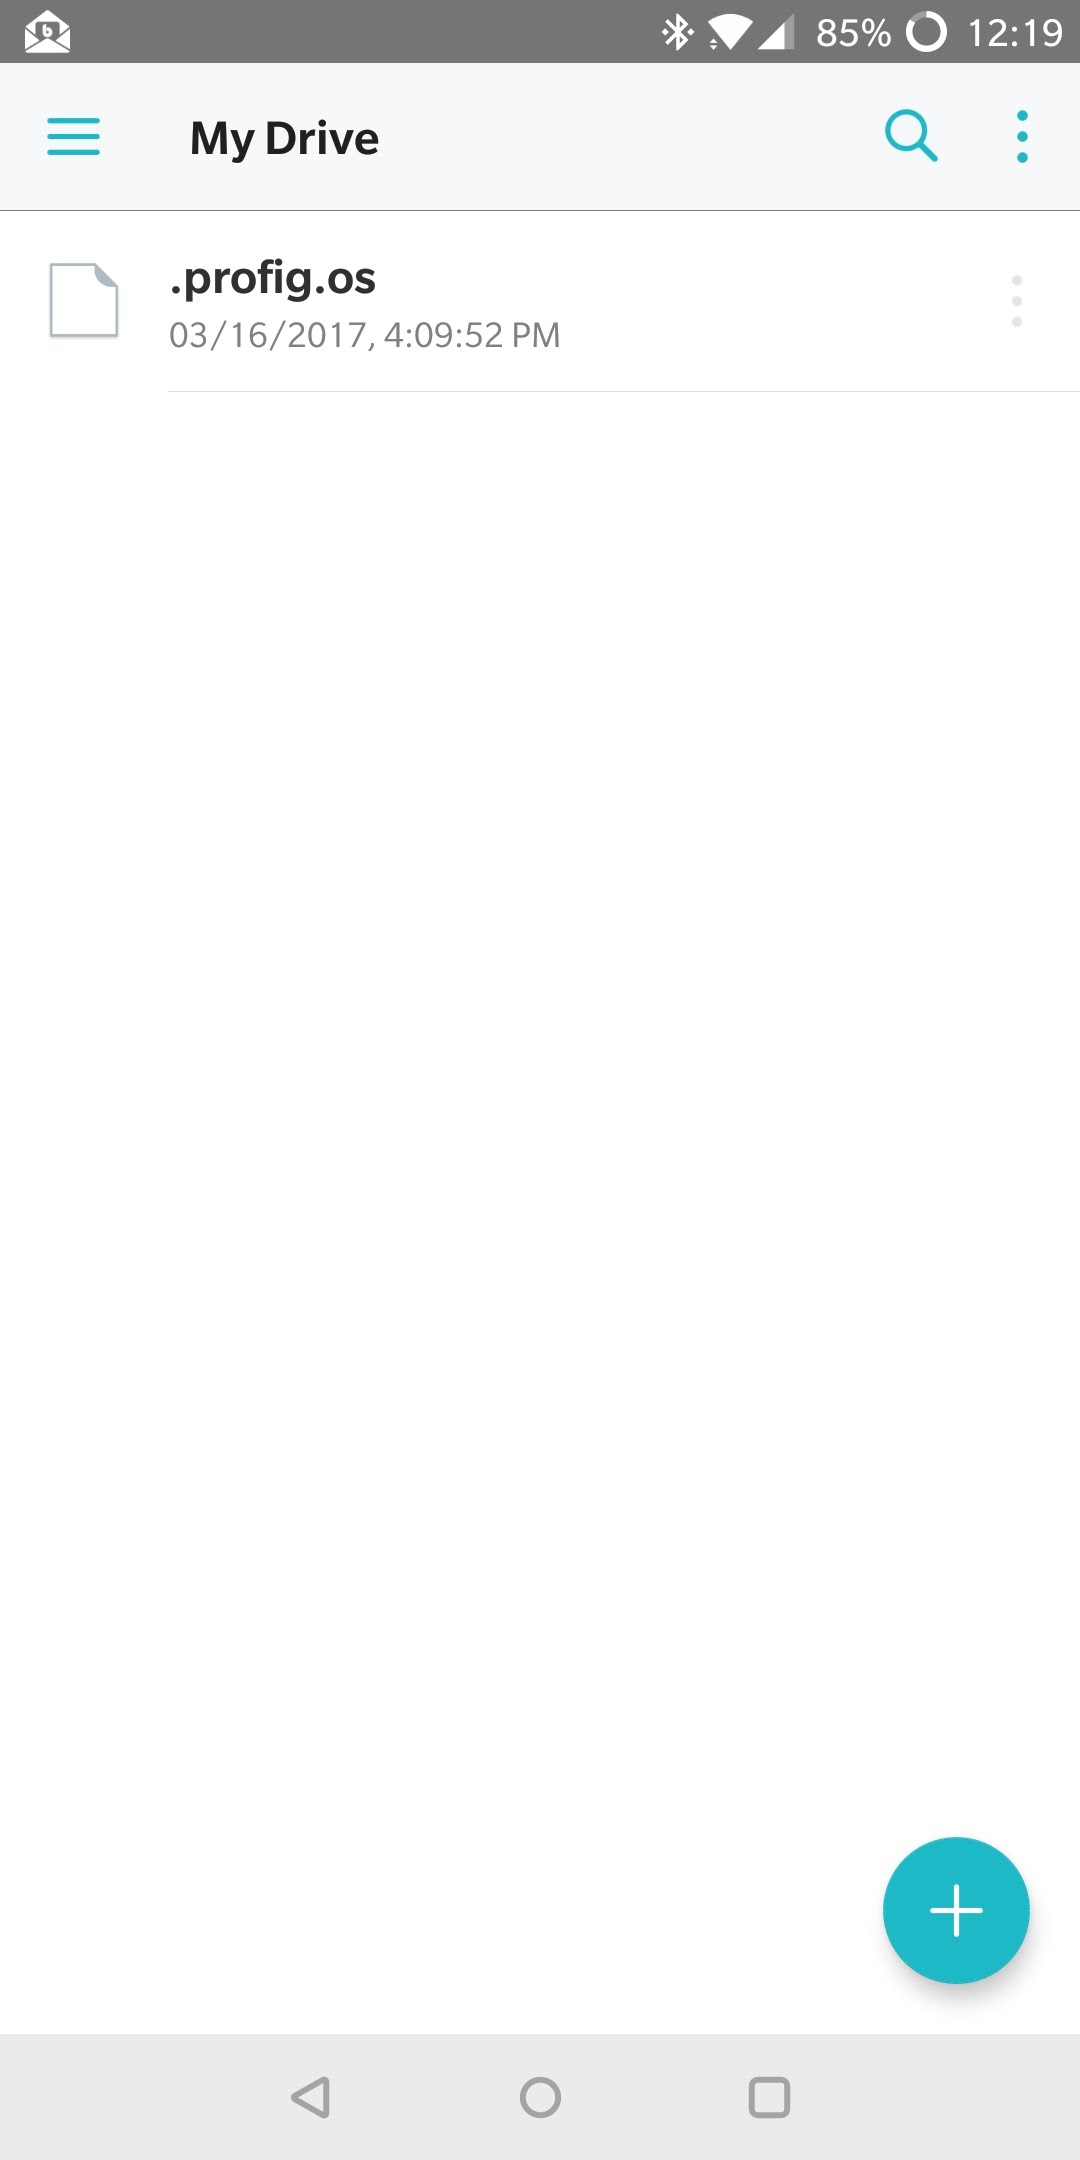
Drive
Drive is one of Synology's newer packages, available only in beta at time of writing. The Android app is available for anyone to download, but I had to install the test version of DSM to access the package. There's also a Windows, Mac, and Linux client for local syncing, much like Google Drive or Dropbox (and it works really well on Windows).


In my DiskStation usage, Drive replaced the old DS cloud app, though the functionality is different in certain regards. Cloud allowed you to choose which folders or files to sync directly to your Android device for offline viewing. It's a neat idea, but Drive takes things a bit further. Much like Google Docs, Synology has its own suite of office applications available to the DiskStation users. Files are saved locally to the machine, and the Drive package lets you open them on the go, effectively creating your own cloud server.
You can set up team folders in addition to your private stuff. Label support is also included if you need the extra organization. Everything is still in beta for now, but I like the functionality here. Cloud Station is still a more reliable way of backing things up, but I really do not like the DS cloud app. It feels outdated and I don't find the offline sync functionality to my Android devices useful for me, personally. Even so, you can download stuff from Drive straight to your mobile device.
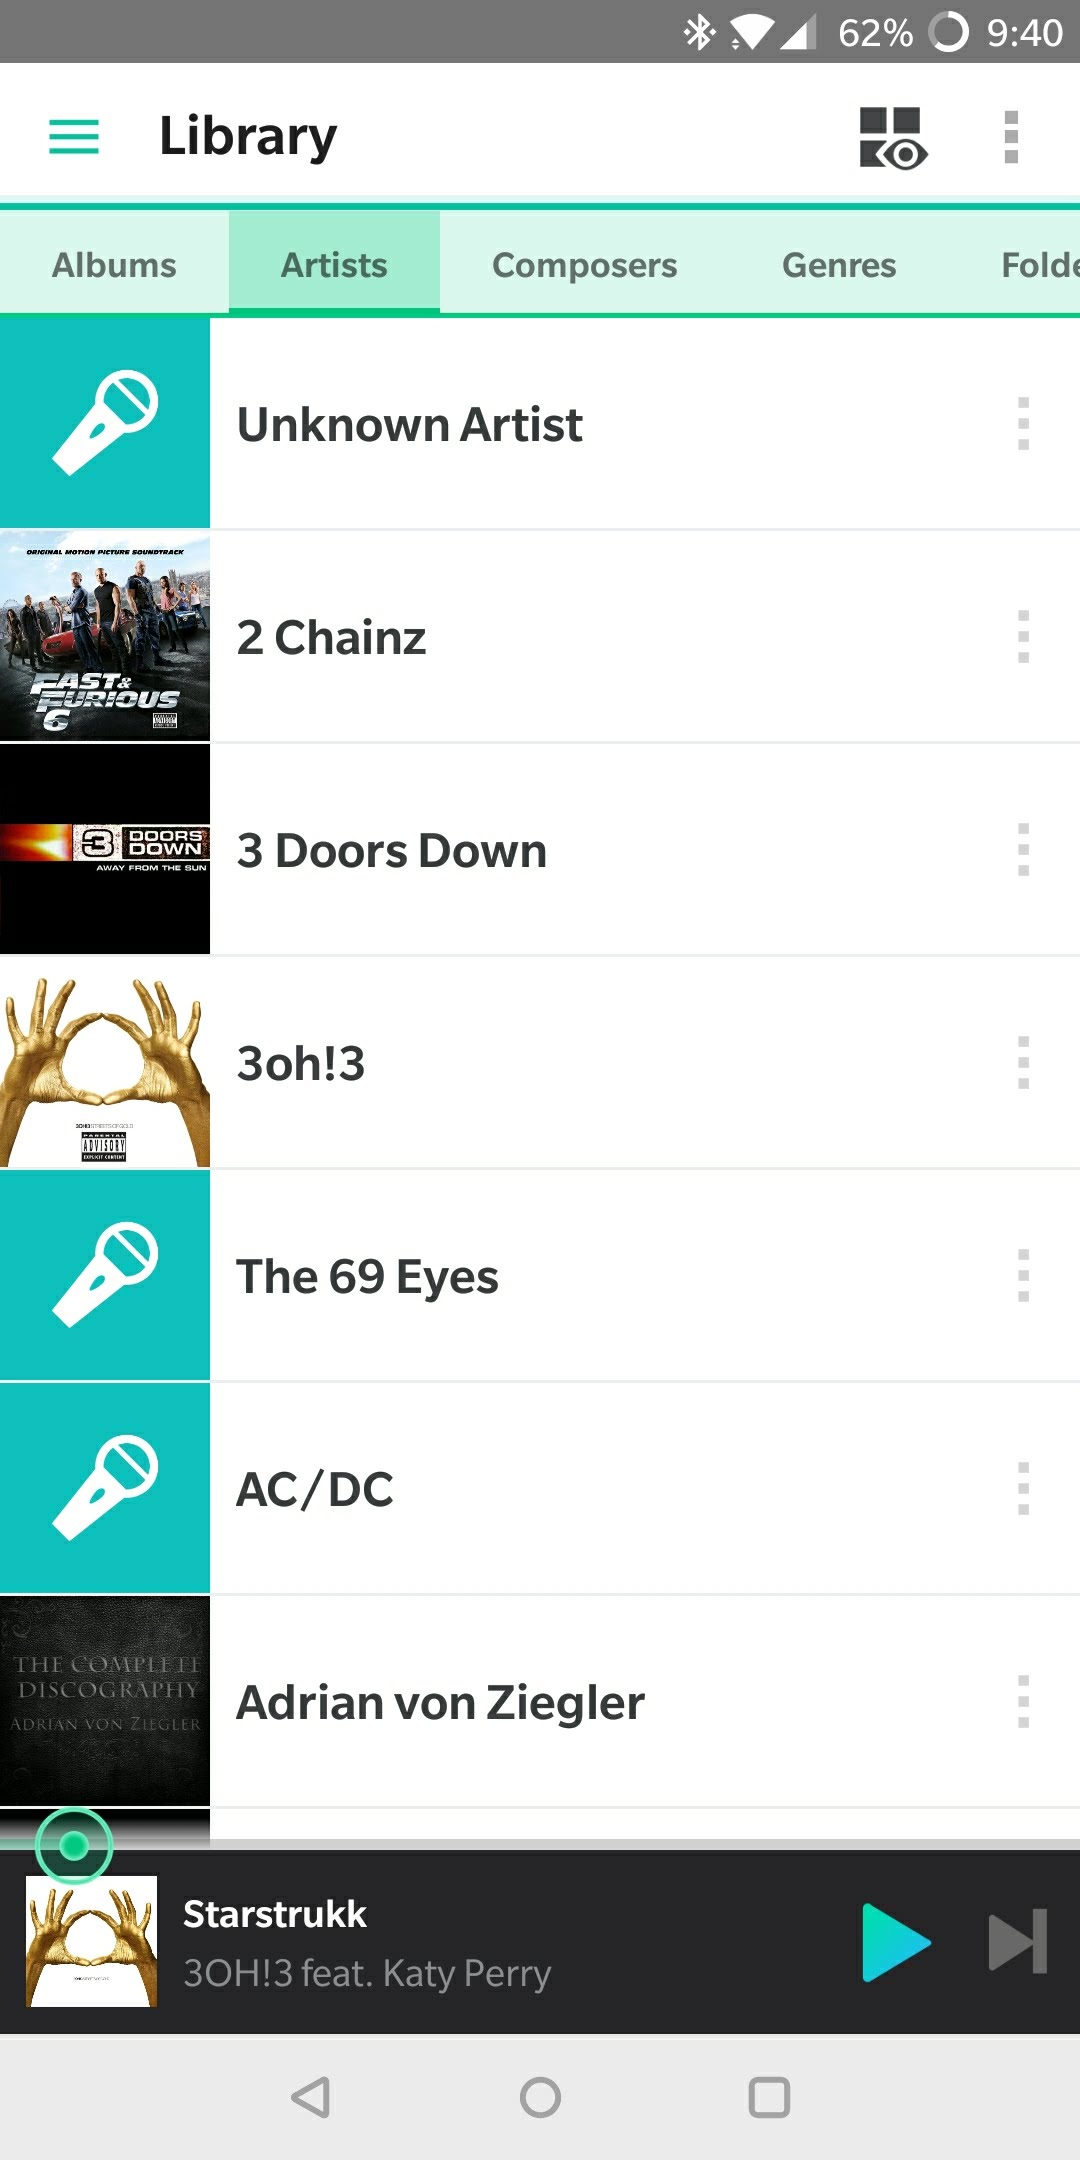
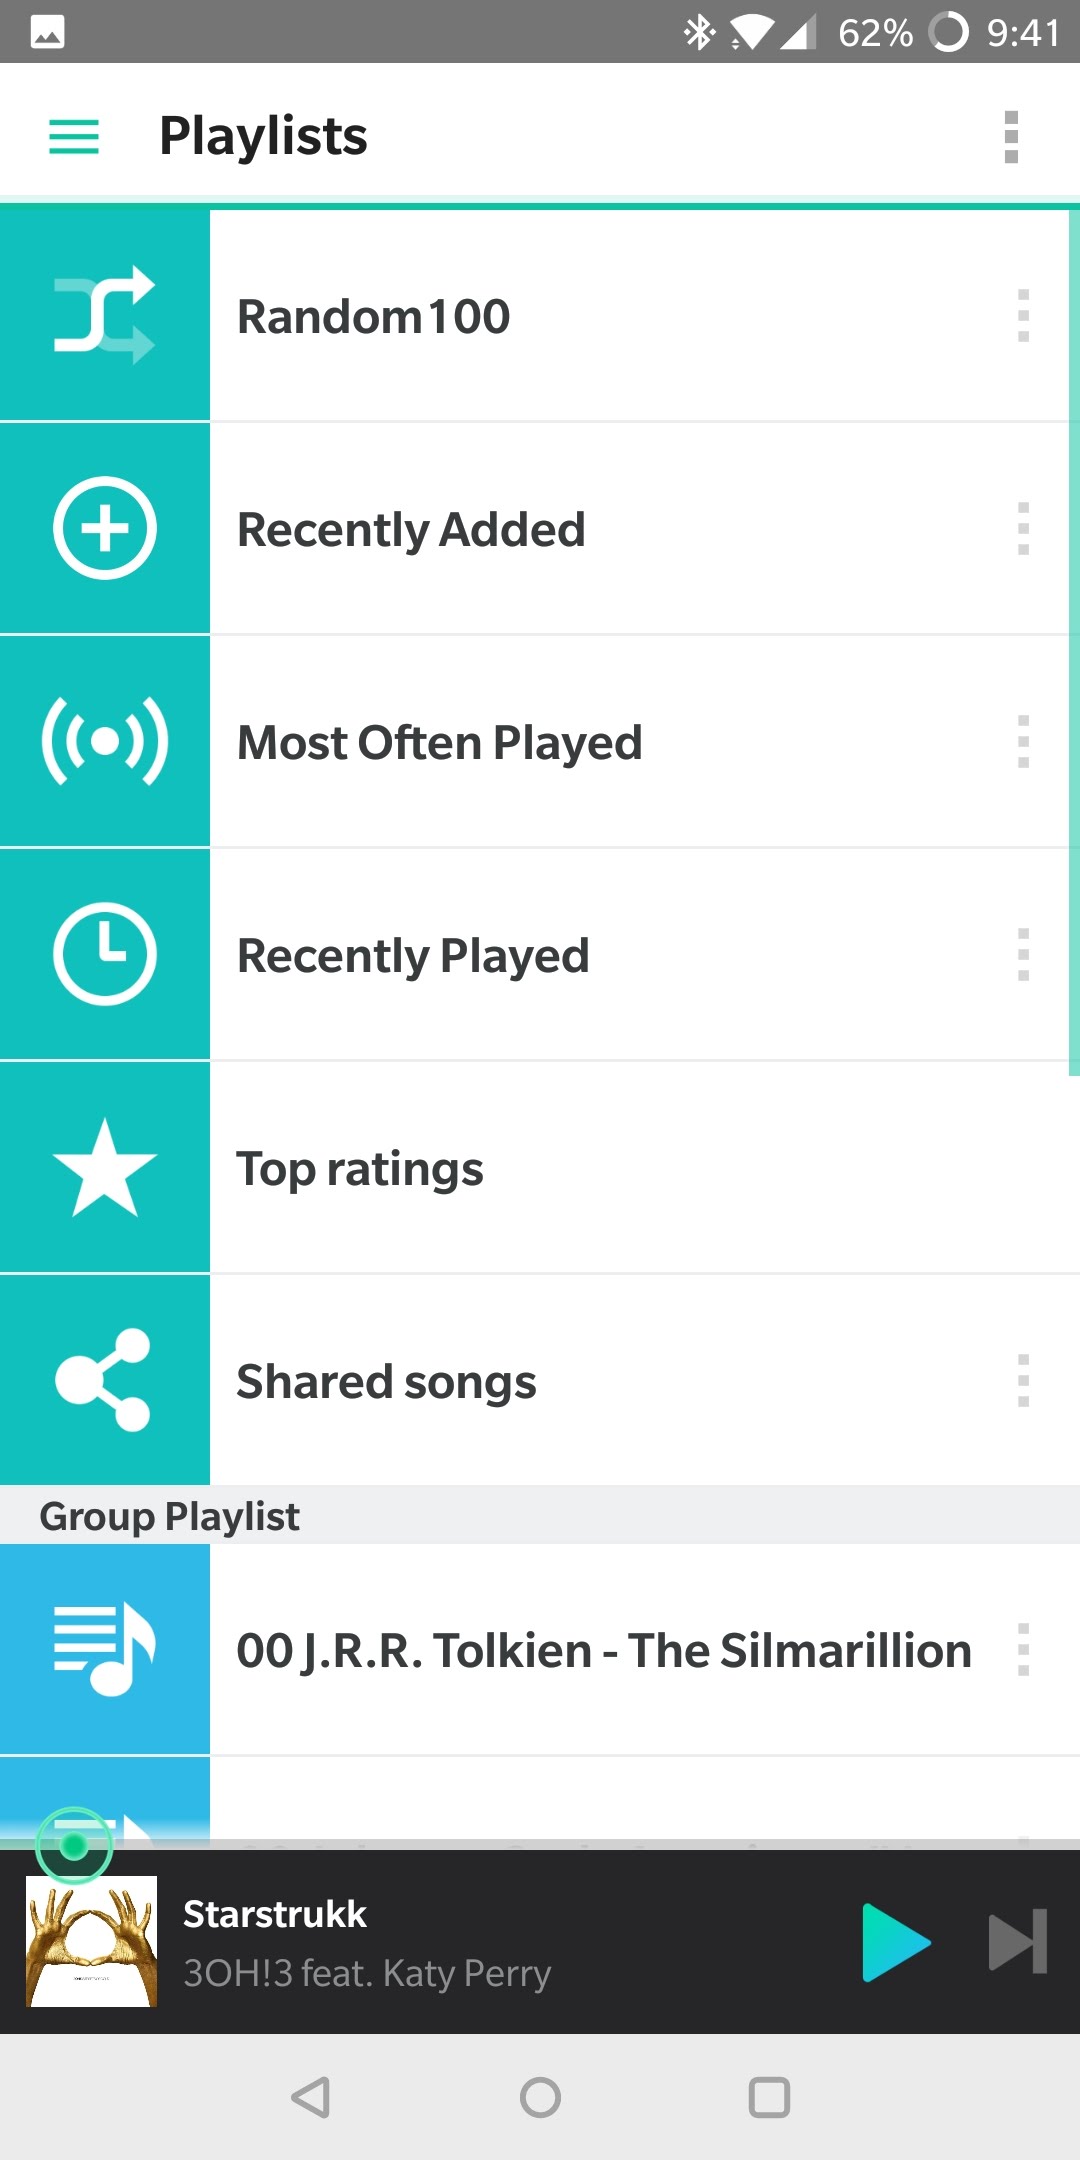
DS audio
One of the main ways I use my NAS is for media storage. A substantial chunk of my collection is my music library, which contains a wide variety of both genres and file types. To be perfectly honest, I use Plex and the music functions within that application to listen to my songs on the go — ain't nobody got time to deal with Google Play Music (de)auth limits. In continuing with the honesty streak, I also have Plex Pass, which allows me to listen to music outside of my local home network.


For those of you who do not take advantage of Plex (or Kodi) in this way, Synology has provided a way for you to play any music file stored on your DiskStation. Beyond this, however, you can sort, search, favorite, create playlists, and download anything for offline listening. The player itself is nicely done, pulling in album artwork and lyrics for the song currently playing (if either are available; I had a few that it couldn't figure out). There's even a sleep timer and multi-select (for favoriting, downloading, or sharing).
I wish it had a dark theme option for the main parts of the app, but the playback screen is all you get if you don't like white.
DS file
This is the bread and butter of the DiskStation. DS file is the basic file manager for everything on your NAS, allowing you to browse through everything you have stored. While one of the most important apps available, it's also one of the more boring ones. When you launch and login to the app, you're dumped right into the root folder of your machine. From here, go to where you want to go.


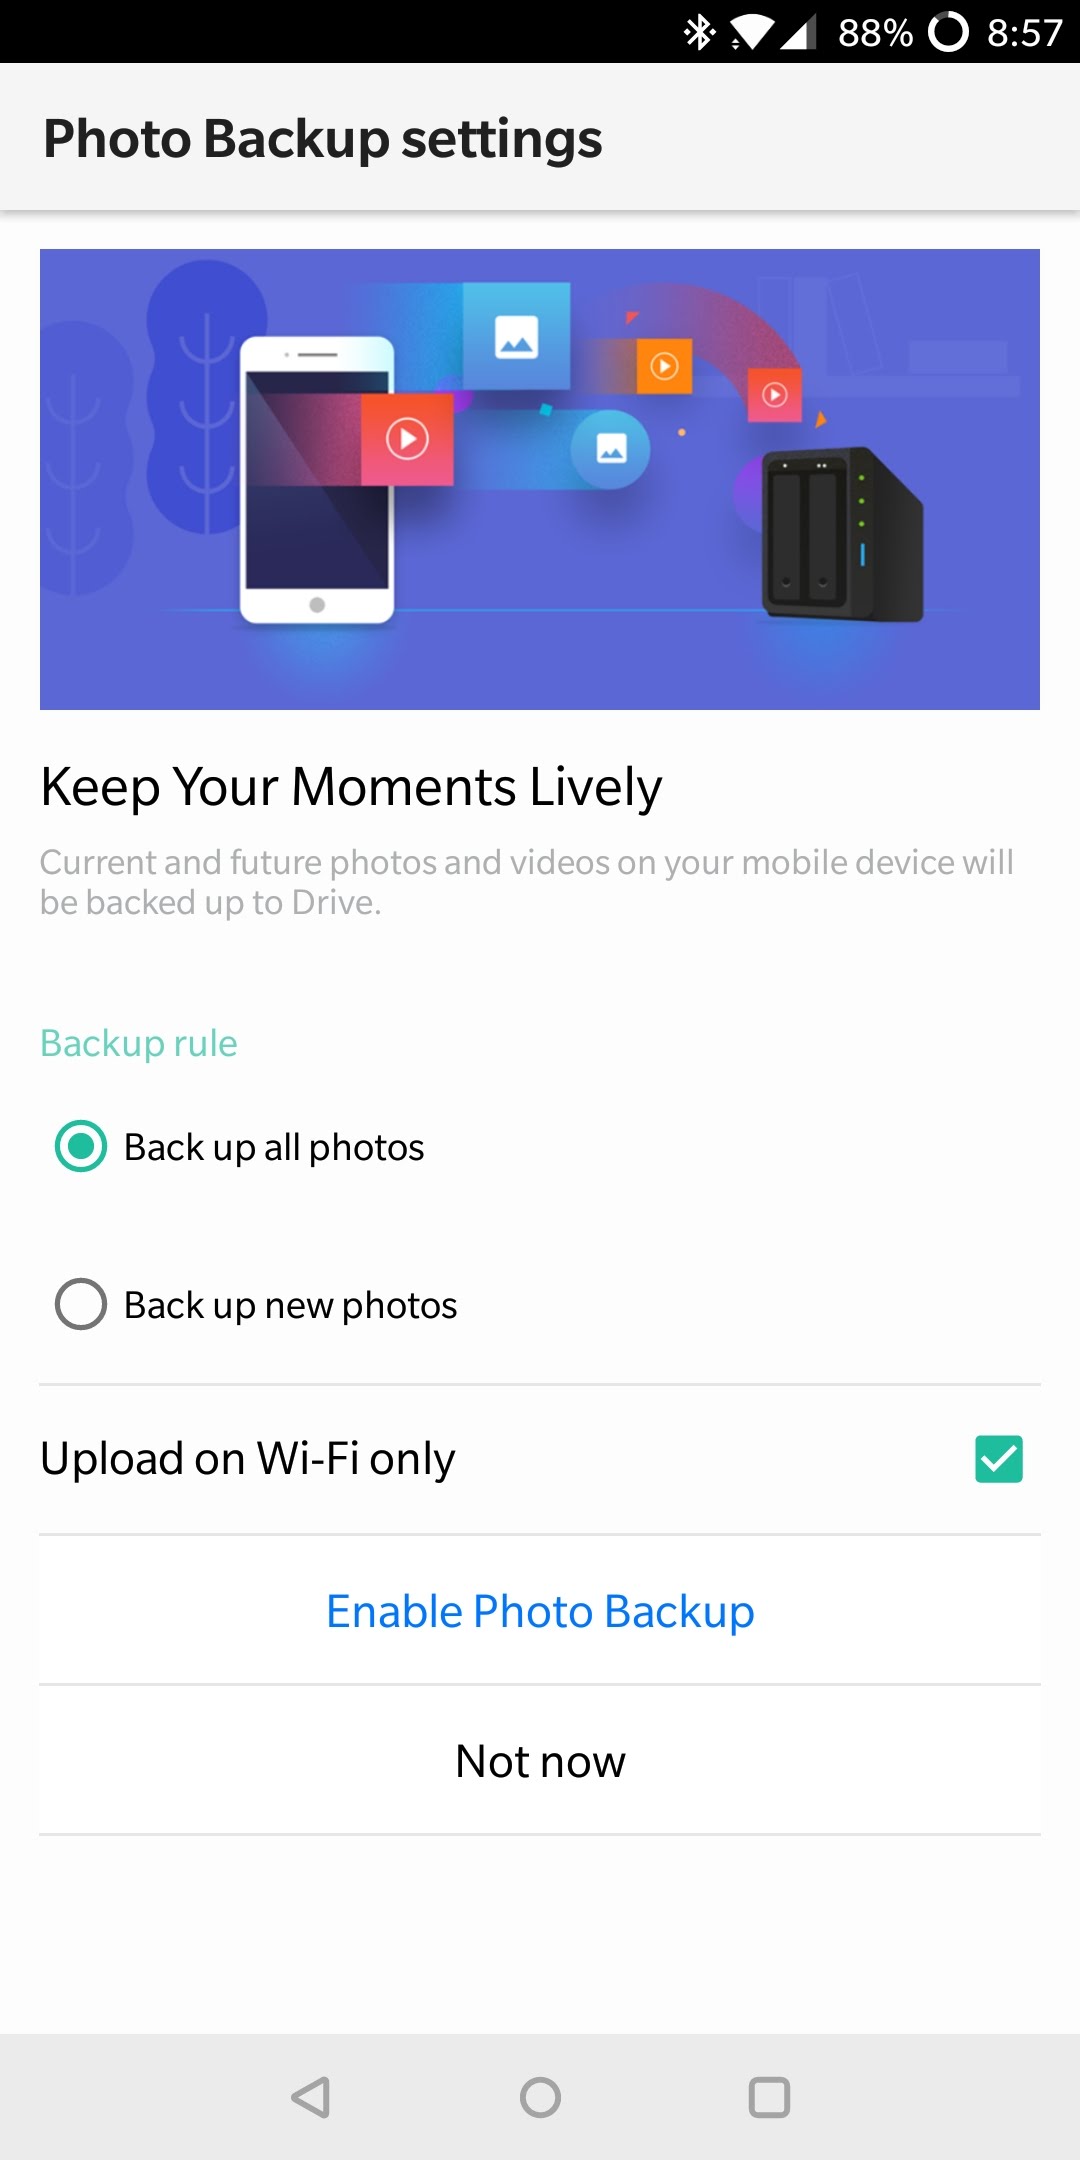
Much like DS cloud, you can set files to save offline — redundancy across apps and packages is pretty common with Synology software. You can also view tasks that you've established in DSM, such as automatic upload/download between your phone and NAS, or any other remote activities you wish your server to do. Finally, DS file contains an automatic photo upload option, à la every other storage service provider (Google, OneDrive, Plex, etc). Personally, I never use these sorts of things because I don't want every single photo I take to upload to my server.
Like I said, this is probably the most important app to have and the one I'd say to keep installed, even if you don't keep the others. Basic isn't always a bad thing, but if you feel so inclined, you can add your NAS as a location in Solid Explorer File Manager (I went with SMB for general ease of use). I preferred using this method to DS file, but I like my dark theme... and having my phone and NAS storage available to browse in one app. The only downside is that I have to be on my local network, whereas DS file is available anywhere.
DS finder
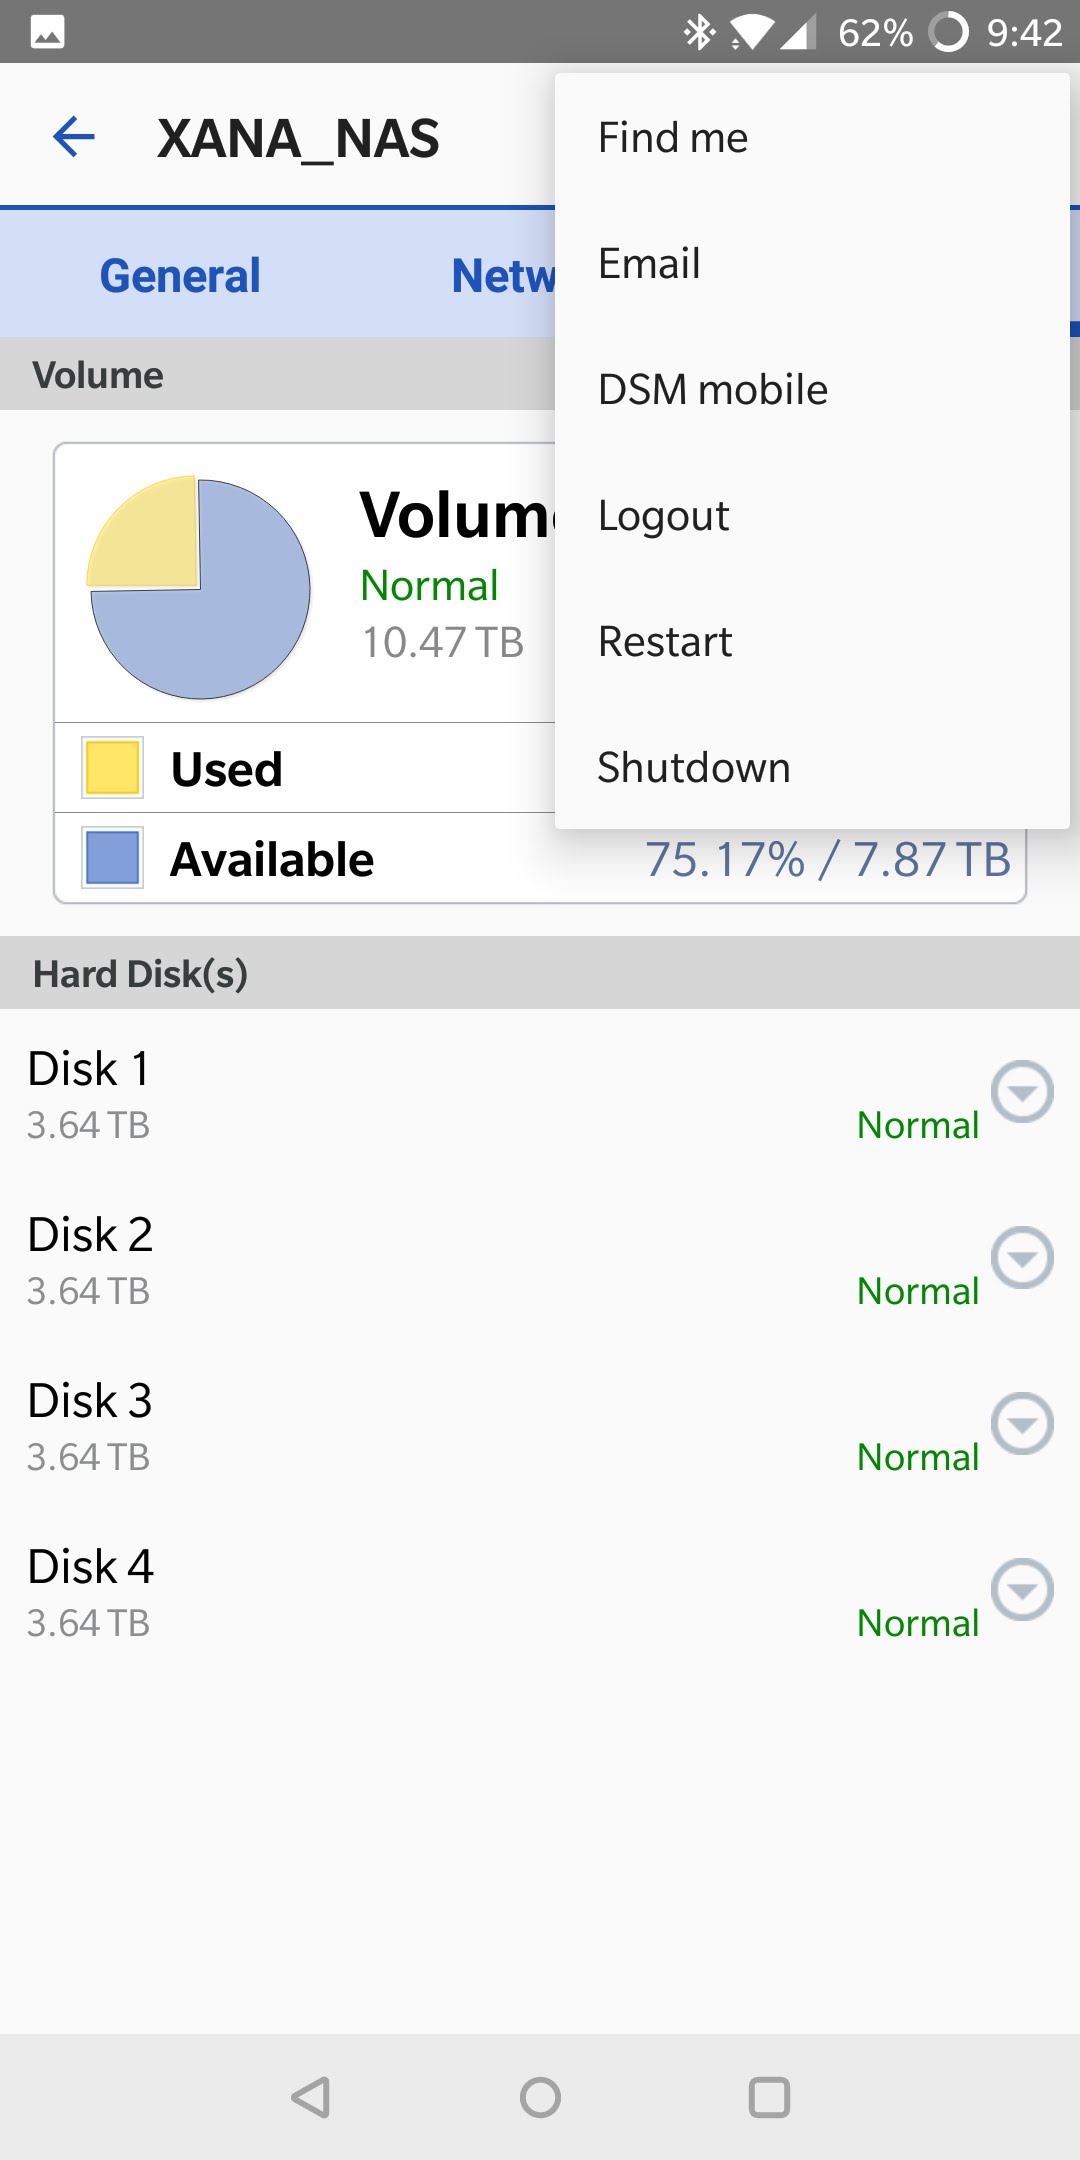
In the event that you do not want to login to DSM, DS finder is an app you should keep installed. It's basically a mobile manager for your NAS, allowing you to check the status, remote reboot/shutdown, and receive push notifications from your system. If the need arises, you can also trigger a "Find Me" signal to help you find your machine. And once you set one as a favorite, you can login via DSM mobile, which offers a bit more utility than DS finder does (such as updating packages).


There are three tabs: General, Network, and Storage. The first displays some basic information like the model name, serial number, physical memory, DSM version, uptime, and thermal status (in both Celsius and Fahrenheit). The Network tab houses some typical stuff like server name and DNS, as well as LAN port IPv4/IPv6 and MAC addresses. Finally, the Storage tab shows a rundown of your storage health and capacity. Each disk is displayed separately with its own health and temperature indicators.
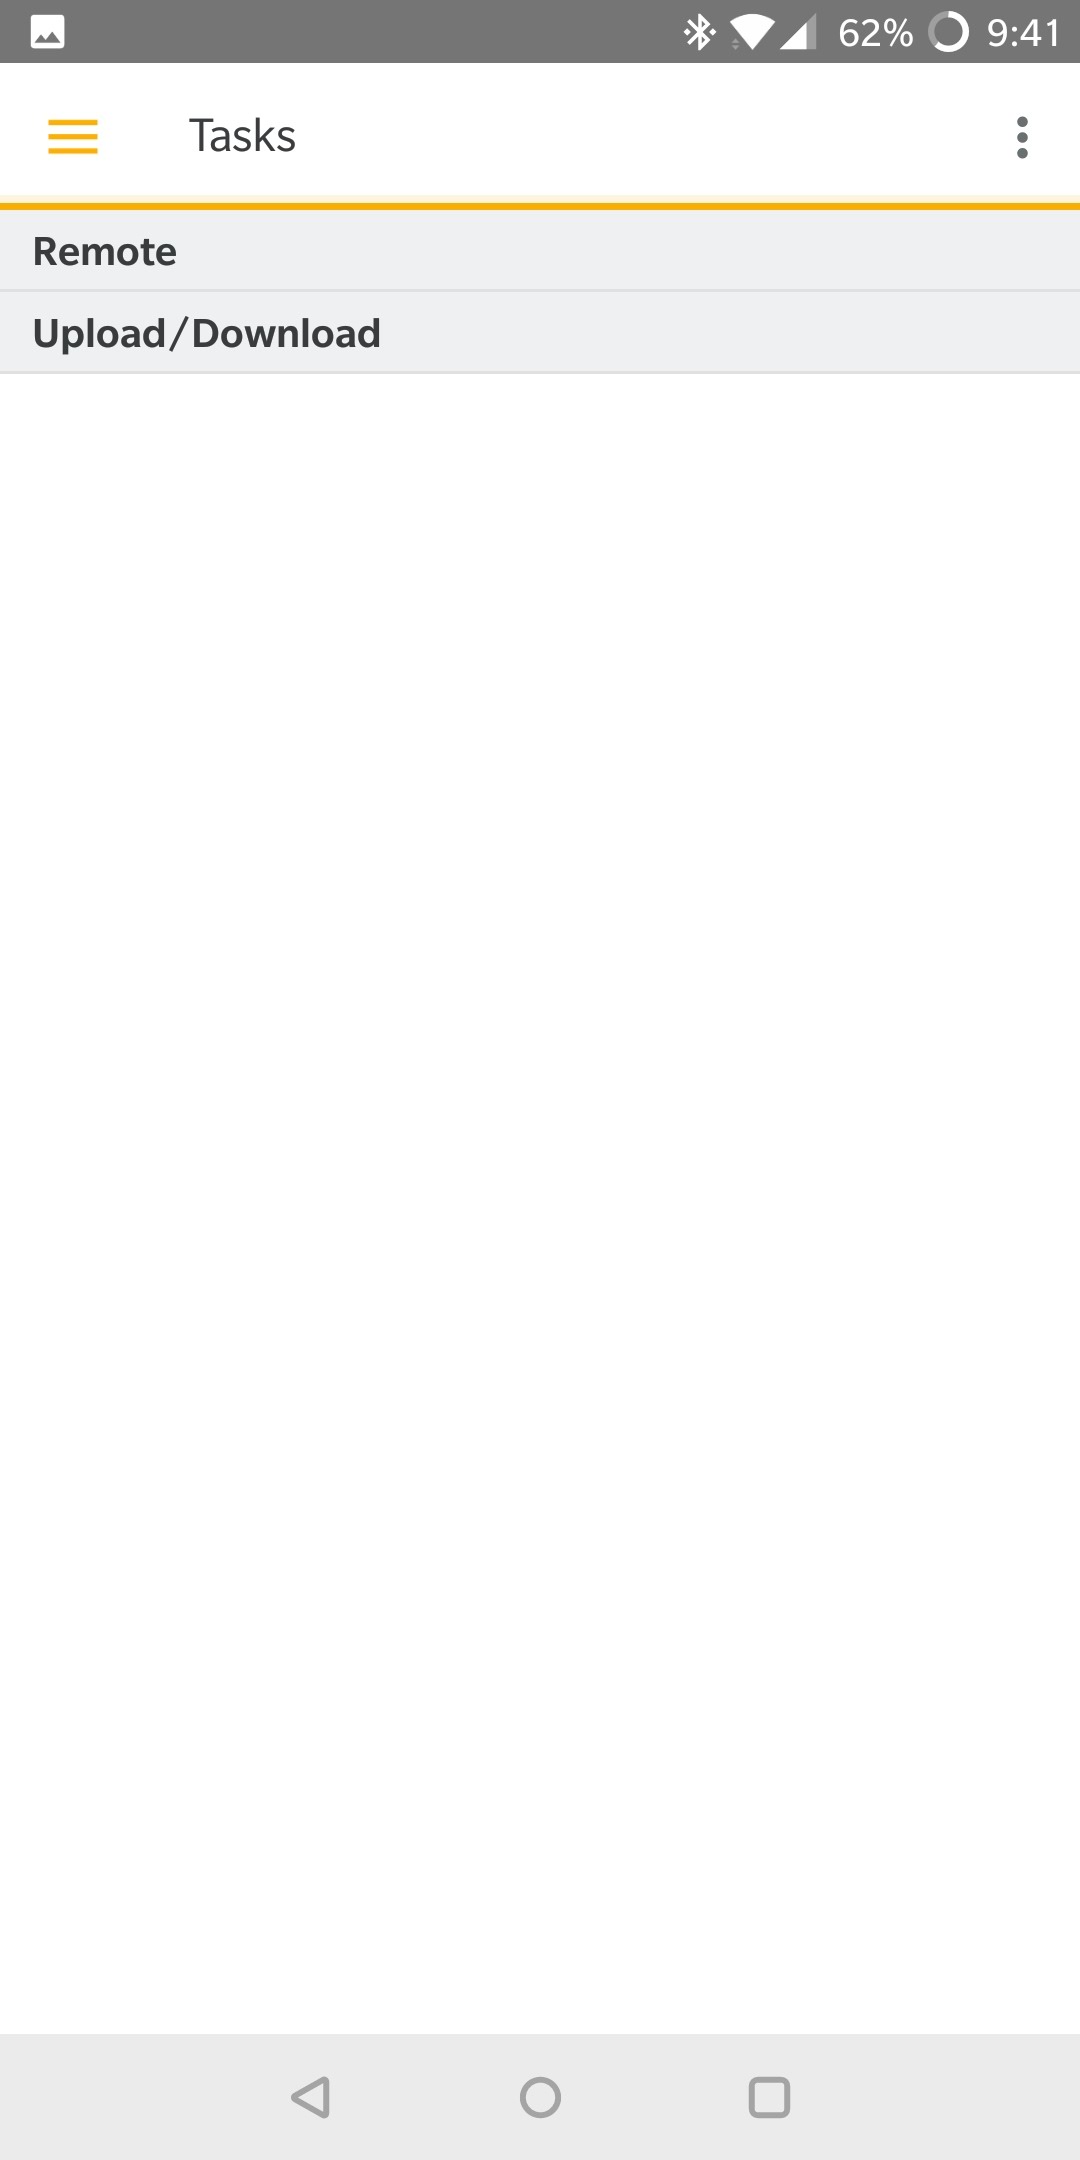
DS get
One of the packages that is available to install on Synology devices is the Download Station. By inputting a URL or uploading a torrent file, the NAS will automatically download whatever you've told it to. This can be scheduled or delayed, told to download under certain restrictions, and so forth. This next app, DS get, is the Android companion for Download Station. Before I get into its specifics, I should point out that this app is awesome and you can use it from anywhere, even outside your local network. I should also point out that we here at AP do not recommend that anyone illegally download copyrighted content, but do as you wish understanding the potential consequences.


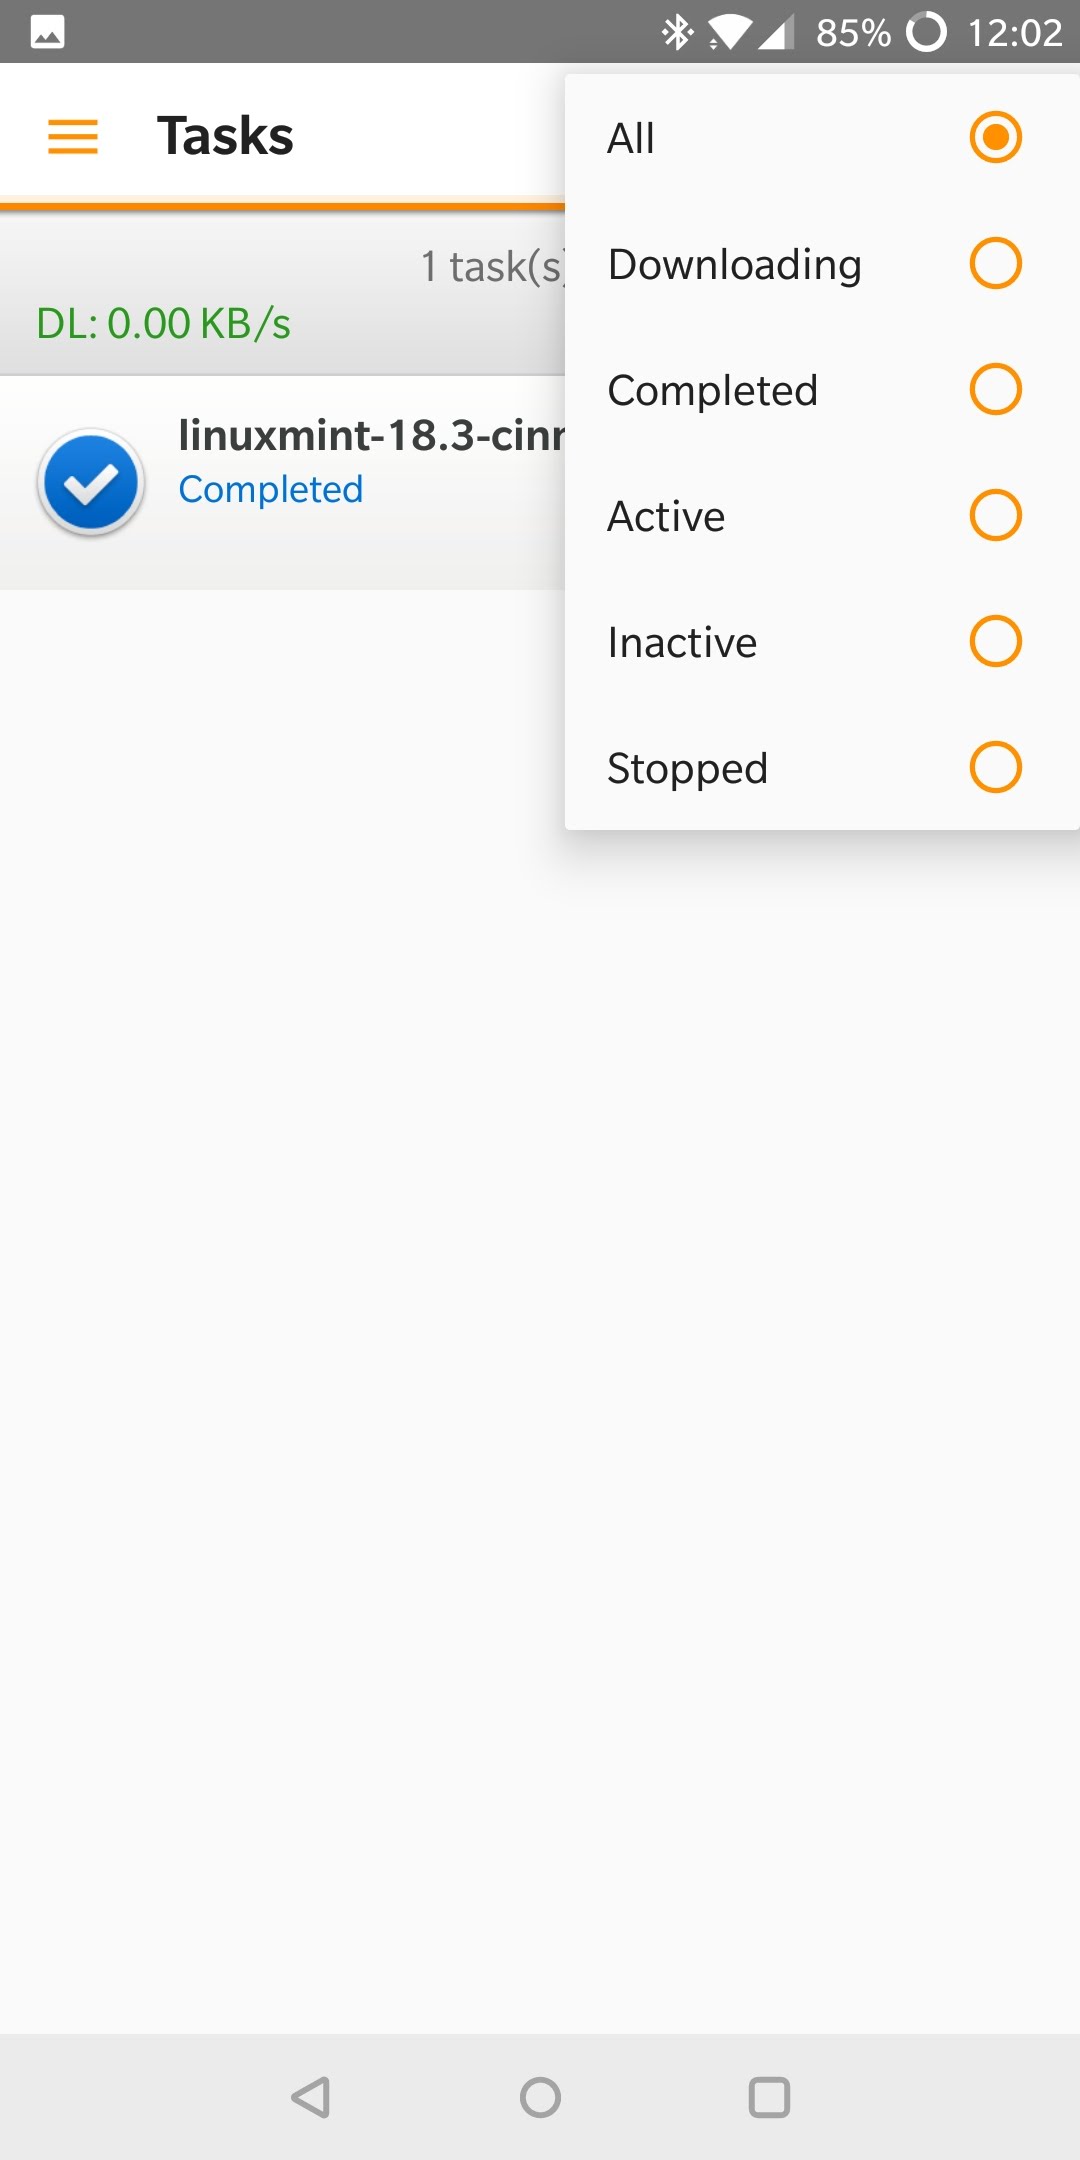
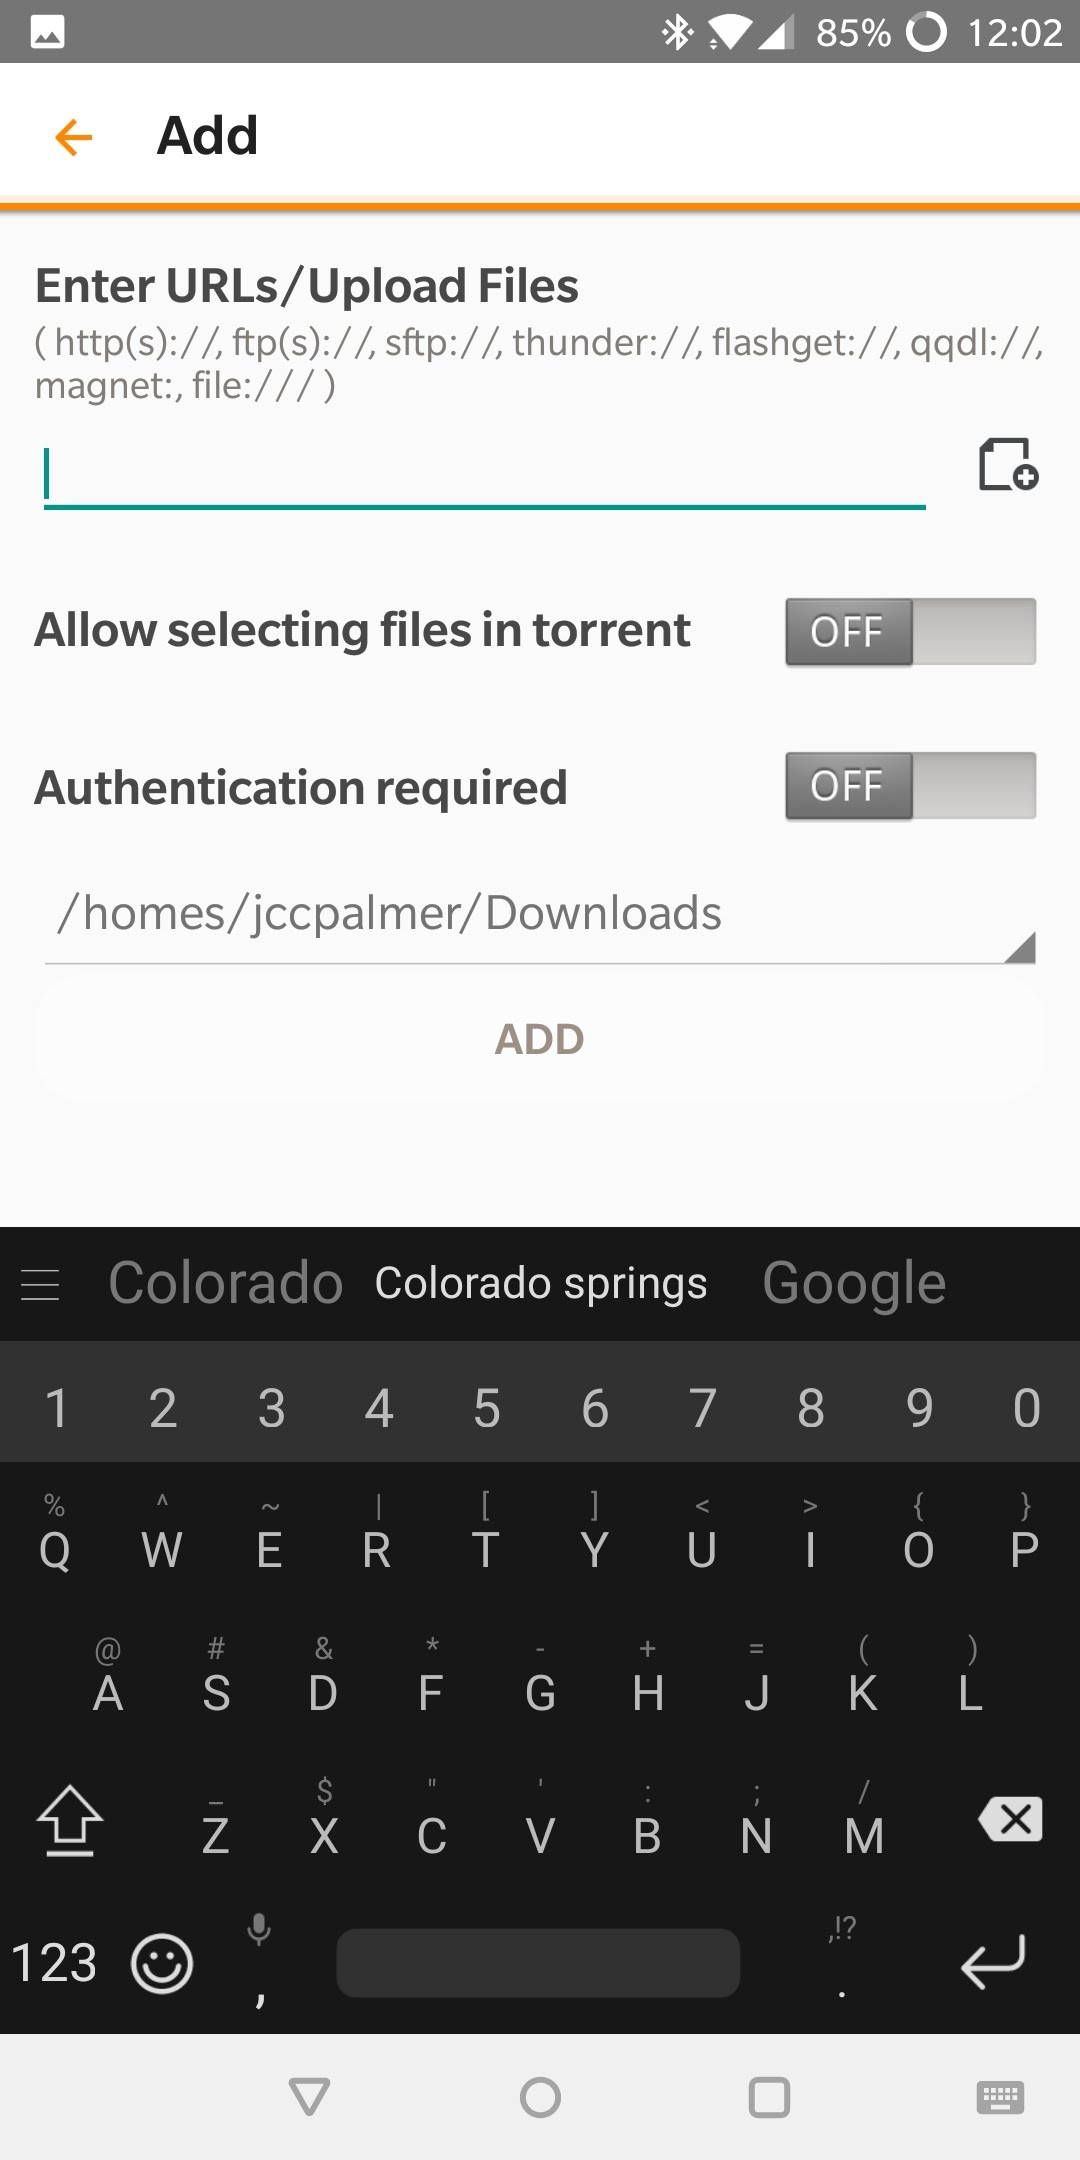
DS get is simple. After launching and logging in, you're presented with your download tasks list. Obviously, on your first time through, this list will be empty. Above the list, you're given both your up and down speeds (in KB/s); further up at the top of the screen are a filter button, a batch options key, and a plus icon to add a new task. When pressed, the latter opens a new menu where you either enter the URL(s) or upload the files you want your NAS to download. You can tell DS get whether you want to allow selecting files in the torrent and/or to require authentication. The last option is where to download the file.
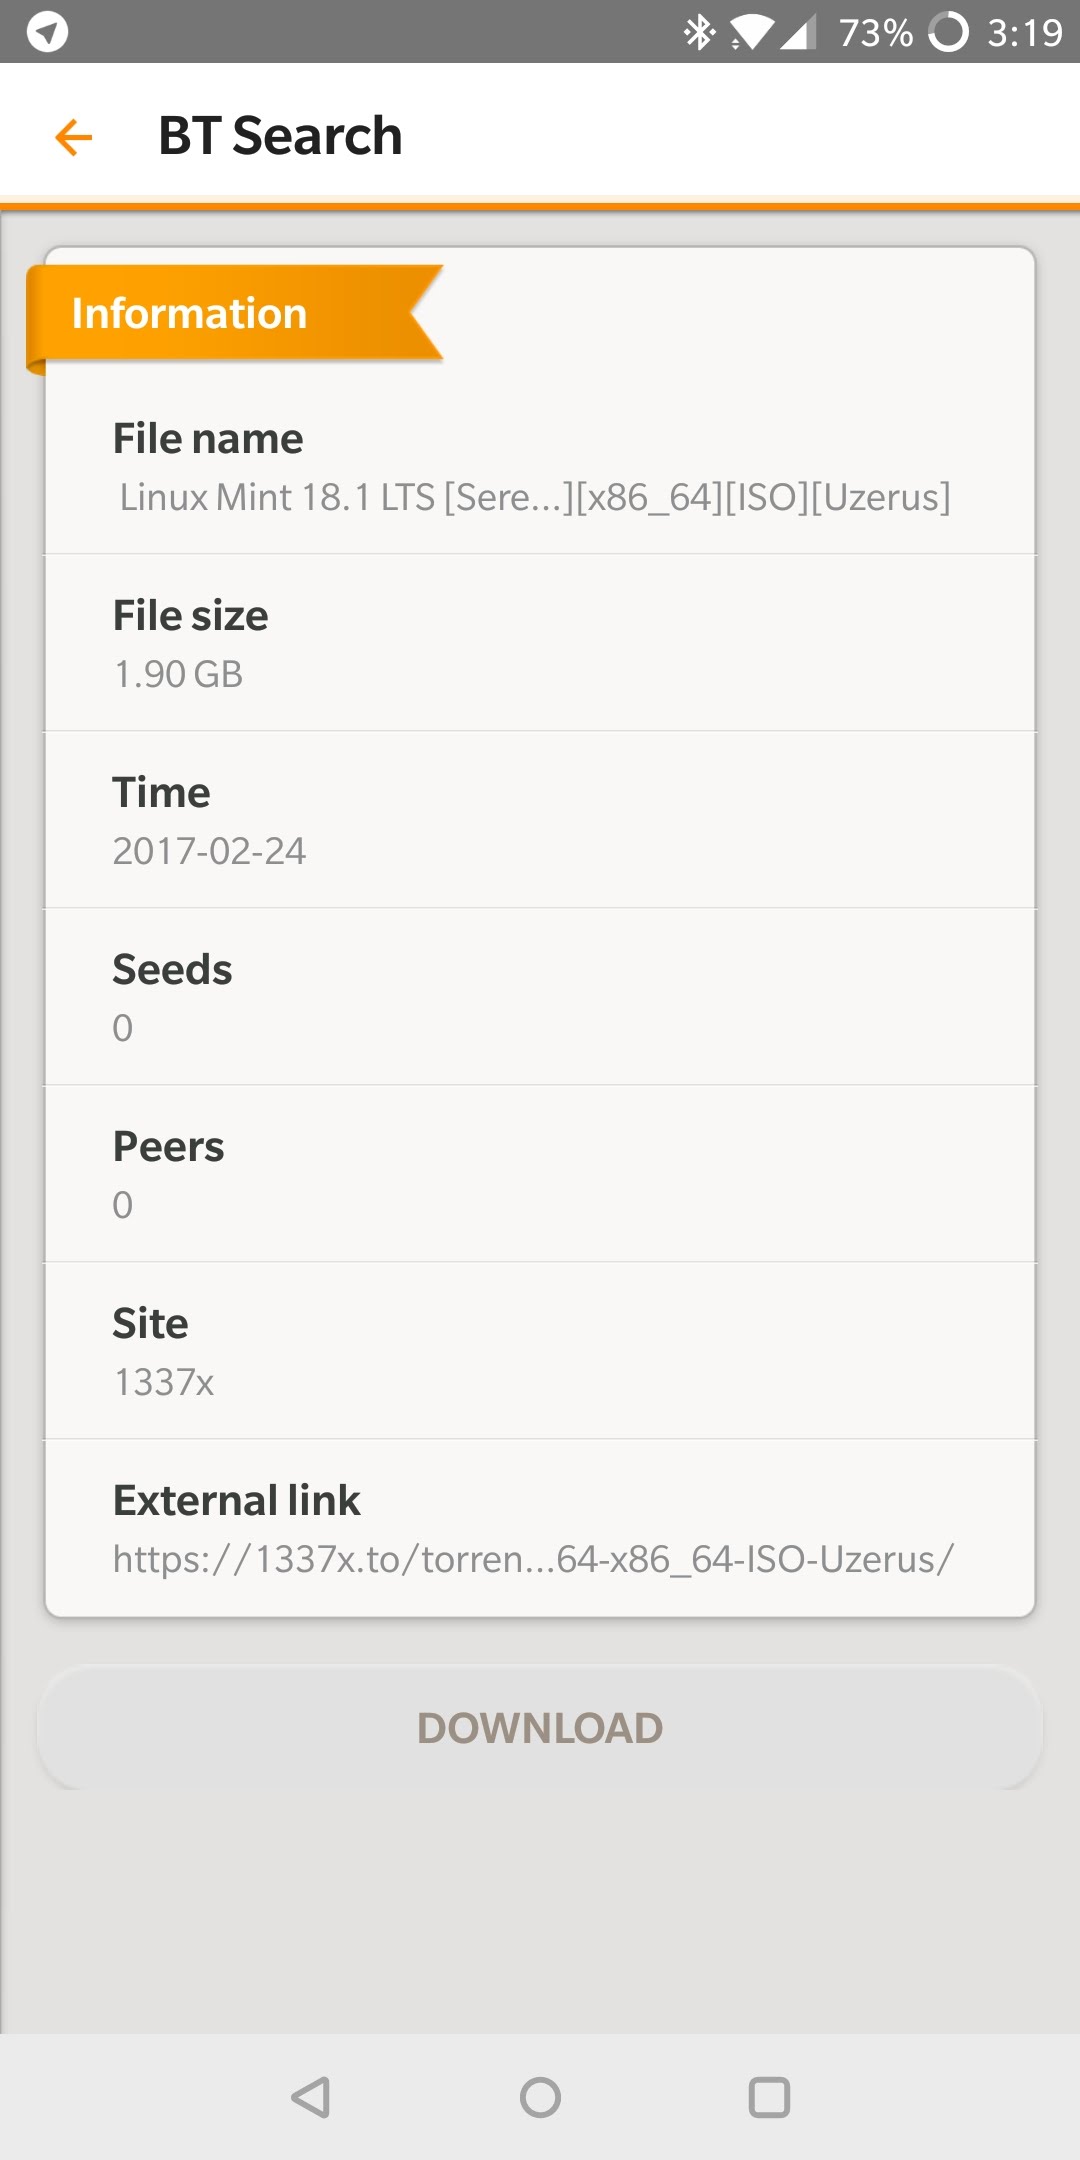
In the hamburger menu are four screens, including the tasks list. BT Search allows you to search for BitTorrent files; just enter your search term, narrow down the categories if needed, and select whichever one best suits you in the menu afterwards. Opening a particular item brings up the torrent information, like name, file size, seeders, and the external link (very useful for checking which site you're downloading from). Alternatively, you can tap the overflow button next to each item in the search to either download straight away or open the external link directly within DS get.


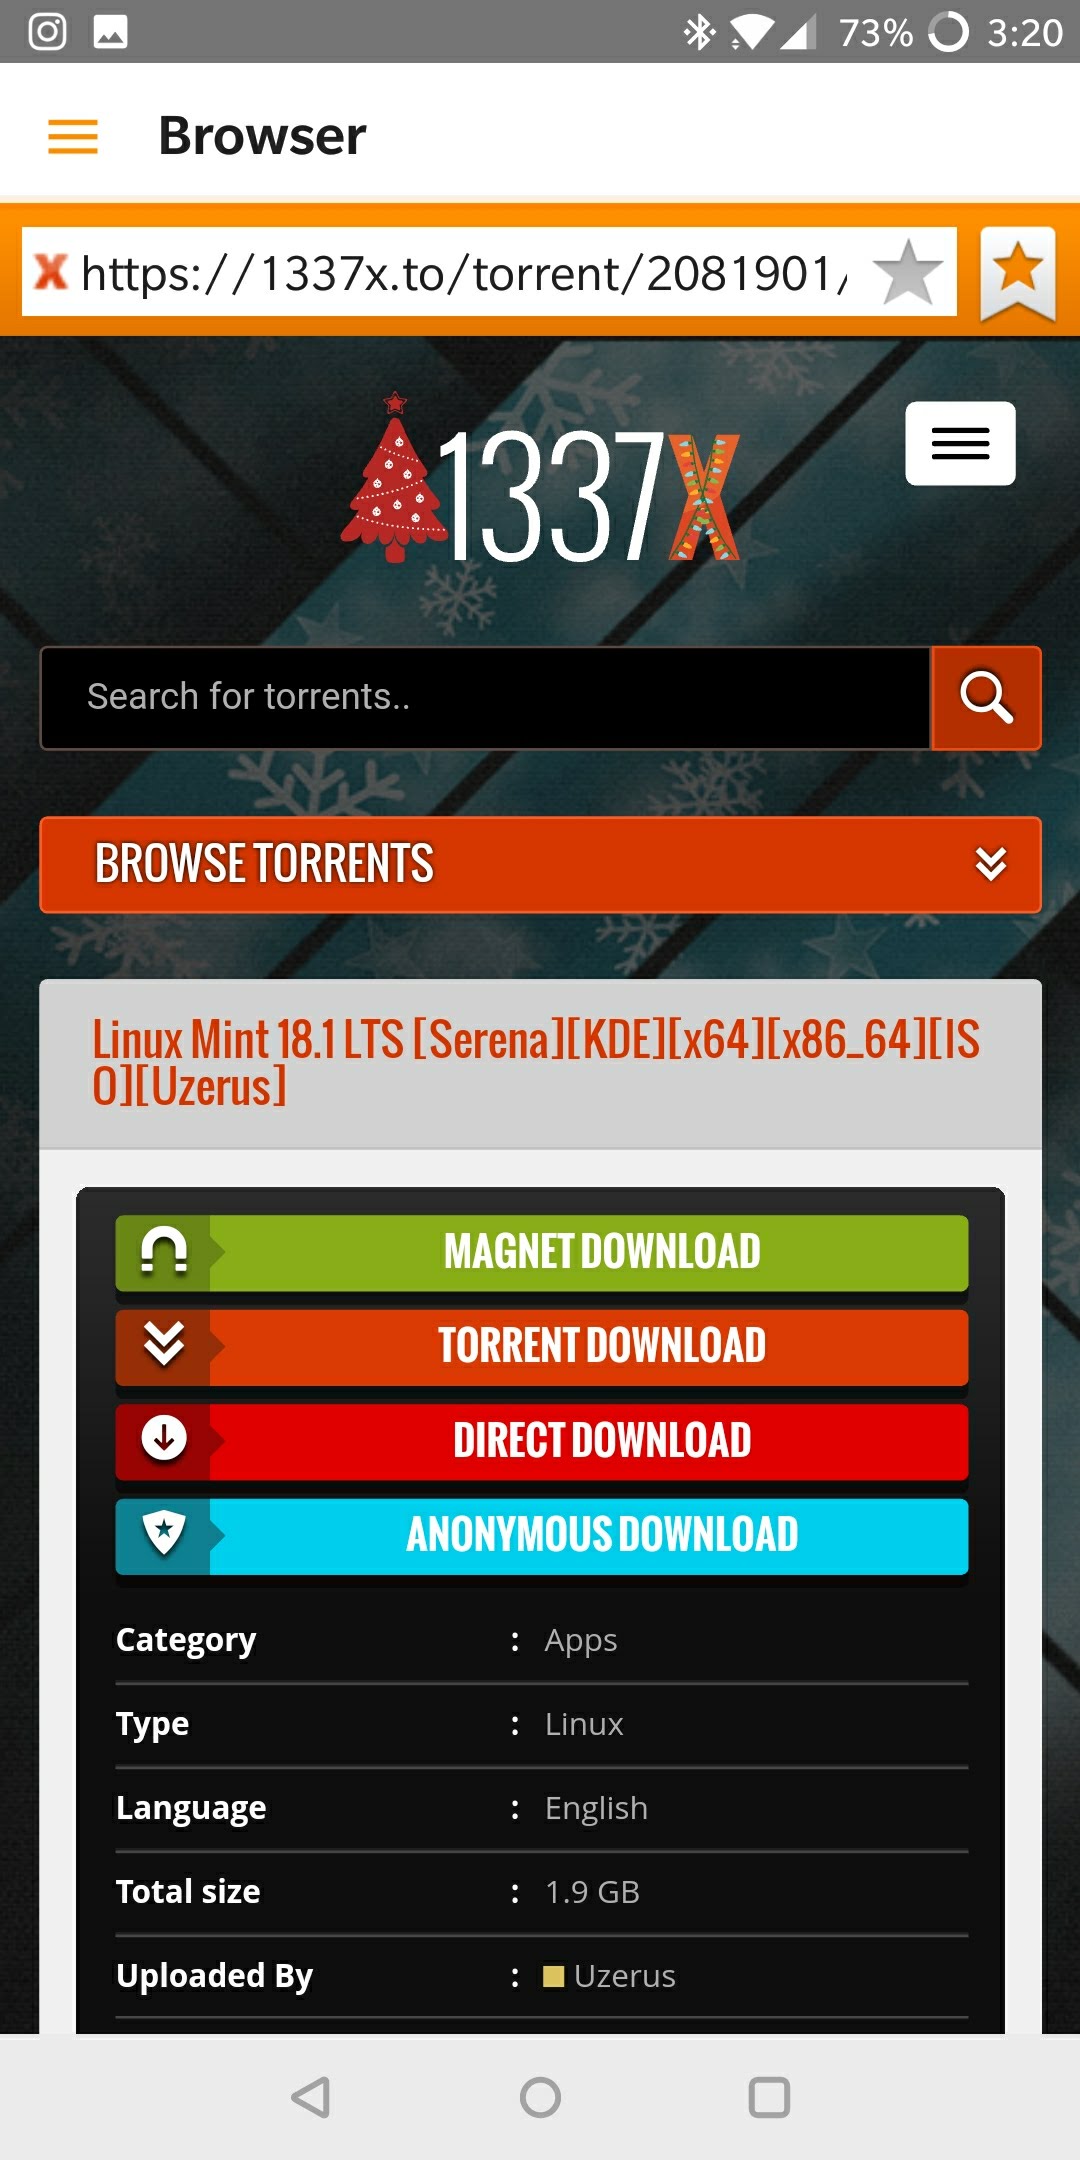
The final two sections, Browser and RSS, are self-explanatory. With the former, you can go directly to whatever site from which you wish to download something and do things manually from there. RSS is obviously where your RSS feeds for downloading would be displayed, but those need to be added in DSM and cannot currently be managed in DS get.
DS note
DS note is Keep, but stored on your NAS instead of Google's servers. This app provides you with note-taking and to-do list creation capabilities. If you've ever used Keep, then DS note will feel very familiar. I've made an attempt to switch over to what Synology offers me — might as well, right? — and so far, the transition has been pretty easy.


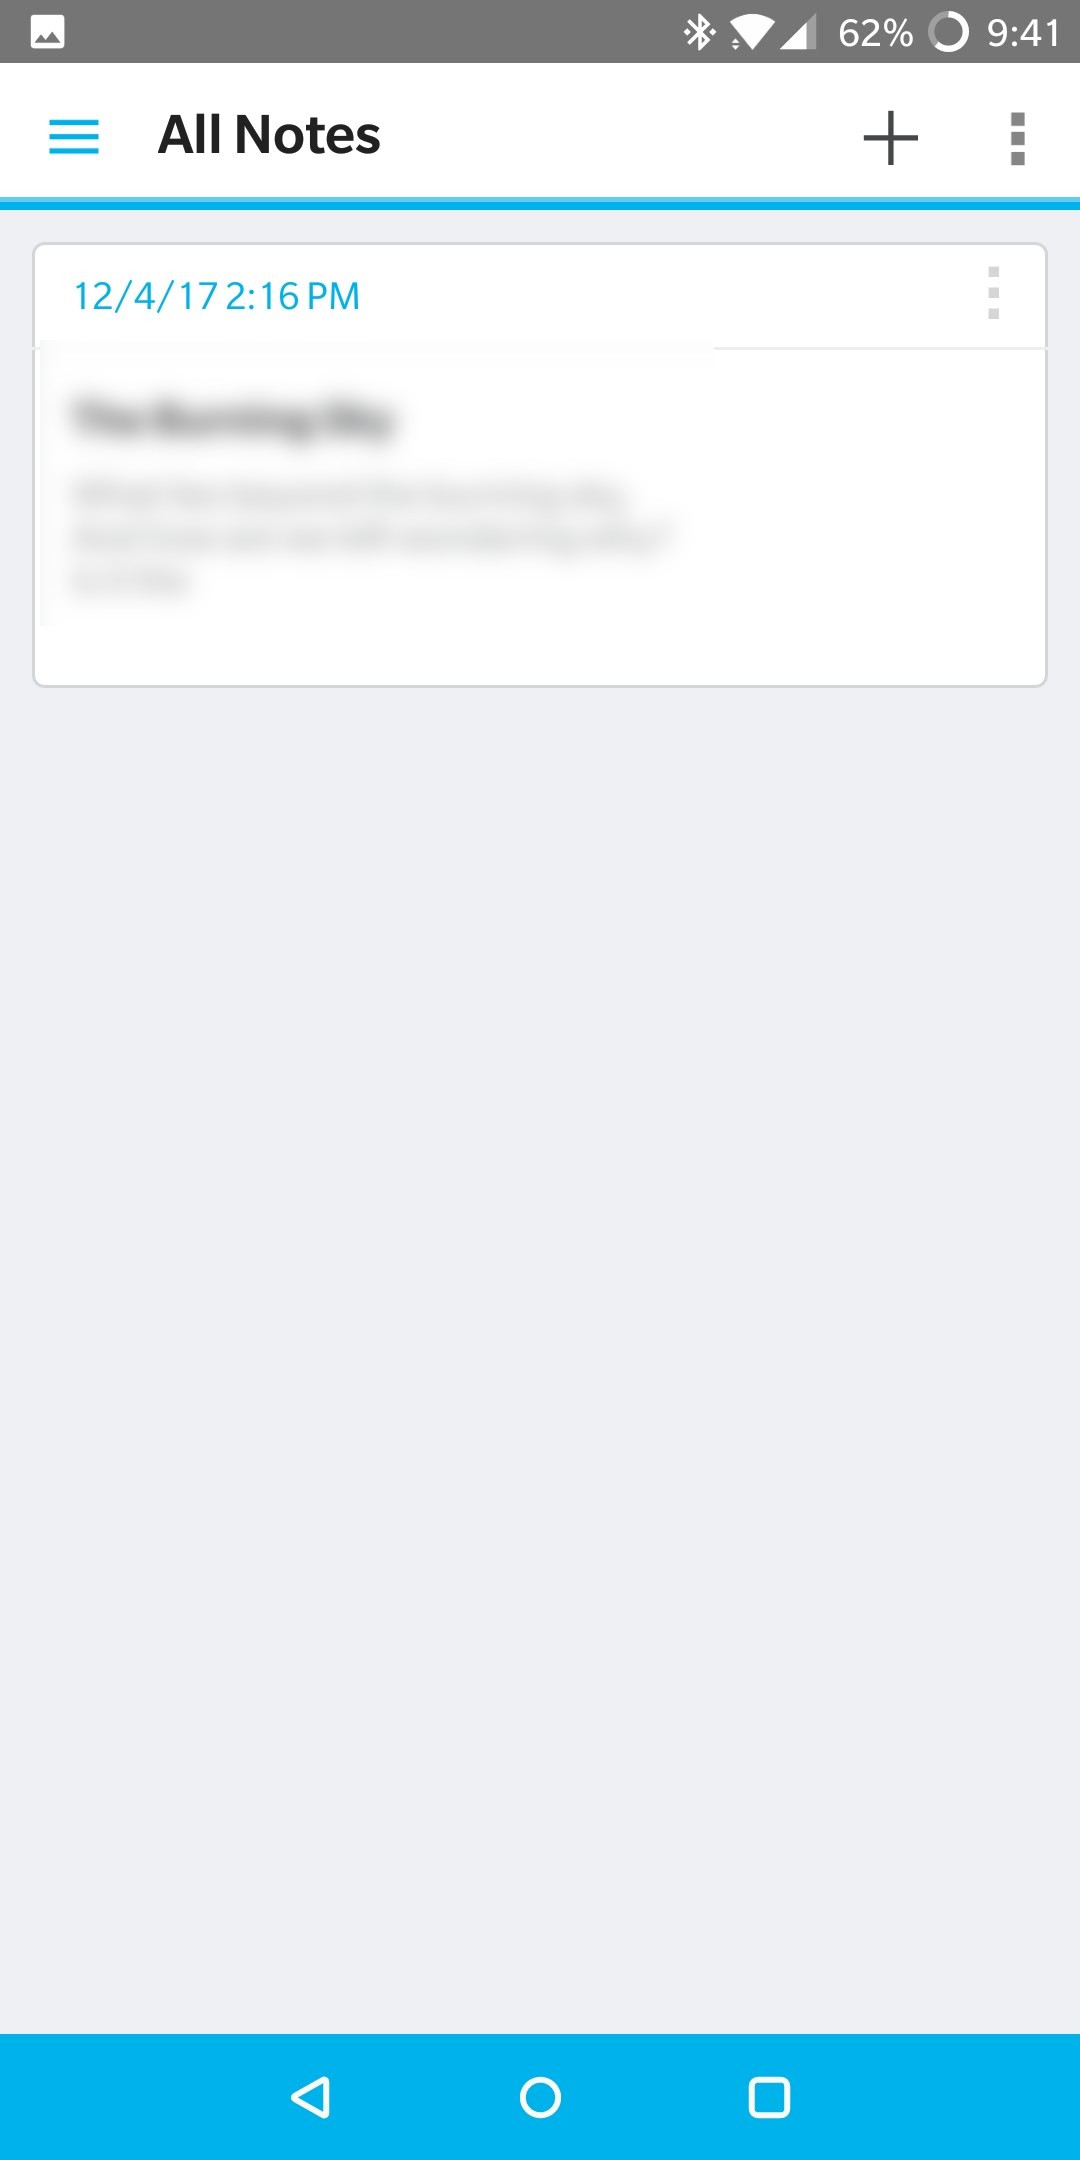
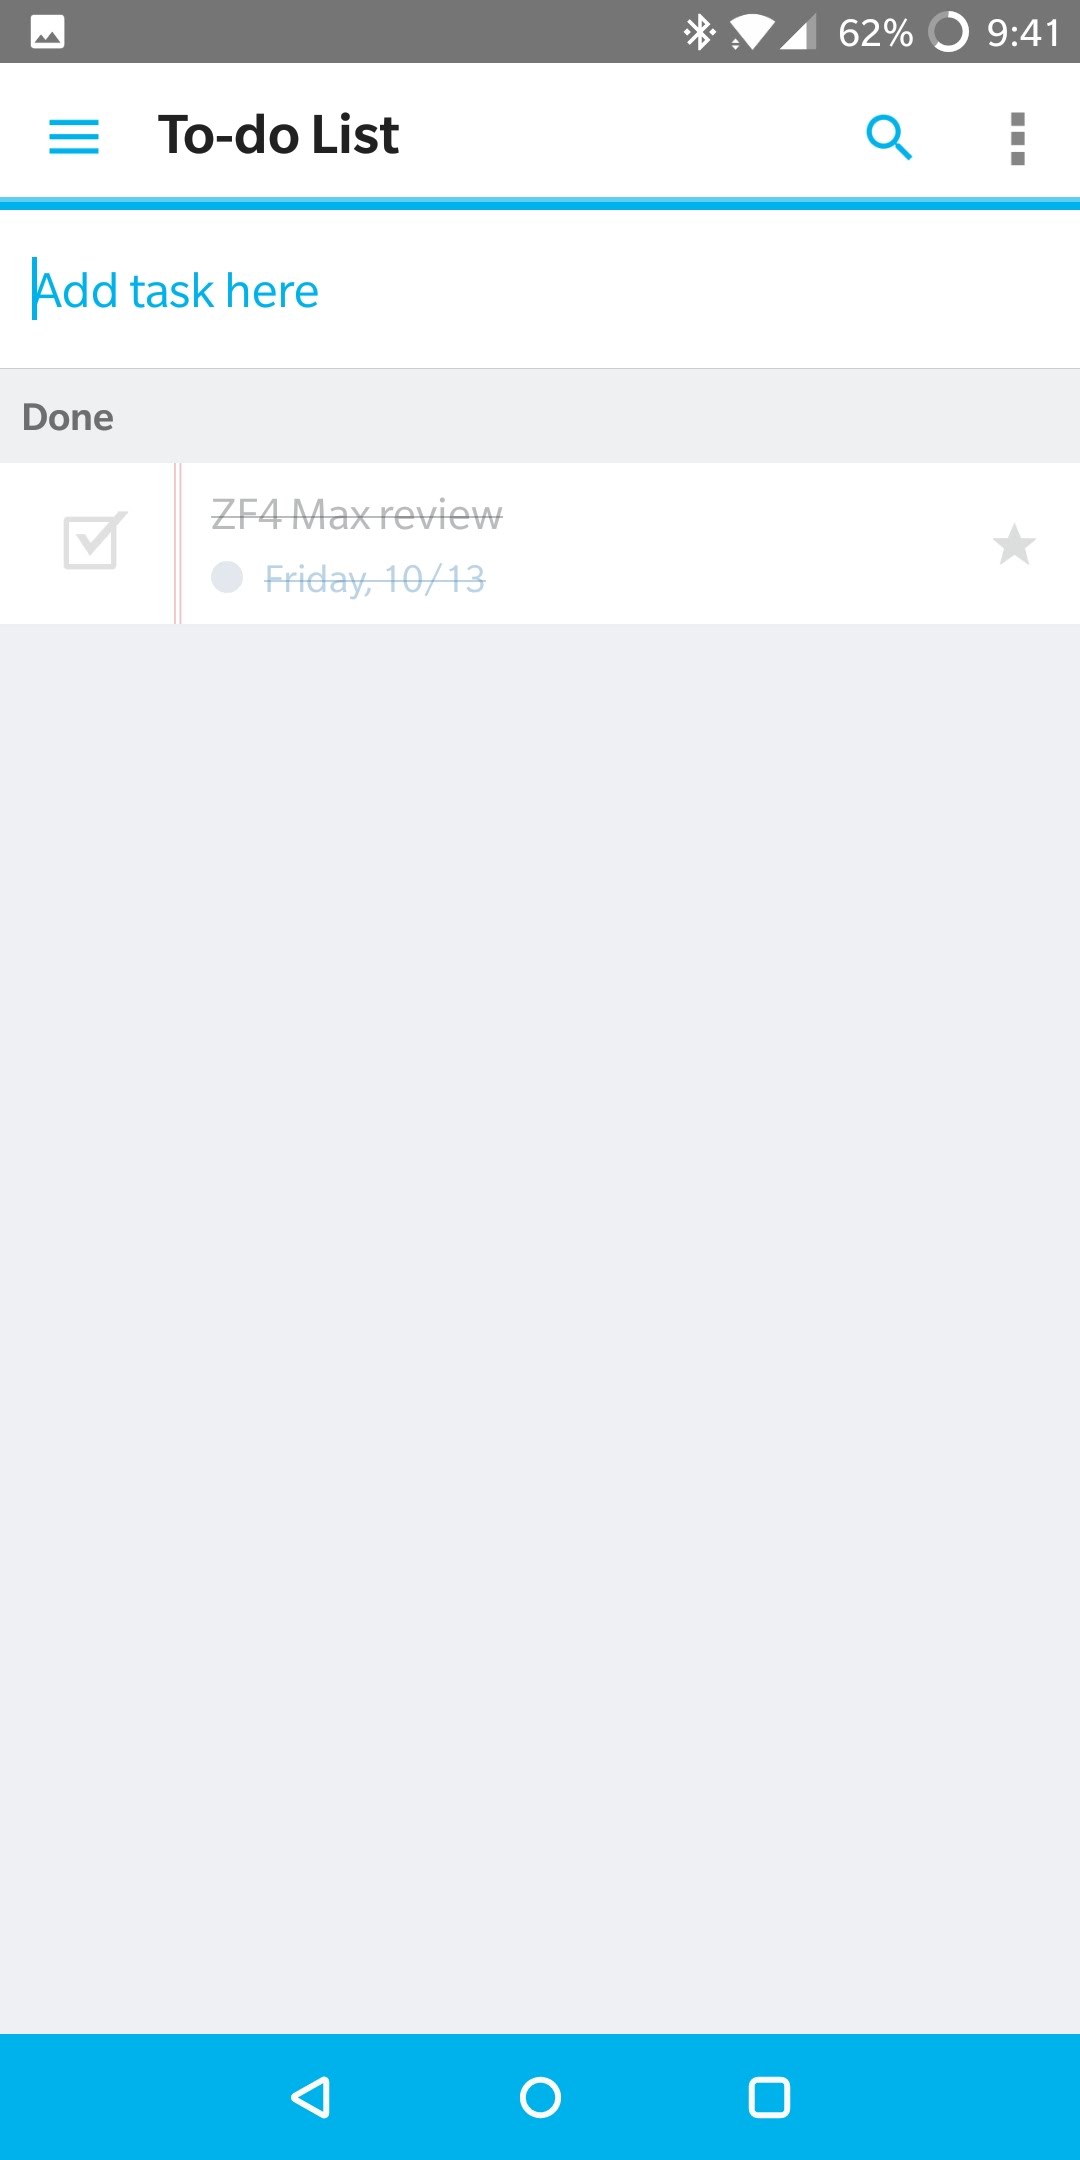
The main screen of the app is the All Notes section, which displays anything you've jotted down, as well as the option to create something new, change the display mode, add an encrypted note, access sort settings, and batch select. Similarly, the To-Do List menu shows you all completed and uncompleted tasks. The text box at the top allows for adding a to-do quickly, while the search icon lets you, well, search through whatever you wrote down to get done. The overflow menu has options for sorting and filtering, as well as batch select.
DS note also has support for notebooks, which reminded me of a functionality that I used heavily in Microsoft OneNote. Each notebook, when tapped, opens a screen much like the All Notes menu. You can also rename, add a favorite, share, or add to your shelf (which is a collection of multiple notebooks). DS note also offers you the ability to tag notes to your liking and to share things with other users on your server. Going back to the Keep similarities, you can create notes based on photos (from the camera and/or gallery), videos, voice, or attachments. I personally don't use such things, but they're there if you need them.
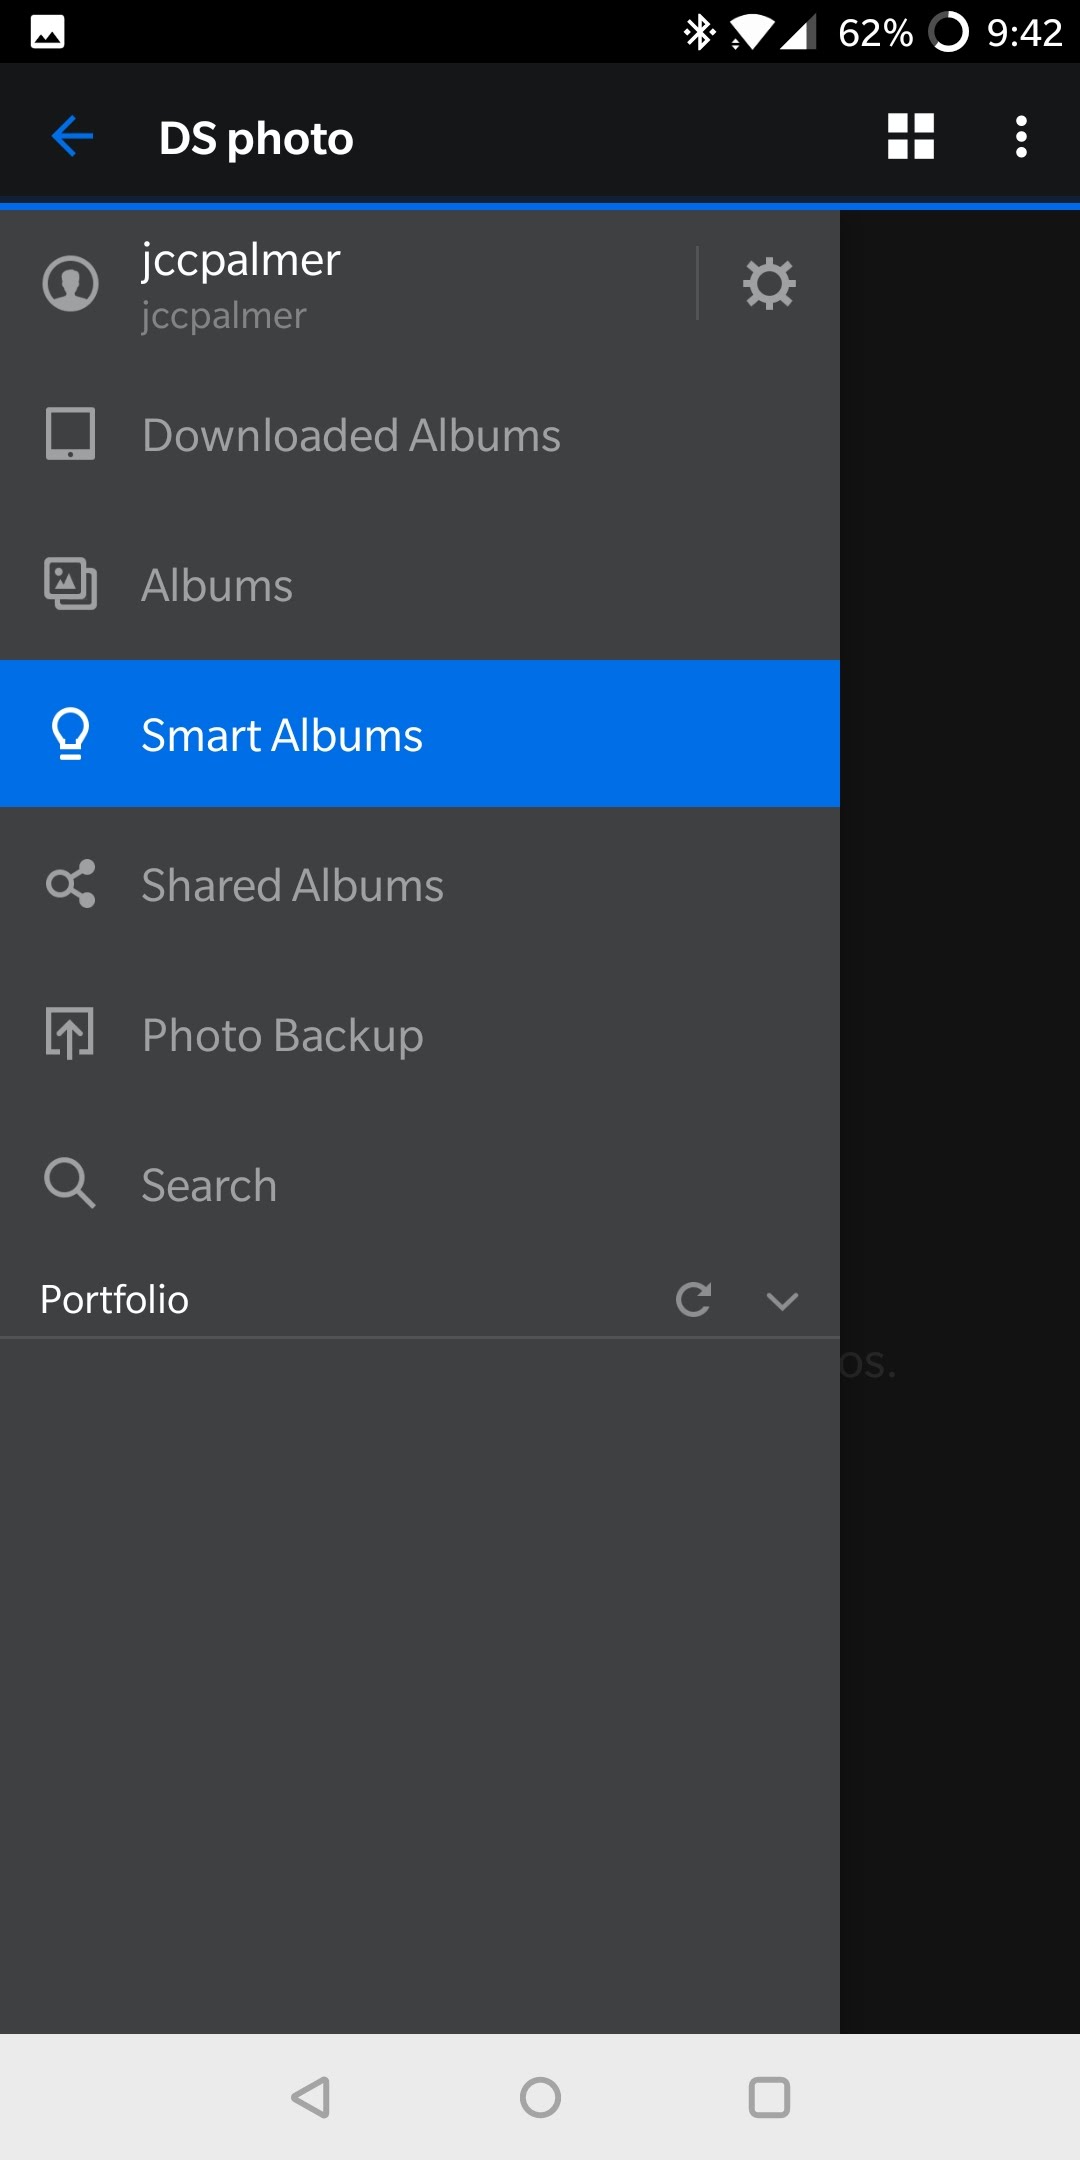
DS photo
Coming in as the run-of-the-mill gallery app, DS photo pairs with the Photo Station package to conveniently display all of the photographs that you have stored on your NAS based on album (i.e. folders) stored in the Photos root directory. At time of writing, I only had one section of pictures on my DS1517+; my collection of badass wallpapers that I've gathered over the years seemed quite important to have backed up. As an avid Google Photos user, I saw little use in DS photo initially.


I still don't use the app too often, but there is an Android TV version if you need that. I'm not a photographer, but DS photo is well-designed and functions as you might expect. However, what may appeal to some is the auto camera backup feature, giving you your own Google Photos cloud solution (without all the Assistant stuff obviously). Any album can be downloaded to the device for offline viewing or shared with other users, and you can create what Synology calls "smart albums" (which I did not get around to creating during my testing). The dark theme is a nice touch, helping your photos stand out more when viewing them.
I like DS photo, even though I don't use it all that often. C'est la vie.
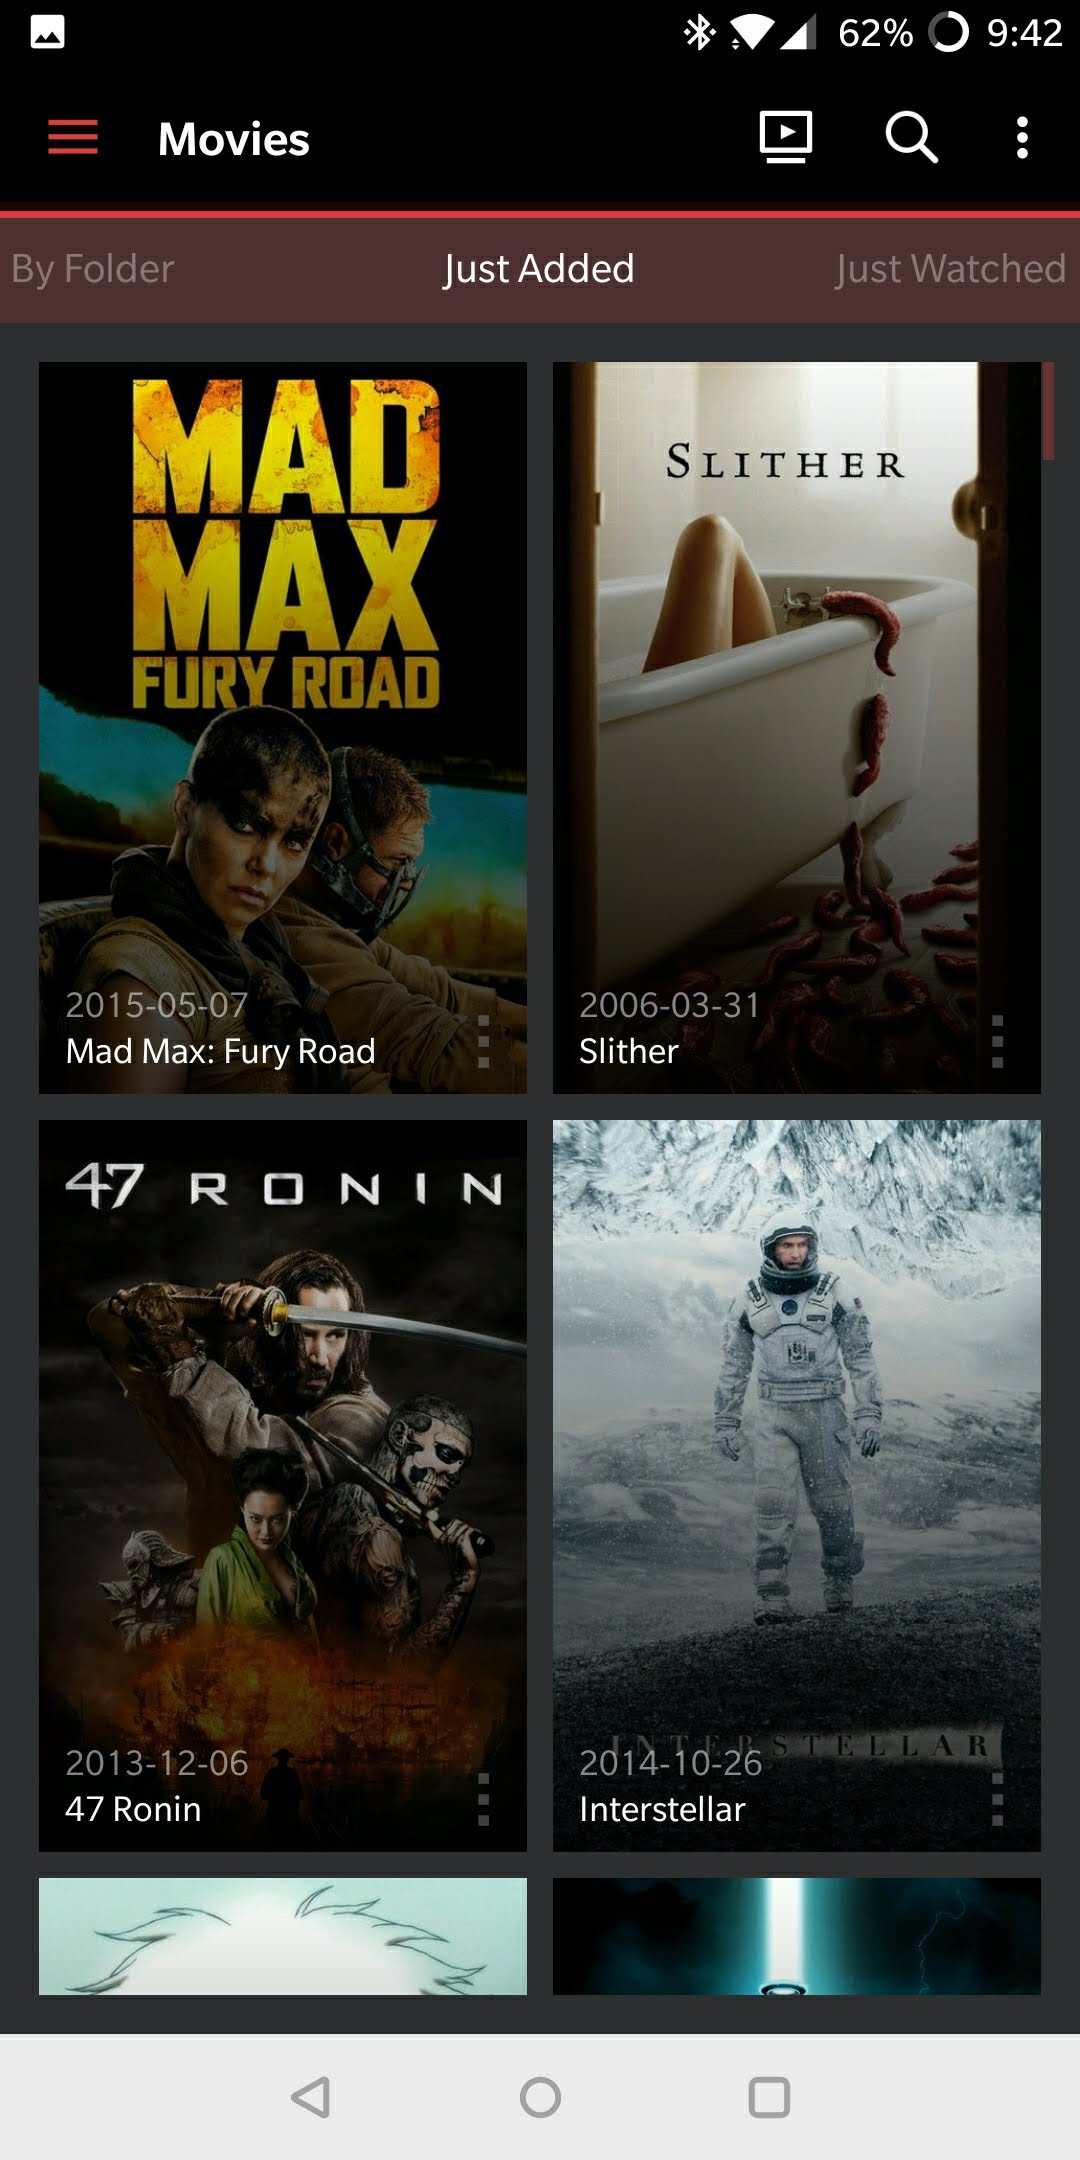
DS video
Like DS audio, DS video is a great app that I never use thanks to Plex (and it also has an Android TV variant). However, if you don't use Plex (or Kodi), or have a Pass membership, then this app might be a good option for you. Similar to DS photo, this is your standard video player for every A/V file on your NAS. Anything you upload to the Videos root directory, assuming that you have the Video Station package installed, will appear here. Movies are separated from TV shows, TV recordings (a cool feature that I cannot take advantage of), and home videos (i.e. recordings from your phone).


I give DS video/Video Station credit for giving a Plex-like experience. Selecting a movie will bring up an info screen with runtime, release date, a synopsis, cast, and links to the IMDb page. You also have the option to save whatever file you want to your device. Like DS photo, the dark theme helps your media stand out a bit better than the rest of Synology's bright white app backgrounds.
Settings are available for video transcoding, subtitles, and AC3 passthrough. The app can also act like a remote for its Android TV counterpart, but that option can be disabled to save battery life. Like I said, I don't use this app much thanks to Plex, but I'm really glad it's here for the people that want it.
Moments
Finally, we have Moments, the other of Synology's two new services. Also in beta at time of writing, Moments seems like Synology's attempt to add Google Assistant-style functionality to your photos. There isn't much to say on Moments from me, since I'm not storing more than wallpapers on my NAS. However, the basic premise is this: Moments gives you the ability to view the photos and videos stored on your DiskStation (much like DS photo and DS video) in chronological order, after which Moments sorts them into "topical albums" and creates "fun and engaging life moments" out of them.


It's not a bad idea in theory, but Google Photos does this for me already — I do realize that some people interested in Synology's products don't use Photos or any Google product if they can help it. Being in beta, I am sure that Moments will improve over time, especially when it comes to the stable package track. I found Drive to actually be useful, able to completely replace DS cloud on my phone. Moments, on the other hand, is not one I keep installed on my main device for long. I will keep my eye on it, though, so hopefully it gets better.
The app description is not super helpful, by the way. Not to mention that it's littered with errors.
Using the DS418play: Media server and backup machine (Ryan)
The DS418play is Synology's latest media-focused NAS box. It has four drive bays, a Celeron J3355 CPU, 2GB of RAM, and a 4K hardware video transcoding engine. The retail cost before hard drives is $430. Throw in a few 4TB drives, and you're looking at the better part of a thousand dollars.
My initial impression of the hardware was positive. The drive bays lock into place to keep the drives secure. There's a small physical locking mechanism that requires a key, but it doesn't look like the most secure lock. It's probably just there to prevent opportunistic tampering or accidental opening.
With the drives mounted, the DS418play is a hefty little cube, but it looks neat in a blatantly nerdy way. I originally intended to have it out in the open across the room from my desk. This would allow me to see the status LEDs on the front of the device. There's one for each drive, as well as one for the overall system. However, one of the first things I learned about living with a NAS is that it's louder than I expected.
For the first day and a half, the DS418play churned constantly to verify the RAID array. The sound of three hard drives clicking in unison is louder than you probably expect, and it all seems to leak out from every gap in the enclosure. This isn't Synology's fault—mechanical drives make noise. However, I finally had to move the NAS into my closet to muffle the noise a bit.
Backups
My first task with this NAS was to get a good backup solution running. For local files on my PC, I decided to go with the standard Cloud Station package. Synology is testing a new sync solution called Drive, but I didn't find it very easy to use. Cloud Station uses a PC application to sync files across the network to your Synology NAS. I configured it to sync both ways, so my NAS has the same files as the computer in the selected directories, but Synology also maintains multiple file versions. For anything I don't want to keep on my PC anymore, I just use a mapped network drive to dump it into the appropriate folder on my NAS.
Many of my files end up in the cloud as they're created—for example, photos and documents. For these, I set up Cloud Sync on the NAS. This package supports Dropbox, Drive, OneDrive, and basically everything else. Dropbox is the big one for me, so I logged in with my account and configured important folders like my photos to sync to the NAS. When I snap photos, they go up to Dropbox and are replicated on the NAS.
Media server
Being a media-focused NAS, I planned to use the DS418play to serve up videos on my devices. There is a hardware video decoder, but it's only for the stock Video Station player. I don't hate Video Station, but it's just not as good as Plex. If I wanted to use Plex on the Synology, it would be running in CPU mode, and the Celeron J3355 is nothing special. It can transcode a lower bitrate 1080p file, but even then it pushes the hardware.
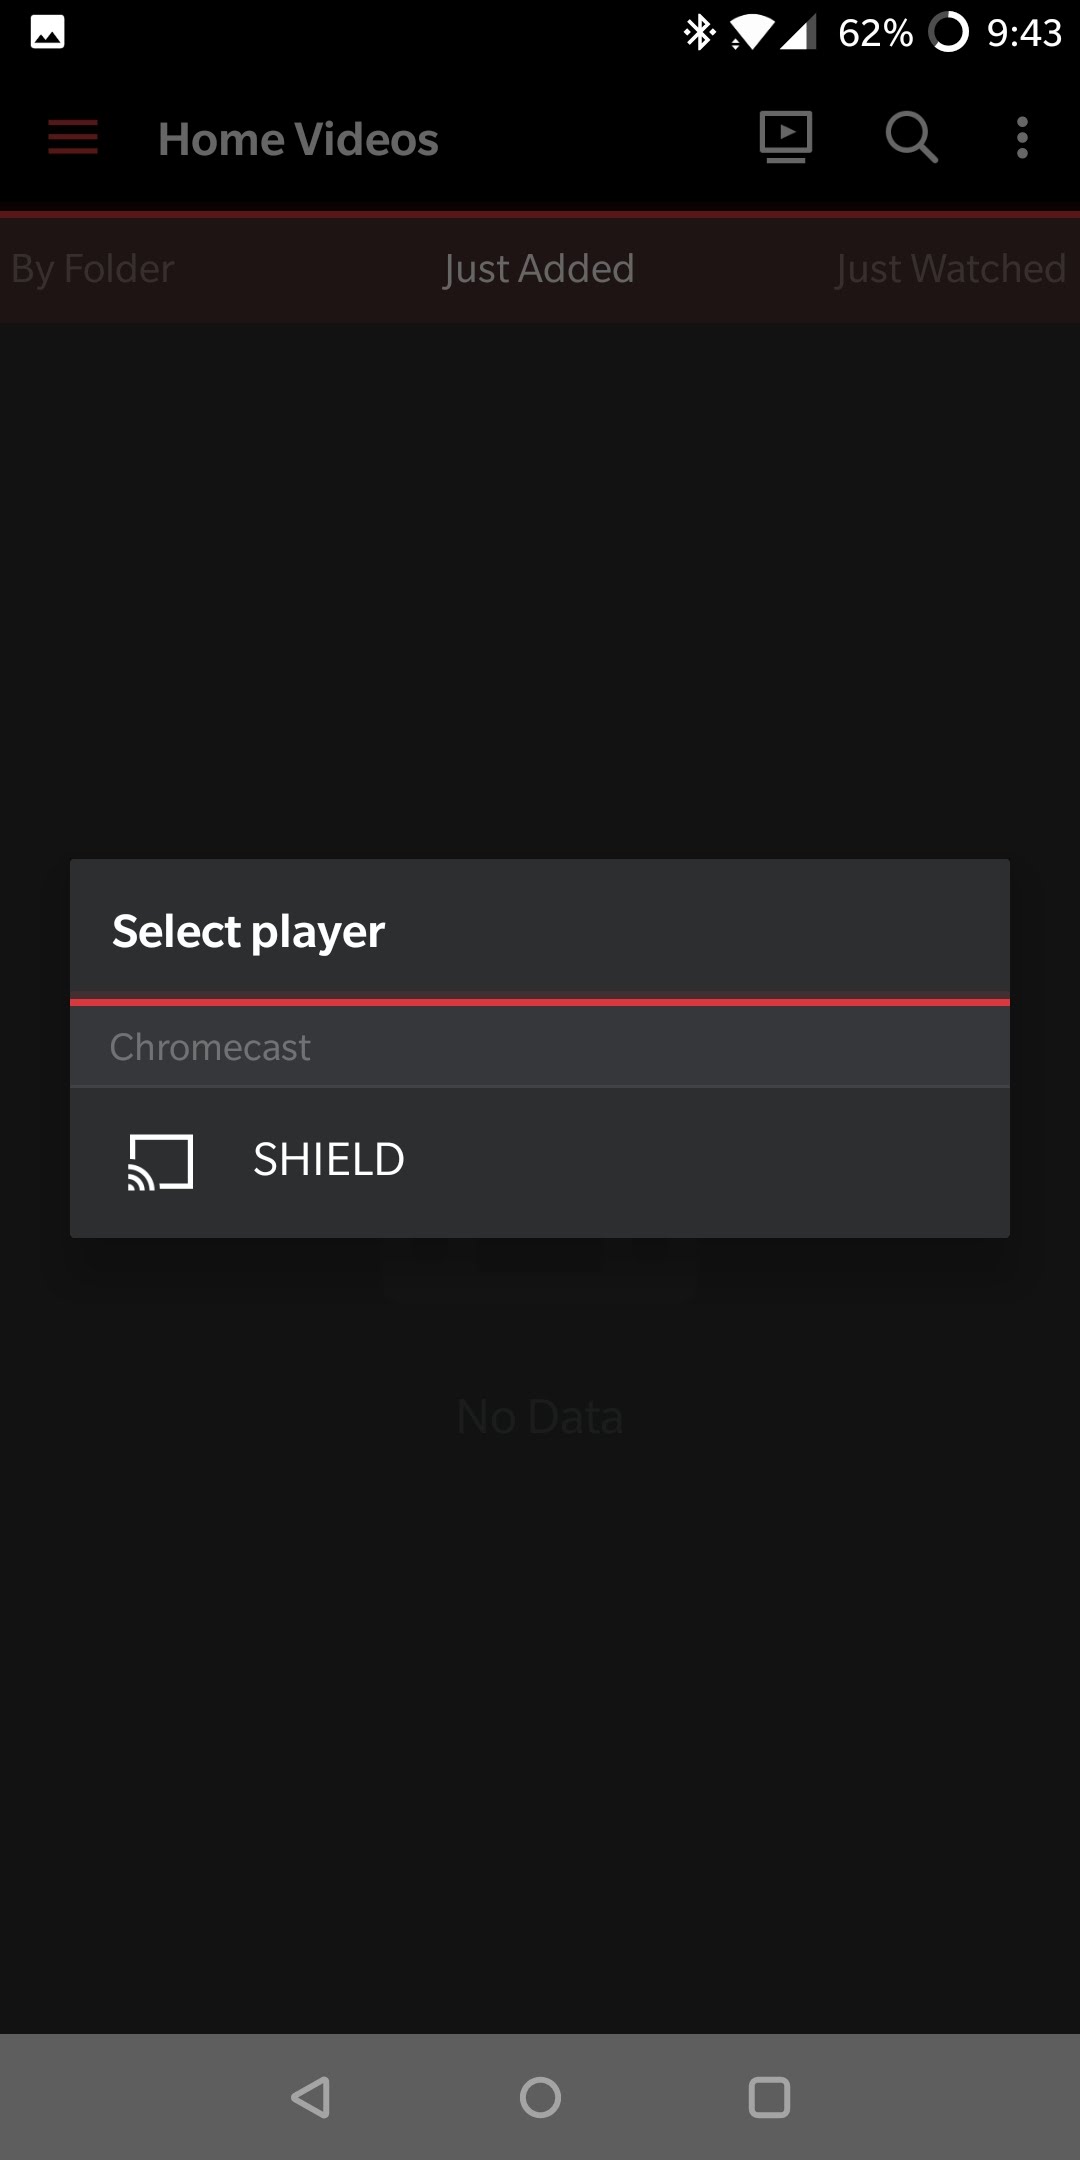
My first option to fix this was a mod for the Plex package to enable hardware decoding. It looked a bit messy, and people reported various issues. I found a much better option was my NVIDIA Shield. The Shield and NAS are both wired to the network with a gigabit switch. So, I mounted the NAS as a network location on the Shield, and added the video directory to the console's built-in Plex server. The Shield's server remains active even when the device is asleep, and it's an absolute monster when it comes to transcoding video.
Conclusion
As a backup device, the DS418play is everything I could want. DSM is a robust web-based interface, and the device works as a mapped network drive in Windows with high throughput. I love that I can have data sync down to the NAS directly from the cloud, and it's easy to dump my files on it for archival.
I'm happy with this device as a media server as well, but most of Synology's NAS boxes would work just as well. The hardware decoder is too limited as it won't support Plex without fiddling, and the CPU isn't quite beefy enough to handle transcoding. However, the Shield plugs in to fill that gap ably. The DS418play is still a good choice for a media server because it has four bays and the Celeron chip is a big step up from the ARM chip in Synology's cheaper 4-bay unit.
The asking price is high, but a powerful NAS is never going to be cheap. This device is more capable than a 2-bay NAS, but it's not as extravagant as the "Plus" series devices. The DS418play feels right for a power user.
Buy: Amazon
Using the DS718+: Semi-portable and very flexible (Cody)
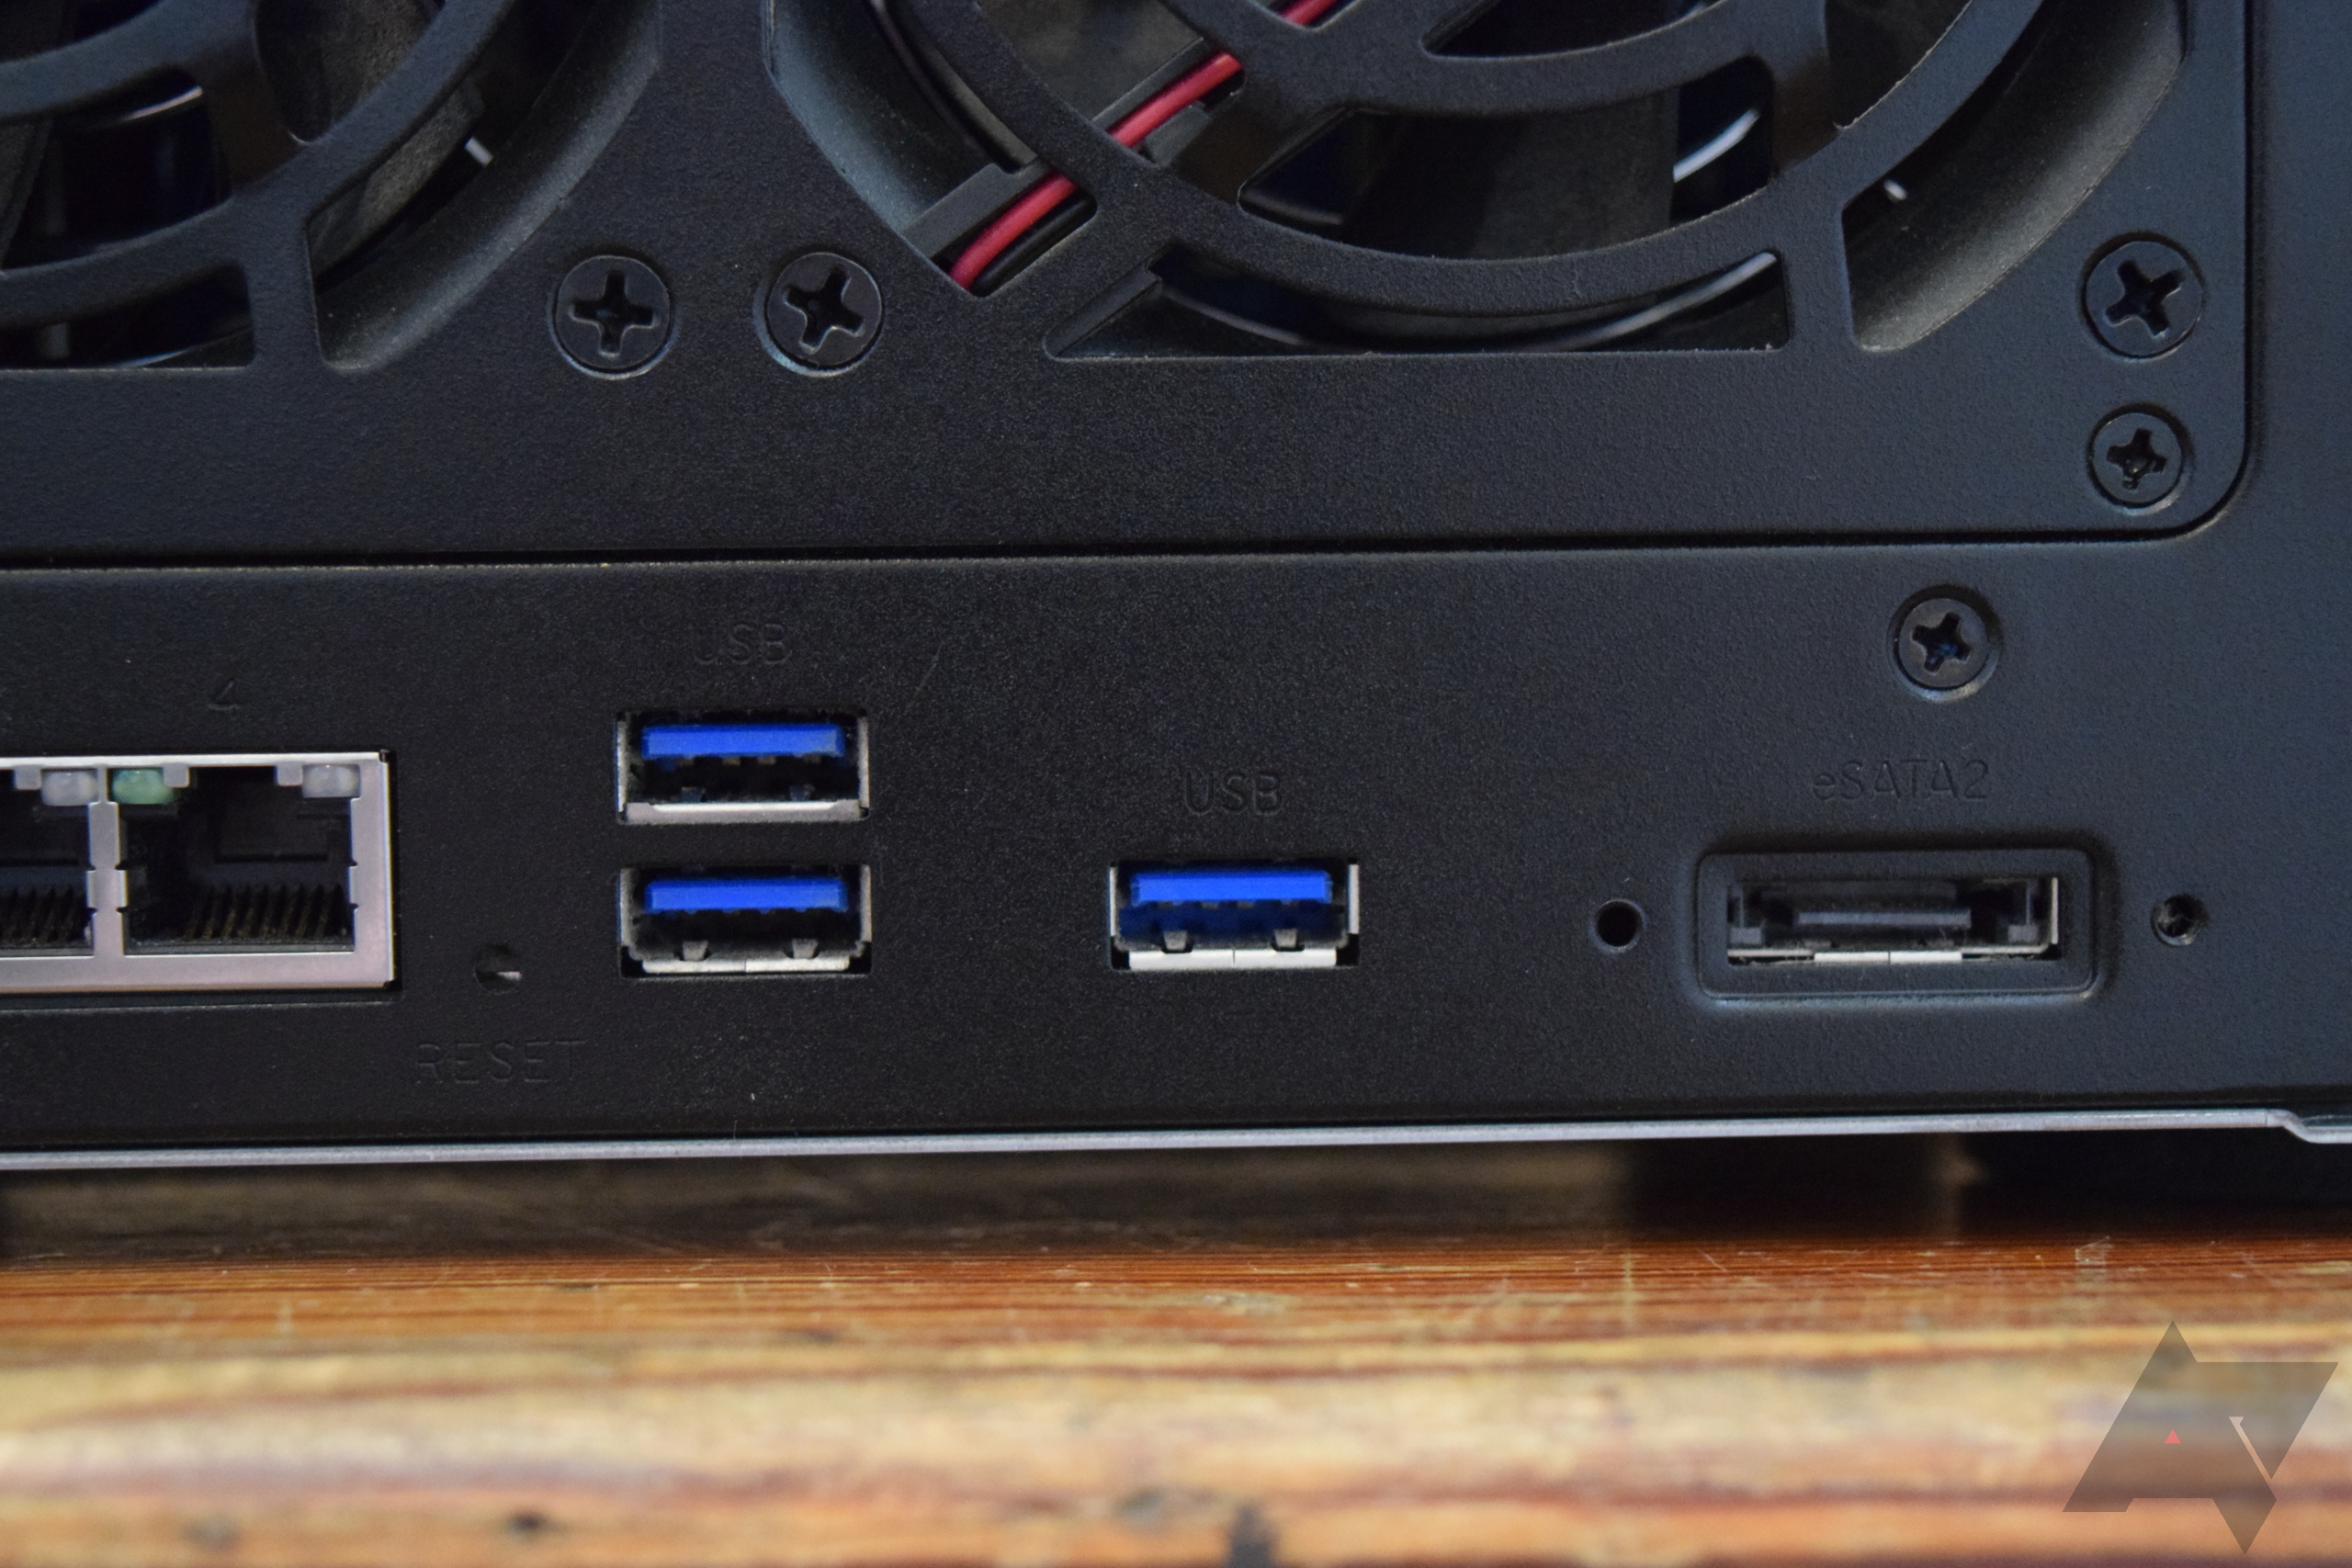
The DS718+ is one of Synology's smallest NAS machines, harboring just two drive bays. For $400, this model comes with an Intel Celeron J3455 64-bit quad-core processor clocked at 1.5 GHz. It has 2GB RAM, but can be expanded to 6GB, or possibly more if some forum posts are to be believed. Two gigabit network ports are located on the back next to a pair of USB 3.0 ports and an eSATA port. There's also an additional USB 3.0 port on the front.
Two drives in one small(-ish) box
It might sound odd to want a NAS with only two drives, but small NAS boxes have become a popular solution for people that have to deal with a lot of data while they're traveling, especially if it has to be shared among others. For example, an older model Synology NAS is used by the Fstoppers crew for video editing.
The DS718+ is "thin" enough to fit into full-size luggage with a little bit of padding on both sides, and the outer shell is very sturdy and could certainly survive a bit of abuse before taking damage. Of course, this is still a fairly heavy box, so I wouldn't suggest carrying it in anything other than a rolling suitcase. Also remember that hard disks with spinning platters are contained within, so they should still be handled as delicately as possible to prevent damage to the spinning platters.
Since there can only be two drives, the RAID configurations are limited to either striped arrays (high performance) or mirrored (higher redundancy). I don't consider a NAS to be a truly permanent backup solution, but in a mirrored configuration, it's good enough for immediate use. This is a good NAS to travel with if you need to have lots of storage space available.
Media server
Like Ryan and Jordan, I use Plex for some of my media consumption. In normal usage, I never ran into a problem playing videos at the highest quality I had available. But that statement comes with a few footnotes. For starters, while I have a 4K television, I don't really collect 4K content. The other factor to consider is that Plex can be fairly clever about when video should be transcoded before streaming or if it can be cleanly decoded on the playing device.
The DS718+ is advertised as capable of transcoding 4K video in real-time, and that's technically true. However, when we talk about 4K, we're only addressing a loose range of resolutions. Things like encoding format, framerate, audio channels, expanded color gamut (read: HDR), and many other details can complicate things immensely. Technical specs for the DS718+ do clarify some limits, basically that it can handle 2-channel, 30 FPS videos encoded in H.265/HEVC or H.264/AVC. Unfortunately, every 4K video I could drum up was too much to handle, and I think that's going to be fairly common for most 4K videos that are "available" out there. The result was playback that could only run for a few seconds before pausing while the transcoder caught up. It didn't matter if I tried it with Plex or DS Video, the results were the same.
But as I mentioned above, Plex can often detect the native decoding capabilities of the TV or set-top box and potentially stream the original file without any transcoding. Since both my TV and Shield could handle anything I threw at them, I never had any problems... Unless I forced transcoding, which would only make sense if you're testing like I was.
Noise
While we're on the subject of watching TV, I want to say that I'd never want to put this NAS box in the same room with me, and that's because of noise. The chunking sound from physical hard disks combined with a constantly running fan are always there, and it becomes fairly anxiety-inducing after a while. There's no sound damping and the metal case almost amplifies the noise.
It might not be considered loud by everybody, and I'd compare it roughly to the sound of a gaming desktop. I remember this level of noise was fairly normal back in the late 90s, but I find it much harder to have near me now that I'm accustomed to a virtually silent MacBook Pro and various other quiet or completely silent gadgets. I really like using a NAS as a media server, but I have to recommend placing it in a different room or constructing something to stifle the noise (while still getting airflow).
Conclusion
I gave up desktop computers a little over a decade ago after an electrical storm played peekaboo with my last one. Given the type of work I was doing then, and the work I went on to do later, portability was crucial, so it was a no-brainer to go 100% laptop. I've never looked back on that decision, but there are some things I miss, like having mountains of (upgradeable) storage. If I can't have that type of storage in a laptop, the next best option is having it in a NAS that can be accessed from everywhere in my house, and even through the Internet.
In the spirit of staying mobile, I like that the DS718+ is small enough to fit in a suitcase and carried onto a plane. It's fast, high-availability storage combined with more than enough computing power to run a Plex server, establish Git repositories, set up a web server, and much more. All of this can be done with a custom Linux machine, but that requires a ton of time to maintain.
The price is probably higher than most of us would normally spend on a secondary computer, especially one with a relatively weak CPU, but I think the advantages of DSM make it a worthwhile investment. Synology maintains a steady update schedule and appears to do thorough testing, so my experience has been basically issue-free. In my perspective, as somebody that already doesn't have enough time in the day, it's worth a little more money to have something that solves a few of my problems and doesn't add any new ones.
Buy: Amazon
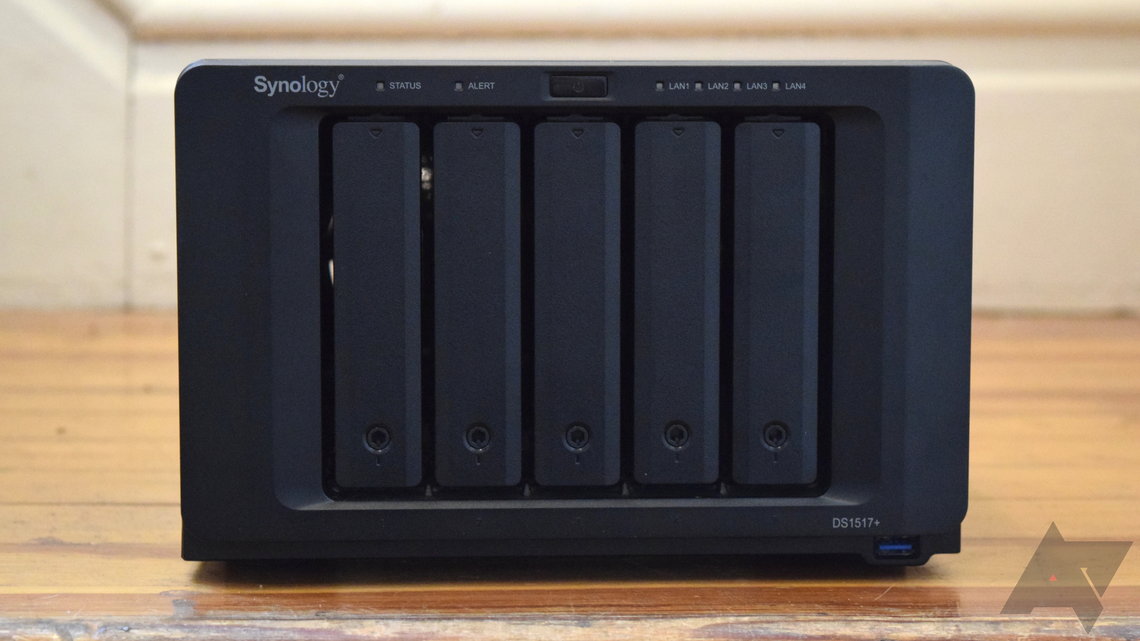
Using the DS1517+: A paranoid nerd's overkill dream (Jordan)

Overview
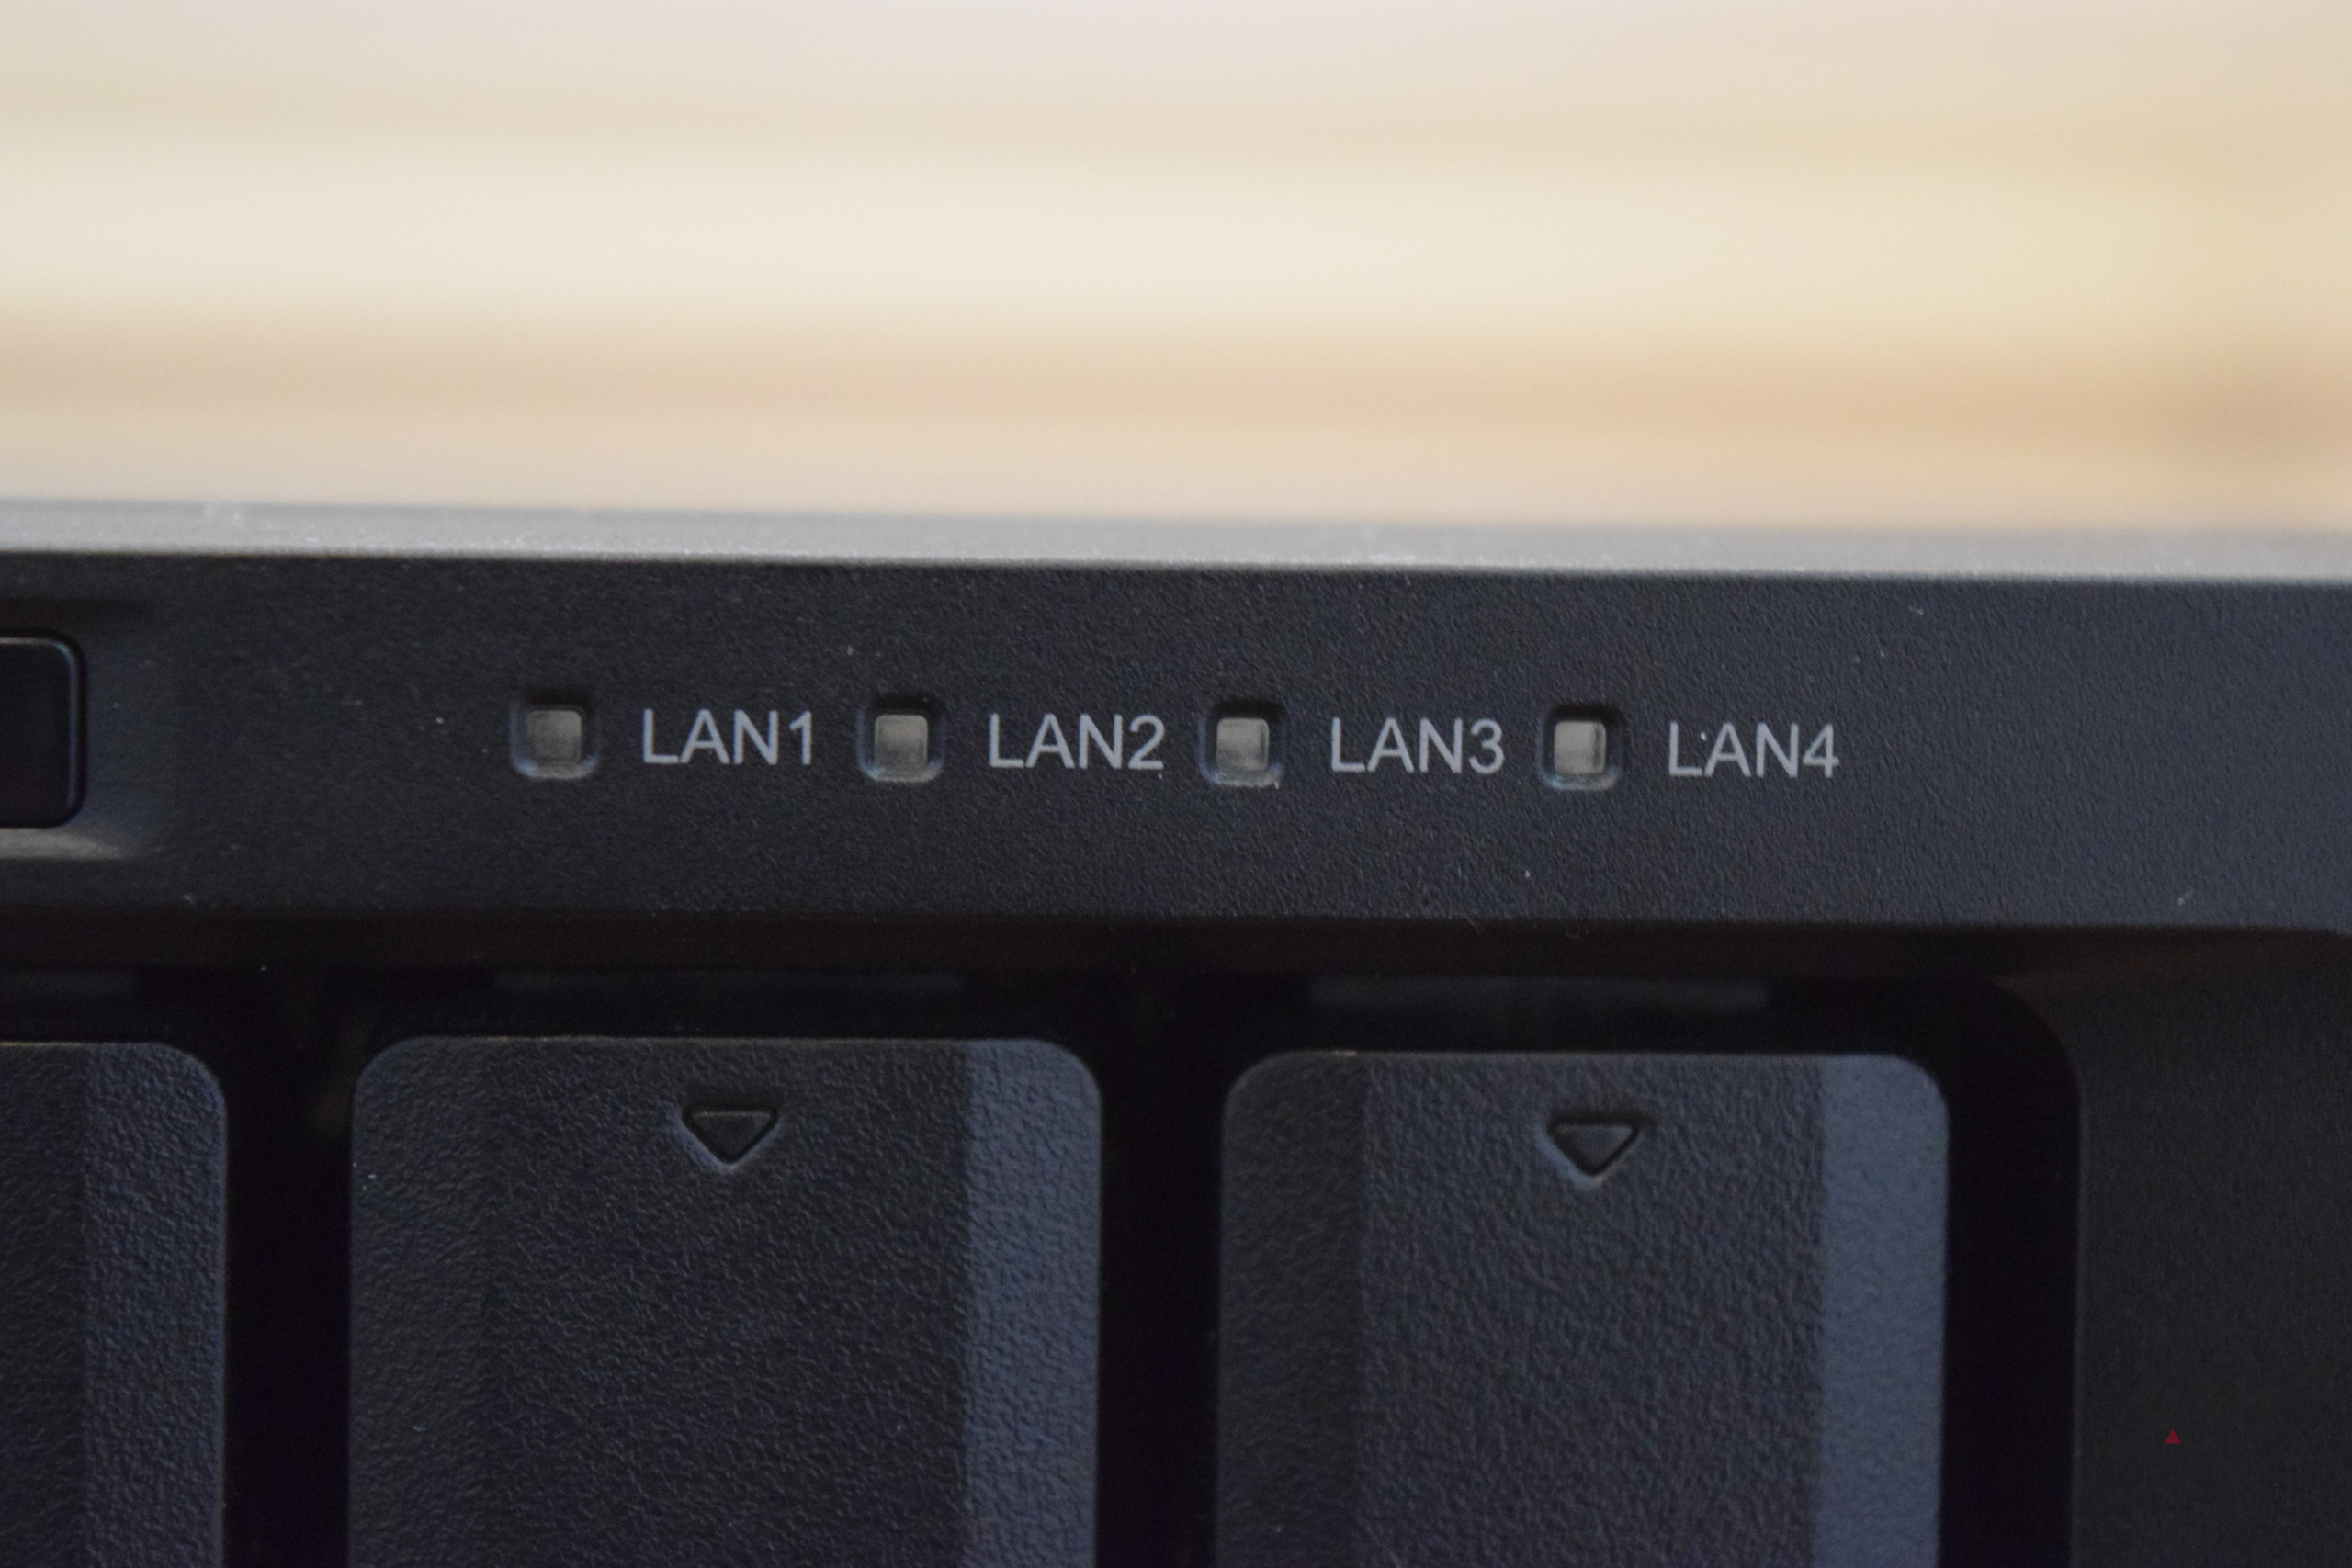
The DS1517+ was released earlier this year as a part of the higher-end Plus Series refreshes (which also include the 8-bay DS1817+ and 12-bay DS2415+). It's a neat little cube designed for small office and home use. It comes packed with five drive bays on the front, each with its own status LED, as well as lights for power and all four RJ-45 1GbE LAN ports. Failover and link aggregation come supported out of the box, with 10GbE (with a compatible network interface card installed) as an additional option. Under the black exterior is an Intel Atom C2538, a 64-bit, quad-core CPU that clocks in at 2.4GHz. By default, either 2GB or dual-channel 8GB DDR3 RAM (2 x 4GB) comes installed, though that can be expanded to 16GB (2 x 8GB) if you wish. Along the back are the four LAN, two eSATA, 3 USB 3.0, and the PCIe 2.0 ports.
Synology sent me this machine with four 4TB IronWolf NAS drives, provided by Seagate, pre-installed (it supports 3.5" HDDs, 2.5" HDDs, and 2.5" SSDs). If you need more than five disks, but don't want to pay more for a larger DiskStation, you can expand the DS1517+ to fifteen drives with the DX517 expansion units. The PCIe 2.0 x8 slot on the back can be used for either the 10GbE NIC or an M.2 SSD for extra cache and performance boosts (M.2 NVMe/AHCI drives are not supported). Synology claims that the DS1517+ supports up to 1,165 MB/s read and 527 MB/s write speeds.

The default internal drive file system is btrfs, but you can use ext4 if you wish (exFAT is purchasable in the DSM Package Center). Two 80mm case fans come pre-installed, though in the default noise setting, they are quite loud. Frankly, this little NAS — supposedly rated at 26dB — is quite a bit noisier and more obnoxious than my gaming rig when the latter is under full load. Part of that has to do with the difference in cases (my desktop has a whole bunch of sound dampeners in it; I love Fractal Design cases), but I've considered some higher quality 80mm fans for the DS1517+ to help it be a bit quieter. Thankfully, Synology makes it easy to swap them out.
A 200W PSU powers everything, with the DS1517+ rated at drawing a max of 42.1W. I saw fairly consistent temps of 40°C (with some obvious variation therein) when reading/writing, as Synology claims on its website, while I ran the system at the default "Quiet Mode" fan speed and ~32°C in "Cool Mode" under peak load. And if you need it, the DS1517+ supports vSphere 6, Windows Server 2012/R2, Citrix, and OpenStack for virtualization.
Without drives, the 8GB DS1517+ costs $789 over on Amazon (the 2GB costs $699.99), meaning that you will easily surpass $1,000 to push this thing to its full potential with good drives and an M.2 SSD or 10GbE NIC. As configured, the unit I received costs $1,309 from Amazon at time of writing. So how have I taken advantage of all of this power? Much as I tried to uncover evidence to the contrary, I found this particular DiskStation to be a bit overkill for my usage, though I've had an absolute blast using it.
Backups
One of my primary desires for a NAS was a comprehensive backup solution for my PCs. However, I wanted more than just another method of keeping copies of files from my main machine, though I have taken advantage of both Synology's Cloud Station and Drive packages for this. What I actually sought was a full system image backup stored safely on my NAS (since external drives have failed me in the past).

For the time being, I use Veeam Backup Agent as an automatic solution. After creating a shared CIFS folder that pointed to a dedicated backup directory on the NAS, I set up a schedule in Veeam to run every morning at 12:30am. The initial task took several hours, but now it simply runs a check each night and saves the delta. Veeam also allows you to restore any backup that is still saved (I have it set to keep them for seven days) should something go wrong. I warrant that this setup is unnecessary, but when you're as paranoid as I am, it helps me feel more at ease knowing that this system is running as I sleep. So far, the only problem I've run into is Veeam throwing an error after I changed the security certificate on the NAS. A few button clicks later and all was back to normal.
Synology does a great job at providing backup solutions for DSM centered around snapshots (which you can then save to another machine on your network if you have one). Other cloud accounts, like OneDrive, Dropbox, and Google Drive, can be synced to the NAS if you want another safe copy of your files downloaded locally on your network — I wish I had set this up when I was working on some of my final papers for school... I would have saved a lot of time.
Media

While the backup stuff sates my nerdy paranoia, media consumption is what I use the DS1517+ for the most. I have my entire film, TV, and music collection stored on it and I use Plex to manage it all. My wife and I watch movies or shows on my Shield TV, or I play songs in foobar2000 on my PC (I added my music directory as a shared network folder, which both foobar and Google Play Music Manager monitor). Like I said in the apps section, I don't use the Audio, Photo, and Video Station packages much thanks to my Plex Pass membership, but those options are available to you should you need them.
Unfortunately, the DS1517+ is not great at dedicated transcoding for Plex (versus something from QNAP), though it can handle a single 1080p stream at 10Mbps or less. Even when Plex announced hardware transcoding earlier this year, Synology was missing from the list of supported devices. Check on the company's forums and you'll find a general consensus that these NASs are not best-suited for people seeking solid transcoding for Plex. One user I found suggested using a DiskStation for storage and an Intel NUC (or something similar) as an application-based server for Plex. Or you could go with Ryan's solution if you have a Shield TV, which I am in the process of trying out for myself.

Playing movies or shows on a single screen works just fine, though any more will show the DS1517+ struggling (i.e. 70%+ CPU usage), as can be expected. I found plenty of framerate stutter and other visual issues when I attempted to stream to my TV and PC simultaneously.
Conclusion
I like the DS1517+. Synology continues to improve DSM, but you can take it one step further by installing the SynoCommunity third-party repository to get some extra functionality (WordPress, Apache, etc). I am currently running the beta track of the OS and I have experienced no issues thus far. After reading about my usage and such above, if you think that you'd use a NAS in a similar fashion, then I'd say consider saving some of your cash unless you really like overkill.

This machine is quite a little beast, providing lots of options to give you highly efficient storage for your small office or home needs. You can easily create network drives in Windows (I did not have a Linux installation to test, unfortunately) to do whatever you need, even if it's to share to your music player of choice. The transcoding business is a bit of a disappointment, but I like the idea of going the Shield TV route.
The starting price is pretty steep, I have to admit, especially when you factor in buying good drives for storage — as a side note, though, I'd definitely recommend getting the 8GB version over the 2GB, since it costs only another $80. I was impressed with the Atom CPU, but I've heard good things about the "upper echelon" of those chips in recent years. The C2538 is plenty powerful enough for most personal NAS needs, minus the raw processing power for hardware transcoding. For that, you may want to look into the DS916+, something comparable from QNAP, or a NUC/Shield TV solution. If you decide that the DS1517+ suits your needs or tickles your fancy, then I say you'd be making a good choice even if it might be more than most people need.
Thanks to Seagate for providing the HDDs for the DS1517+.
Buy: Amazon