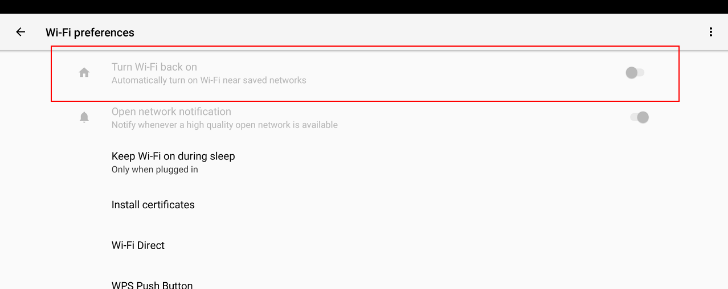
One of Android Oreo's new features is the ability to automatically turn Wi-Fi back on when you're near a saved network. Essentially, Android will keep track of where each network is located, and will use location services to only turn on Wi-Fi when you're in range. The feature was available for all devices on the Android O Developer Previews, but was disabled in the final release for the Nexus 5X and 6P:
Thankfully, it's possible to re-enable it using simple ADB commands, as XDA Developers has pointed out. You don't even need root.
This guide is slightly long because everything is explained in detail, not because it's hard. This should take less than 10 minutes if you don't have ADB installed, and less than two minutes if you do.
Prerequisites
Before getting started, let's go over what you need. Your Nexus 5X/6P obviously has to be running Android 8.0 or higher, and you'll need a USB cable to connect your phone/tablet to your computer. If you don't already have the ADB command-line utility installed on your computer, you'll have to download that first.
Even though Google now offers ADB downloads from its website, you still have to manually add it to your system path. For that reason, I still recommend using a 3rd-party ADB installer, like this one for Windows. If you're using Mac or Ubuntu Linux, you can try the installer I made.
You'll also need to turn on ADB Debugging, if you haven't already. On Android Oreo, open the Settings app, tap System near the bottom, tap About Phone, and keep tapping the Build Number at the bottom until you get a pop-up saying you're a developer. Once you do that, press Back, tap the new Developer Options item, and set 'USB debugging' to On.
Running the ADB commands
Go ahead and plug your device into your computer, if it wasn't connected already. On Windows, press the Windows key and R at the same time, type "cmd" in the text box (without the quotes), and press Enter. On Mac, search for Terminal with Spotlight and open it. If you're on Linux, you probably already know where the terminal app is.
The screenshots in this post will be from Windows, but the ADB commands work exactly the same across all operating systems.
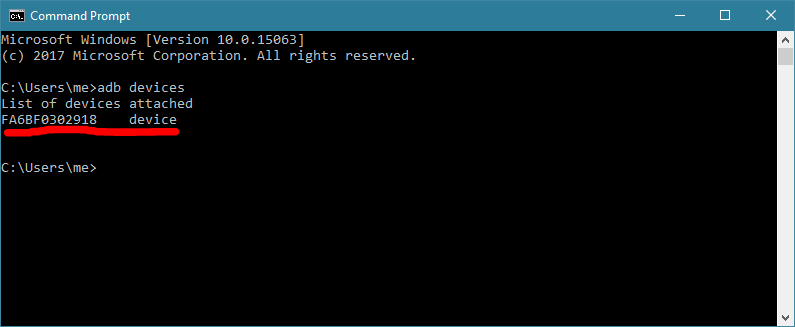
Now that you have the Command Prompt/Terminal open with your Android device connected, type "adb devices" (without the quotes) and press Enter. This will search for connected Android devices. If you get an alert on your phone/tablet about allowing USB debugging, press 'Always allow from this computer' and tap OK.

If you see anything under 'List of devices attached,' it means you're on the right track. In the above screenshot, you can see my Google Pixel is properly connected. Now just type in these two commands, pressing Enter after each:
adb shellsettings put global wifi_wakeup_available 1
settings put global wifi_wakeup_enabled 1
The menu option should now be visible from the Wi-Fi area of the Settings app. To disable the feature, just run all of the commands again, replacing the 1 with a zero.
Source: XDA Developers