With the arrival of Honeycomb 3.1 came some really nice features, including one of the most useful to date: USB host support. This allows users to plug thumb drives, external hard drives, mice, keyboards, and more into their tablets and use them with little-to-no hassle.
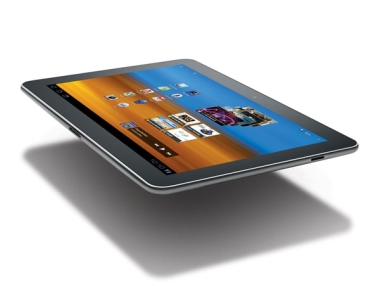
Out of the many uses for USB host support, adding a game controller to your tablet is a simple way to have more fun with your device -- it improves the experience with a lot of games, especially if, like me, you hate touchscreen controls. While most tablet manufacturers have included gamepad support in their devices right out of the box, such is not the case with the Galaxy Tab 10.1 (possibly because of the lack of a dedicated USB port), but not to worry -- if you're looking to use a USB game controller on your Tab, there is a way to get it working, granted you have the 30-pin USB adapter.
- Rooting Explained + Top 5 Benefits Of Rooting
- Top Android Apps Every Rooted User Should Know About: Part 1 (Apps 1-8), Part 2 (Apps 9-16), Part 3 (Apps 17-25)
- Custom ROMs Explained And Why You Want Them
- How To Fully Back Up And Restore Your Android Phone Using Nandroid Backup
- How To Flash A Custom ROM To Your Android Phone With ROM Manager + Full Backup & Restore
- So You Want To Know About Bootloaders, Encryption, Signing, And Locking?
Required Files
In order to make this happen, you're going to need a few things. Firstly, you'll need ClockworkMod Recovery installed, which you should already have if you're rooted. Other than that you'll need:
Okay, now that we have that out of the way, let's get started!
Flashing the Kernel
Once downloaded, move the file to the root of your SD card and reboot into recovery by using ROM Manager or turning the device off and holding volume down+power. Once in recovery, I strongly suggest making a backup in case anything goes wrong. To do this, navigate to "Backup and Restore" by using the volume keys (the power button activates the selection) and choose "backup." This will create a Nandroid backup of the current system state that you can restore later if need be.
After that is finished (it may take a while), navigate back to the main screen by using the "+++++Go Back+++++" option. Navigate down to "install zip from SD card" and select "choose zip from sdcard." From there, you'll choose the kernel file that you downloaded earlier. This should only take a couple of minutes to flash, after which it will tell you that it was successfully completed. Once it's finished, just reboot the device by choosing "+++++Go Back+++++" and "reboot device."
Congratulations! You're now running a custom kernel.
Installing the Modules
In order for the kernel to recognize the game controller for what it is, certain modules need to be loaded into the system. There are two different methods of doing so, each of which are outlined below.
ADB Method
If you already have ADB set up, this is probably the best way to go. If not, you can either skip ahead to the terminal method or go ahead and set ADB up. There are plenty of tutorials on the internet if you need help getting everything going.
Firstly, if you haven't already, go ahead and grab the controller files from the download link above. Save the file somewhere memorable, such as the root of the C: drive, which is the location that I'll be using for this tutorial. Once the download is finished, go ahead and extract the contents of the zip using an appropriate application, such as 7-zip.
Fire up the command line and navigate to where the extracted files are located and move them to the appropriate location using the following command (assuming you saved the files to C:).
cd C:controller
adb push ff-memless.ko /data/local/modules
adb push xpad.ko /data/local/modules
The next step is to install the modules into the kernel.
adb shell insmod data/local/modules/ff-memlless.ko
adb shell insmod data/local/modules/xpad.ko
That's it! You should now have full support for game controllers!
Root Explorer + Terminal Emulator Method
This one requires no interaction with your computer, so the entire process is done directly from the device.
Download the above controller file directly onto your device. Once downloaded, use a file manager with root privileges (I recommend File Manager HD) to navigate to the download folder and extract the contents of the zip. Select both files (ff-memless.ko and xpad.ko) and move them to '/data/local/modules,' which should have been created during the kernel flashing process.
Once the files have been moved, fire up Terminal Emulator and enter the following commands:
su
insmod /data/local/modules/ff-memless.ko
insmod /data/local/modules/xpad.ko
...and you're done.
Whichever method you choose to use is completely up to you and will yield identical results regardless, but I find it easier to use the Terminal Emulator method to reinstall the modules after each reboot.
Enjoy!