
Yesterday, I told you how to use pre-made icons to create a custom Android Phone 7 theme. Today, I'll walk you through how to create your own icons in Adobe Photoshop. I'm going to assume you have at least a basic understanding of Photoshop.
Estimated time required: 15 minutes for the first icon, and 2 minutes for each subsequent icon.
Difficulty: Low if you've used Photoshop before.
What You Need
- Adobe Photoshop
- The .PSD templates (included in the full ZIP, linked)
Getting Started
Rally The Troops
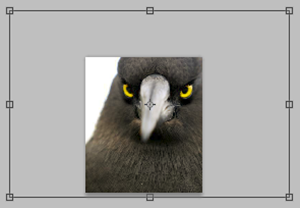
Before we begin making the icons, you'll need to make a list of what Apps you want to have immediate access to. For this example, I'll be creating a 1x1 Angry Birds icon and a 3x1 Advanced Task Killer icon. Once you know what you want, all that's left is finding the images you want to use.
There are a few ways to find your images: DeviantArt is an awesome website full of amateur and professional works, and Google Images is a handy backup method. Many of the existing icons came from DeviantArt, but both of the images I'm using today (see above) are from Google Images.
Fire Up Photoshop
Now that you know what you're making and have the stock images to use, let's get to work:
-
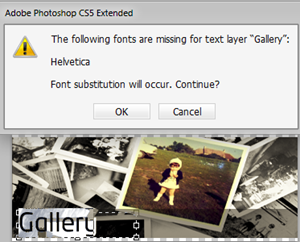
Open up the template files. I used the 1x1.PSD and 3x1.PSD for my icons, but you should open whichever ones you need. Note: You might get an error here about the font or text. The template .PSD's are from newone757, who used Helvetica. I don't have Helvetica, and you might not have it either. Photoshop substitutes Myriad Pro, which is a very close replacement.
- Open your image files.
-
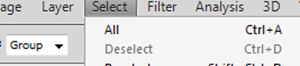
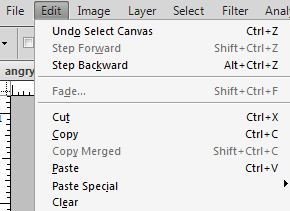
In your image file, go to Select -> All (or press Ctrl + A).
-
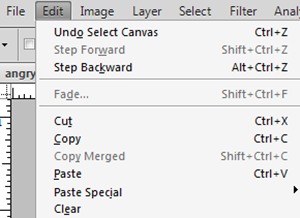
Copy it: Edit -> Copy (or Ctrl + C).
- Paste the image into the icon template (Edit -> Paste or Ctrl + V). For Angry Birds, I dropped it into the 1x1, and for ATK I used 3x1.
-
Move the image so that it's roughly centered. For example, when I pasted the Angry Bird image into the 1x1, it automatically anchored at the top-left corner. I then moved it so that it was centered the way I wanted it to be.

-
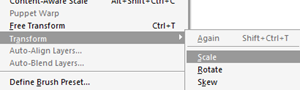
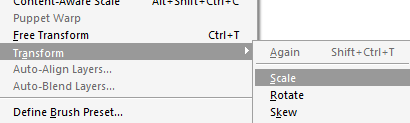
Chances are the image is way too big for the icon, so we'll need to scale it down. To do so, go to Edit -> Transform -> Scale. Hold Shift to keep the axes locked and maintain the aspect ratio. Depending on the size of your image, you may want to zoom out first or go through a process of scaling down and then centering the image. If you centered your image (Step 6), you can scale from all four corners to have the icon placed and sized pretty well without much tweaking.
-
Depending on your image, you may want to make all but select parts of it black and white. There are various ways of selecting certain parts of the image, but that's beyond the scope of this article.
For those who are a little more familiar with using Photoshop: for the Bird image, if I only wanted to keep the yellow color of the eyes and make the rest black and white, I'd probably use the Magic Wand tool to select the eyes and copy them to a new layer, then make the rest of the image black and white. For the ATK image, I used the Quick Selection tool, first at 8px to make the selection, and then 4px to fine-tune and deselect parts. Once again, I copied my selection to a new layer and made the full layer black and white. -
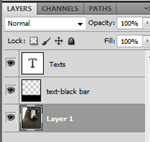
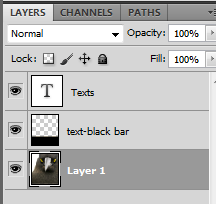
In your layers box, click and hold on the image layer (Layer 1) and drag it to the bottom of the stack so that it's below everything else. Right click on the Background layer and select Delete Layer.
-
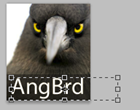
Click on your Texts layer to select it. Select the Type tool and select the word Texts. Type in whatever word you need for your app. Since "Angry Birds" wouldn't fit, I decided to go with "AngBrd". Note: Depending on your tastes, you may want to move the text to the right or left side of the image. In the 1x1's case, this only equates to a few pixels in one direction or the other, but for 3x1 images, you're going to be moving it from the far left to the far right.
-
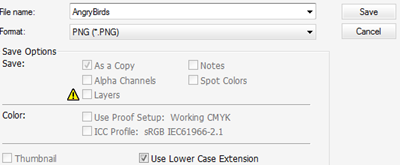
You're done! Go to File -> Save As and save the file as a .PNG. Make sure you don't save over the template! After you click Save, it will ask you about Interlacing. Just click OK.
- Copy the image file onto your phone and use the information covered in Part 1 to apply your icon. Here's what I came up with:


And that's that! For those familiar with Photoshop, this should be a fairly quick and easy procedure (I made my 10 custom icons in about 30 minutes total, including time to find source images). Be sure to post your results below, and if you have any suggestions for future How To Theme articles, feel free to shoot me an email!